Soaking time can be shorter—5–10 minutes usually does the trick.
Restore power or reset the temperature to 37–40°F (3–4°C) for the fridge and 0°F (-18°C) for the freezer.
- and why is it important”, you’re zeroing in on a chore that can impact food safety, energy bills, even your peace of mind.
Power down: If you plan to leave the door open for more than 15 minutes, consider turning the fridge off or lowering the temperature to avoid overworking it.
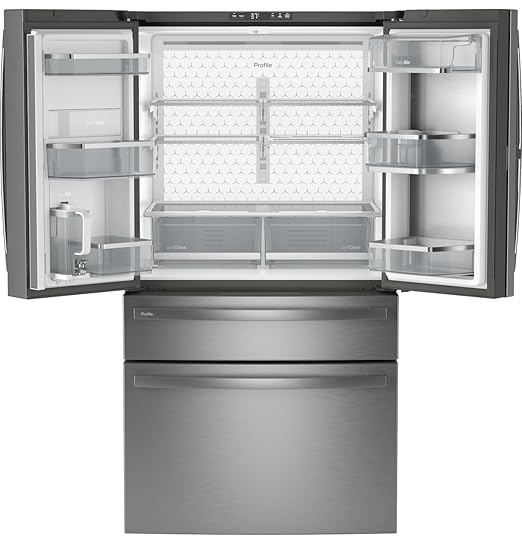
When you ask yourself, “how do you clean your fridge? - and why is it important”, you’re zeroing in on a chore that can impact food safety, energy bills, even your peace of mind. Your fridge works around the clock to keep produce crisp, dairy fresh and leftovers safe. But over time spills, crumbs and sticky drips turn it into a breeding ground for bacteria, funky odors and wasted groceries. By tackling a thorough cleaning, you not only restore order and eliminate smells, you help your appliance run more efficiently and protect your family from spoilage and cross-contamination.
In this guide you’ll get a friendly, step-by-step approach to fridge cleaning—no harsh lectures, just clear instructions and practical tips. Whether you’re a home cook juggling meal prep, a busy parent storing baby food or a craft beer enthusiast loading kegerators, you’ll learn how to strip down your fridge, sanitize every nook, and set up a routine that keeps it sparkling with minimal effort. Let’s dive in.
Fridge cleaning benefits
Cleaning your fridge isn’t just about making it look pretty. When you commit to regular scrubbing, you’ll enjoy:
Better food safety: Removing old spills and moldy bits cuts down on bacteria like listeria and salmonella
Fresher flavors: Stale odors from last week’s takeout vanish, so herbs, cheeses and fruits smell and taste as intended
Energy savings: A clean interior and unobstructed vents help your compressor run smoothly—often shaving off a few dollars on your utility bill
Longer appliance life: Grime on coils and seals can force your fridge to work harder and wear out sooner
Reduced food waste: With clear bins and labeled sections, you’ll spot what needs eating before it goes past its prime
By the end of each session you’ll feel like you gave your kitchen’s MVP a spa day—so it can keep performing at its best.
Before you get started, arm yourself with the right supplies. Having everything within reach saves time and keeps the process smooth:
Mild dish soap or dedicated appliance cleaner
Baking soda (natural deodorizer and mild abrasive)
White vinegar (for stubborn stains and mildew)
Warm water in a bucket or large bowl
Microfiber cloths or soft sponges (to avoid scratches)
Old toothbrush or small scrub brush (for crevices and gaskets)
Rubber gloves (if you have sensitive skin)
Towels or absorbent rags (for drying surfaces)
Garbage bags or bins (for expired food)
Optional: spray bottle (for vinegar solution)
If you want extra pointers on tackling every nook inside and out, check out our step-by-step walkthrough on how to clean the fridge inside and out. Once your tools are ready, let’s clear it all out.
Step one is stripping your fridge bare. You’ll need space to work and a chance to toss anything past its prime.
Power down: If you plan to leave the door open for more than 15 minutes, consider turning the fridge off or lowering the temperature to avoid overworking it.
Remove contents: Take out all food, condiments, beverages and jars. Use a cooler or insulated bag to keep perishables safe if the process takes a while.
Sort as you go: Create three piles—keep, toss, donate. Discard expired items, questionable leftovers and anything that’s lost its color or smell.
Clear drawers and shelves: Slide out all removable parts. This is your chance to declutter deeply—if a plastic container has lost its lid or shape, recycle it. For more tips on a freezer-to-fridge overhaul, see how to declutter a fridge freezer.
Wipe initial spills: Lay down towels or old dishcloths inside to catch drips while you clean so you don’t track mess across your kitchen floor.
With an empty, curated fridge you’ll have the perfect blank canvas to scrub away grime.
Wash interior surfaces
Now that you’ve cleared the space, it’s time to tackle those walls, corners and crevices where spills like to hide.
Prepare your cleaning solution
Mix one tablespoon of mild dish soap or two tablespoons of baking soda in a quart of warm water. If you prefer a natural disinfectant, fill a spray bottle with equal parts white vinegar and water—just be aware of its strong scent.
Scrub walls and ceiling
Dip your sponge or cloth into the soapy solution and gently wipe the ceiling and walls. Pay special attention to corners and seams where food particles collect. For stubborn stains, apply a baking soda paste (baking soda + a little water), let sit for 10 minutes, then scrub with an old toothbrush.
Clean door interior
Remove the gasket (rubber seal) gently if it’s loose, then scrub around it and underneath with your brush. This gasket trap often collects crumbs and mold. Rinse your cloth frequently to avoid spreading old grime.
Rinse and dry
Once you’ve wiped every surface, go over it with a clean damp cloth to remove any soap or baking soda residue. Then dry thoroughly with a fresh towel to prevent moisture buildup.
Shelves, drawers and door bins deserve their own spa treatment. It’s easiest to soak and wash them in your sink or bathtub.
Shelves and drawers
Soak in warm water: Fill your sink or tub nearly to the brim with hot water and a squirt of dish soap. Let glass shelves, plastic drawers and wire racks sit for 10–15 minutes.
Scrub and rinse: Use a non-abrasive sponge to remove sticky spots. For grooves or textured plastic, a toothbrush works wonders. Rinse thoroughly.
Dry completely: Place items on a clean towel or drying rack.
Door bins and small racks
Soaking time can be shorter—5–10 minutes usually does the trick. Scrub gently, rinse, and dry. Reassembly later will go much smoother when everything is bone dry.
For freezers without automatic defrost, you’ll need a delicate touch to melt away ice without damaging coils.
Unplug or power down: For safety and energy reasons, shut off the freezer section.
Set up towels: Lay towels on the floor under and around the freezer to catch melting ice and water.
Use warm water bowls: Place a few bowls of hot water inside the freezer and close the door—or cover the door jamb with a damp towel to funnel steam in. Check every 15 minutes and replace water as it cools.
Chip gently: Once ice sloughs off, lift it out carefully. Never use sharp tools to pry ice—you could puncture coolant lines.
Wipe dry: After all ice is gone, wipe the interior with a damp cloth, then dry fully.
Your fridge’s outside sees high traffic—door handles, control panels and crowns of dust on top can harbor germs and allergens.
Handles and touchpoints: Spray a gentle antibacterial cleaner or vinegar solution on a microfiber cloth and wipe every handle, button and latch.
Stainless steel exteriors: Use a dedicated stainless cleaner or apply a few drops of olive oil on a soft cloth, rubbing with the grain to remove fingerprints and add shine.
Top and sides: If you can slide your fridge out safely, it’s a good chance to tackle back coils and sides. For tips on moving without scuffing floors, check how can i slide my fridge without scratching the floor?. Vacuum or brush off coils to boost efficiency.
Control panels: Gently wipe digital displays with a barely damp cloth, then buff dry.
Keeping the exterior spotless not only looks great, it helps your appliance breathe easier and work less hard.
Maintain door gaskets
Those rubber seals around your doors keep cold air in and humidity out. Dirty or cracked gaskets can waste energy and invite mold.
Inspect the seals
Run a dollar bill or piece of paper along the closed gasket. If it slips out easily, you may have a gap. Look for cracks, brittleness or black mildew spots.
Deep clean gaskets
Mix equal parts water and white vinegar in a spray bottle. Spray the gasket, then scrub gently with an old toothbrush. Wipe dry with a lint-free cloth. For persistent mold, let the vinegar sit for five minutes before scrubbing.
Recheck the seal by closing the door on your test paper strip again. A snug fit means you’ve done it right.
A clean fridge is the perfect opportunity to rethink how you store food for maximum freshness and convenience.
Zone by type: Keep dairy on an upper shelf, raw meats on the bottom, produce in crisper drawers and condiments in door bins.
First in, first out: Place newer items behind older ones so you use up what’s soonest to expire.
Clear bins and labels: Invest in clear plastic bins or lazy Susans for groups like snacks, cheese, meal-prep containers or craft-beer stock. Label shelves or bins with masking tape and a marker.
Temperature safety: Avoid crowding vents—cold air needs to circulate freely.
Odor control: Tuck in a coconut carbon pad to absorb lingering smells from strong-smelling foods like fish or blue cheese.
Well-organized shelves mean fewer forgotten leftovers and a quicker grab-and-go morning routine.
Adopt maintenance routine
To keep that fresh-fridge glow, turn cleaning into bite-sized habits rather than a once-year slog.
Weekly wipe down: Spend 5 minutes quickly wiping spills and checking for expired items.
Monthly mini check: Remove a single shelf or drawer to wash and inspect gaskets.
Quarterly deep clean: Repeat this full guide every three months—adjust frequency if you notice spills or odors sooner.
Temperature audit: Use a fridge thermometer to confirm optimal settings.
You’ve earned it—open those doors to crisp, clean shelves and the satisfaction that comes from giving your fridge the care it deserves. A properly cleaned and organized appliance not only keeps your groceries at peak quality, it saves you time, money and stress. Plus, you’ll breathe easier knowing harmful bacteria and mold don’t have a home in your kitchen.
Next time you prep dinner or grab a snack, you’ll see the payoff of your efforts: better visibility of ingredients, smoother airflow, even lower energy bills. Keep up the small habits, rely on this guide for quarterly deep dives, and your fridge will reward you with years of reliable service. Here’s to a healthier, happier fridge—cheers to fresh starts and clutter-free kitchens.
Free tool
Refrigerator Refrigerant Leak Guide
Free interactive tool from Fridge.com — get a quick answer while you read.