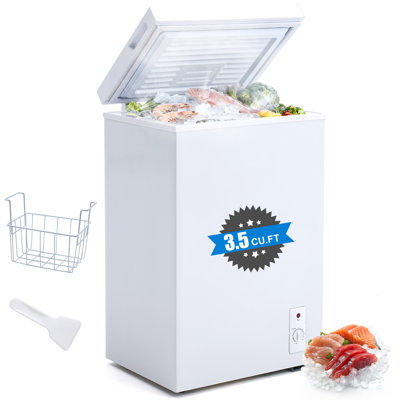
Freezer canning is a simple way to lock in flavor and nutrients by freezing jars filled with your favorite meals and produce. When you combine easy freezer canning stackable techniques with the right containers, you maximize space in your fridge or dedicated freezer, streamline meal prep, and keep everything within reach. Whether you’re a busy parent storing baby food, meal prepping for work lunches, stocking up before a road trip, or outfitting a commercial kitchen, these tips will help you make the most of your freezer’s real estate.
In this guide, you’ll learn how to choose stackable canning containers, prepare foods for freezing, arrange jars for airflow, organize your freezer space, and thaw jars safely. Let’s dive in and turn your freezer into a neatly stacked food preservation powerhouse.
Understanding freezer canning
What is freezer canning?
Freezer canning isn’t the same as traditional water-bath or pressure canning. Instead of sealing jars with heat, you pack sterilized containers with cooked or blanched foods, leaving enough headspace for expansion. Then you freeze them. This method preserves taste, texture, and nutrients without the risk of botulism that comes with improperly processed low-acid foods.

Comparing canning methods
Water-bath canning and pressure canning use heat to create a vacuum seal, letting you store jars safely at room temperature. Freezer canning relies on cold to halt microbial growth. Key differences:
- Processing time: Freezer canning takes minutes to prepare, whereas water-bath cycles can run an hour or more.
- Storage: Freezer-canned jars must stay frozen, while heat-processed jars sit on your pantry shelf.
- Equipment: Freezer canning needs only jars and a freezer, no large pot or pressure unit required.
Benefits of freezer canning
You’ll appreciate these perks:
- Fast setup: No lengthy boil times, no special canning gear.
- Better texture: Vegetables and fruits stay closer to their fresh state, since they skip high heat.
- Flexible batch sizes: Freeze single portions, family-size meals, or soup quart jars.
- Space savings: Stackable jars and containers make the most of tight freezer shelves.
Choose stackable containers
Types of freezer-safe jars and containers
Not all jars survive the cold, and not all containers stack neatly. Here’s a quick look:
| Container type | Material | Stackable | Best for |
|---|---|---|---|
| Glass freezer canning jars | Tempered glass | Yes | Soups, sauces, baby food |
| Plastic freezer containers | BPA-free plastic | Some | Bulk meals, stews |
| Silicone freezer bags | Food-grade silicone | No | Smoothie packs, purees |
| Vacuum-seal mylar bags | Mylar | No | Dehydrated or powdered foods |
Advantages of stackable design
When containers nest or lock in place, you get:
- Improved airflow between layers
- Easier inventory checks—nothing hides in the back
- Safer transport for potlucks, RV trips, or office kitchens
- A tidier, more professional look for cafeterias and catering back-of-house
Sizing for your needs
Ask yourself what you’ll freeze most often:
- Pint jars (16 oz) for smoothies, sauces, baby food
- Quart jars (32 oz) for soups, stews, chili
- Rectangular plastic containers for casseroles or layered salads
A mix of sizes lets you grab just the right portion. If you mainly meal-prep lunches, pint jars stacked in columns might be your best bet. For bulk batches, quart jars on a deep shelf will serve you well.


Prepare foods for freezing
Selecting produce and recipes
Choose foods and dishes that freeze and thaw well:
- Cooked grains and legumes (rice, beans)
- Sauces, purees, soups, stews
- Blanched veggies (green beans, peas, corn)
- Fruit slices for smoothies or cobblers
Avoid recipes with high cream content or raw potatoes—they can turn grainy or mealy after thawing.
Pre-cooking and blanching guidelines
Protect color, texture, and nutrition:
- Blanch vegetables: boil 1–2 minutes, then plunge into ice water.
- Cook grains and proteins fully, but avoid overcooking.
- Cool foods completely before packing to prevent jar cracking.
Spacing and headspace
Liquids expand when they freeze. To prevent cracked jars:
- Leave ½ to 1 inch of headspace at the top of each jar.
- Wipe rims clean before adding lids.
- Screw bands on finger-tight to allow air to escape as contents freeze.
Freeze jars effectively
Setting freezer temperature
Aim for 0 °F (–18 °C) or lower. That halts microbial growth and preserves quality. If you’re using a shop compact freezer in an RV or small apartment, monitor the temperature so you don’t accidentally creep above freezing.
Arranging jars for airflow
Give containers breathing room:
- Avoid cramming jars edge to edge.
- Place them in single rows until fully frozen, then stack.
- Keep heavier jars on the bottom to prevent crushing.
Avoiding freezer burn
Freezer burn happens when air dehydrates food. To cut it off at the pass:
- Use airtight, freezer-safe lids.
- Remove excess air from plastic containers or bags.
- Rotate jars every few weeks to use older items first.
Learn more about what causes freezer burn and how to stop it at what causes food to freezer burn?.
Organize your freezer space
Maximizing vertical storage
Stackable jars shine here. You can:
- Place pint jars in tiered shelving racks.
- Nest quart jars with the lids slightly ajar until frozen, then seal.
- Keep stackable plastic bins for bundled meals.
Labeling and dating
A little clarity goes a long way. On each jar, note:
- Item name and variant (e.g., “Tomato-basil soup”)
- Date packed
- Cooking or reheating instructions
Use a permanent marker or freezer-safe label. That way you avoid mystery meals six months down the line.
Using freezer bins and shelves
Bins help you group similar items. For example:
- Soups and stews in one bin
- Smoothie packs in another
- Blanched vegetables together
Good lighting also helps you find jars fast. If your freezer is dim, consider adding bright strip lights, see what freezer lighting covers every shelf corner brightly?.
Quick-access strategies
Keep daily-use jars at eye level. Store long-term items on lower or upper shelves. When you add fresh batches, slide older jars to the front. That simple rotation keeps food moving and prevents freezer clutter.
Thaw and use jars
Safe thawing methods
To thaw without compromising safety:
- Move jars to the refrigerator 24 hours before use.
- For smaller portions, place a sealed jar in cold water for 30–60 minutes.
- Never thaw at room temperature, bacterial growth could start.
Best practices for reheating
Reheat right in the jar or transfer contents to a pot:
- For glass jars: invert in warm water to release the seal, then microwave or simmer.
- For plastic containers: remove lid, microwave in short bursts, stirring between intervals.
- Stir and taste as you heat to adjust seasoning.
Cooking and serving ideas
Frozen meals from your stackable jars can become:
- Grab-and-go burritos with beans and rice
- Single-serve lasagna in a jar
- Smoothie “kits” with fruit and greens
- Individual servings of chili or curry
Label each idea on the lid so you know at a glance what’s inside and how to serve it.
To wrap up, easy freezer canning stackable setups let you build a neat, efficient food preservation system that grows with your needs. With the right containers, proper prep, smart organization, and safe thawing, you’ll enjoy home-made meals anytime—whether you’re feeding a crowd, entertaining friends, or just stocking lunches for a busy week.