Preparing for Packing
Packing your water dispenser doesn't have to be a chore. With a bit of planning and the right mindset, you can get it done without a hitch—just like being ready for a road trip with all your snacks and good tunes.
Assessing Your Water Dispenser
Don't just jump in with bubble wrap and tape right away; give your dispenser a good once-over first. Make sure it's all in one piece, nice and clean, and nothing's gone missing. You'll want it spotless, like nobody’s ever splashed water on it before. Here’s what to focus on:
| What to Look At | Why It Matters |
|---|---|
| Size | Measure it to make sure it fits like a dream in your car. Our fridge measuring guide has some smart tips if you need 'em. |
| Condition | Spot any cracks or leaks, because no one wants a wet surprise during the move. |
| Parts | Double-check that every part, especially lids and taps, is there and working—like a band with all its members in tune. |
Organizing Packing Supplies
Got your dispenser all checked out? Time to grab your packing materials. Getting the right stuff is a lifesaver and keeps everything hassle-free. Here's your shopping list:
- Bubble Wrap or Packing Foam: This is your dispenser's bodyguard against bumps and thumps.
- Packing Tape: Keeps everything tight and tidy, so no loose ends are flapping around.
- Cardboard Box: Go for a cozy fit—like a sweater that’s just right.
- Scissors: Because tearing packing tape with your teeth is not the best plan.
- Markers: Keep track of what's what with some nifty labeling.
| Packing Gear | What It’s For |
|---|---|
| Bubble Wrap | To shield against bumps |
| Packing Tape | For locking down items |
| Cardboard Box | To keep everything snug during the ride |
| Scissors | Making easy work of packing materials |
| Markers | So you know what's what at a glance |
Having these supplies at your side is like having your packing superpower ready to go. If packing a water dispenser's got you scratching your head, peek at our guide on packing an undercounter freezer. It's got a bunch of cool tidbits that can ease your packing puzzles.
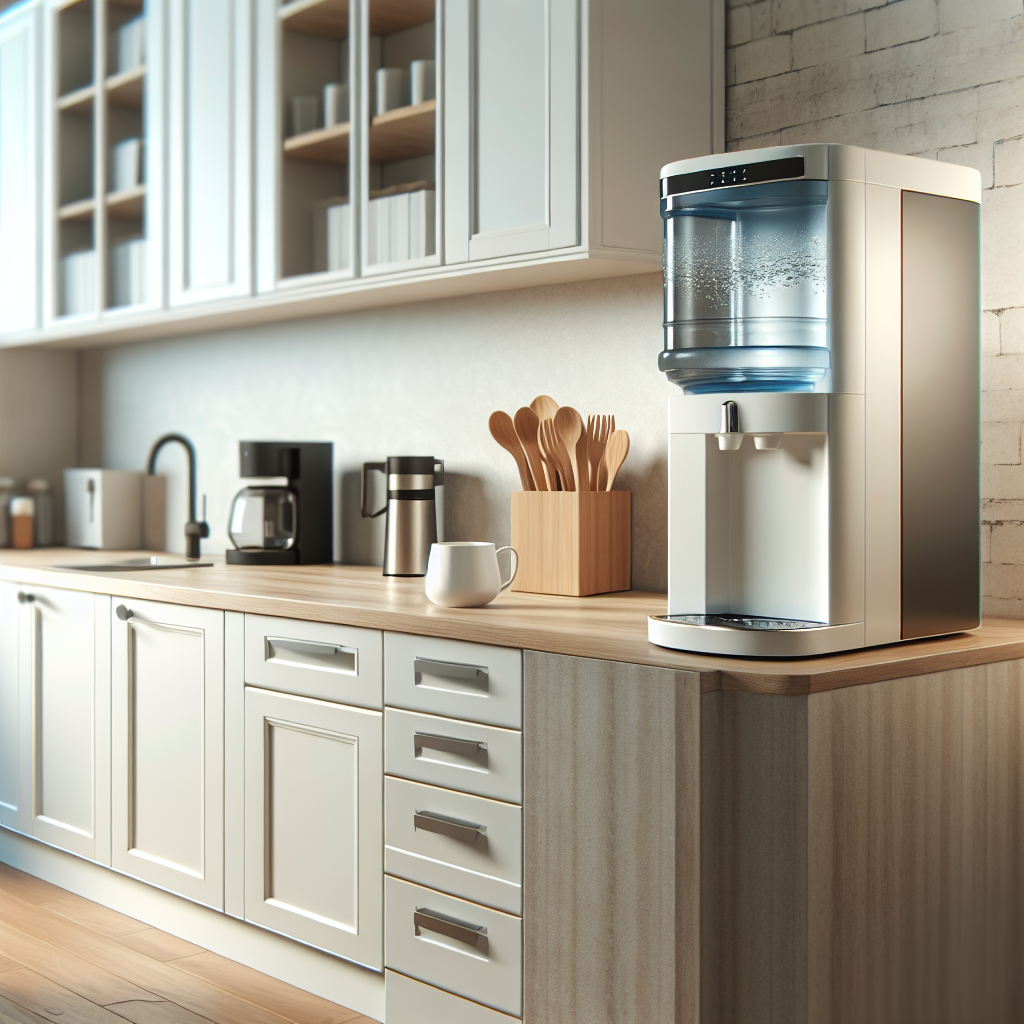
Packing Your Water Dispenser
Packing your water dispenser isn't as hard as it seems—promise! Just a few steps, and it’ll ride safely to its new digs. Here’s how to get it all set.
Emptying and Cleaning the Dispenser
First things first, you’ll need to empty that bad boy. Drain out every last drop, then toss that water out somewhere it won’t make a mess. Need to ditch those smelly leftovers or weird stains? Scrub-a-dub with warm soapy water or go all out with vinegar magic for tough spots. Here's a neat checklist to get you squeaky clean:
| Step | Action |
|---|---|
| 1 | Ditch all the water bottles |
| 2 | Give the outside a once-over with a damp cloth |
| 3 | Tidy up the inside with warm soapy suds |
| 4 | Rinse everything off, then let it dry thoroughly |
Securing the Lid and Taps
You don’t want an impromptu water park in your moving truck! Make sure those taps and the lid are sealed up tight. If your taps pop off, wrap and secure them with plastic or tape, then slap ‘em in a bag. If they don’t come off, double-check that everything is sealed. No mess on my watch!
Wrapping for Protection
A stripped-naked water dispenser is like a sitting duck for scratches. Bubble wrap or soft towels to the rescue! Snuggle it up from head to toe with a good buffer. Pay extra attention to those corners and edges—they’re delicate!
- Layering: Bubble wrap the whole dispenser, doubling up if the wrap looks thin.
- Secure: Sticky tape it up to keep the wrap from slipping.
- Boxing: Split the dispenser into a snug, sturdy box. Fill in any extra space with peanuts or paper to keep it comfy.
Boom! Your water dispenser is now bubble-wrapped in safety armor, ready to move. Curious about more stuff like this? Check out our article on packing an undercounter freezer without a hitch.
Loading Your Water Dispenser
You're loading up your water dispenser for a trip, and no one wants a soggy car or a busted appliance. Follow these quick tips to make sure your dispenser gets from A to B safe and sound.
Positioning in the Vehicle
Getting your dispenser comfy in the car is step one. Here's how to give it a cozy spot:
- Flat and Secure: Find a nice, flat perch in your car. Big dispensers usually feel at home in the trunk, while smaller ones might chill in the backseat.
- Room to Breathe: Give your dispenser some space. Avoid stuffing it into a packed car where things might scratch or ding it.
- Standing Tall: Keep it upright, always. It's the best way to avoid unwanted waterworks.
| Best Spots | Why They're Cool |
|---|---|
| Backseat | Perfect for little guys; keeps them steady. |
| Trunk | Good for the bulky models; toss in some blankets for a snug fit. |
| Car Floor | Stays put really well; just be gentle with the brakes! |
Securing for Transport
Locking down your water dispenser is as important as giving it a good spot. Here’s how to lock it in:
- Strap It Down: Use some sturdy tie-down straps or bungee cords to snug your dispenser against the car frame.
- Cozy Cushioning: Wrap it up in blankets or soft cloths—like swaddling a baby, but this one keeps your car dry.
- Clear Heads: Make sure not to stack stuff on top of your dispenser. That way, it stays steady and your goods stay uncrushed.
| Securing Methods | Why They Work |
|---|---|
| Tie-Down Straps | Stop that dispenser from going anywhere. |
| Padding | Cuts down on bumps and bruises. |
| Clear Top | Keeps it upright and avoids toppling. |
Sensibly placing and tying down your water dispenser ensures it arrives just right—no spills, no thrills—ready to quench your thirst when you get there. For a full breakdown on getting that dispenser packed perfectly, have a peep at our guide on how to pack a water dispenser.
Unpacking and Setting Up
So, you've got your hands on a brand new water dispenser, and now comes the fun part: getting it all ready to quench your thirst. Let’s make this process a breeze.
Unloading the Water Dispenser
First things first, it’s time to get that dispenser out of your car. If it's a bit on the hefty side, wave someone over to lend a hand – no need to throw out your back before the first glass of water!
| Step | What to Do |
|---|---|
| 1 | Gently hoist the dispenser from the car. |
| 2 | Make sure the coast is clear – nobody needs a walking obstacle course. |
| 3 | Stand it up right where you plan to keep it. |
Reassembling and Positioning in Your Space
With the dispenser now out in the open, check if anything needs to be put back together, like any lids or taps that might’ve loosened up during the ride.
As you pick its forever home, keep a few things in mind:
- Accessibility: Pop it somewhere everyone can easily reach, especially if kiddos or pets are around who might get thirsty.
- Room to Breathe: You’ll want some elbow room around the dispenser for those times you need to refill or give it a good clean.
- Sturdy Ground: Make sure it’s sitting pretty on a nice flat surface, because nobody likes an unexpected mid-sip spill.
Once it’s cozied up in its new spot, here’s what to do next:
- Connections Check: If your dispenser has any fancy filters or heating bits, give the connectors a quick once-over.
- Fill’er Up: If you’re using bottled water, plop that bottle in carefully.
- Give it a Test: Fire it up, turn the taps, and make sure it’s all running like a dream.
If you're on a roll with setting up kitchen gear, why not swing by our guide on how to measure for a new refrigerator? You might even find a new fridge buddy for your nifty water dispenser. Getting everything set up right not only keeps you hydrated but also keeps your kitchen humming smoothly.