Introduction to Pickled Brussels Sprouts
What Makes Pickled Brussels Sprouts Special
Pickled Brussels sprouts are like the rockstars in the pickle jar world, thanks to their zingy flavor punch and crunchy goodness. Pickling jazzes up their natural taste, giving you a tangy twist that dances with their slight bitterness. The end result? A crispy, tasty bite that fits right into whatever dish you're whipping up.
And the magic of pickling means you can throw in your favorite spices, herbs, or even a hint of sweetness into the brine. Want your own flavor showstopper? This is your ticket to creating a taste that's just how you like it.
Benefits of Pickling Vegetables
Pickling veggies, especially the sprout kind, has perks galore. It’s about more than just taste. Check out the picklin’ advantages:
| Benefit | Description |
|---|---|
| Lasts Longer | Pickling stretches the life of Brussels sprouts, so you can snack on them for months. |
| Holds Onto Nutrients | Pickling works its magic to lock in the good stuff, keeping your veggies healthy. |
| Easier to Digest | These fermented delights help your tummy by aiding digestion. |
| Many Uses | Use ’em in salads, sandwiches, or enjoy as a solo crunchy treat, giving you mealtime flexibility. |
| Cuts Down Waste | Got an overload of Brussels? Pickling is a top-notch way to prevent them from going to waste. |
Pickled Brussels sprouts don’t just spice up your taste buds; they also slide right into a healthier diet. Curious about more food storage smarts? Don't miss our article on how long does spaghetti last in the fridge? for a deeper dive.
Proper Storage of Pickled Brussels Sprouts
To keep your pickled Brussels sprouts from turning into a science experiment, storing them right is the name of the game. Here's how to make sure they stay tasty and fresh in the chill zone.
Refrigerator Storage Tips
When it comes to resting your pickled Brussels sprouts in the fridge, you gotta keep them locked up tight in a container that's not gonna let a single whiff of air get through. Air's the enemy here—spoilage is what it brings to the party. Here's how to get it done:
| Tip | Why It's a Good Idea |
|---|---|
| Use Glass Jars | Glass doesn't have a memory for smells and scrubs up nice. Perfect for this pickling gig. |
| Keep in Brine | Those sprouts gotta stay swimming in brine; that's where the magic happens. Keeps them tasty and firm. |
| Seal Tightly | No loose lids allowed. Tighten 'em up, and don't let air crash the Brussels sprout party. |
| Label and Date | Write down the day they became pickled darlings. Helps you remember when it's time to munch. |
Stick with these tips, and you’ll be keeping those pickled Brussels sprouts fresh and fabulous for the long haul.
Temperature and Humidity Considerations
To keep your pickled goods in tip-top shape, your fridge has to play nice with temperature and humidity. Here's the lowdown:
| Factor | What's Best |
|---|---|
| Temperature | Keep your fridge in the chill zone of 32°F to 40°F; that's the sweet spot for freshness. |
| Humidity | Don’t let things get too steamy or too dry. Too much moisture or too little can spell trouble for your sprouts. |
Give your fridge's settings a check now and then. If you're curious about how other foods do in there, like how long does spaghetti last in the fridge?, go ahead and snoop around.
Keep an eye on how you stash your sprouts, and you’ll be munching them at their best for longer. Enjoy those crunchy bites!
Keeping Those Pickled Brussels Sprouts Tasty
Knowing the secrets to keep your pickled Brussels sprouts fresh is half the battle for extending their taste and crunch. Let's dive into the tips you need.
Pickled Brussels Sprouts: How Long Do They Last?
If you stash your pickled Brussels sprouts just right, they’ll stick around for quite a while. But don't expect them to last like the fridge light—forever. Here’s the 411:
| Where They're Stored | How Long They'll Keep |
|---|---|
| Chillin' in the fridge | 1-3 months |
| Tucked in a sealed jar | Up to a year |
| Stashed in the freezer* | 6-12 months |
*Freezing isn't the best idea if you're picky about quality. For peak yum, munch on them in the first few months. If you've got a spare minute, check out our other tips on spaghetti's fridge lifespan.
Spoilage Signs: When to Say Goodbye
Nobody wants a sour surprise. So, keep your eyes (and nose) sharp for when your pickled Brussels start throwing a party gone wrong:
| What to Look Out For | What It Means |
|---|---|
| Funky smells | That rotten or sour whiff? Yep, it's time to toss 'em. |
| Mold magic | Spot mold? No magic here—ditch the jar! |
| Color drama | If they’re no longer a lively green, there’s trouble afoot. |
| Slippery suckers | Slimy sprouts mean it’s time to say goodbye. |
If your batch waves one of these red flags, chuck it. For more home storage wisdom, swing by our article on making bread last in the fridge. Follow these nuggets of advice, and your Brussels sprouts will stay as savory as they were meant to be!
Organizing your Fridge for Pickled Items
Keeping your fridge tidy can make your pickled Brussels sprouts stay fresh and tasty longer. Here's how to get the most out of your refrigerator space.
Placement and Organization Tips
When it comes to placing your pickled goodies, here's what you should know:
- Top Shelf: Top shelf is the chill zone of stability for your pickled Brussels sprouts.
- Use Clear Containers: Clear jars are a game-changer for spotting what’s inside without a guessing game.
- Labeling: Stick a label on the jars with pickling date and what's inside; your future self will thank you.
- Group Similar Items: Buddy up your pickled pals for easy grab-and-go access.
- Avoid Overcrowding: Give those jars some breathing room to avoid smash-ups and keep air flowing.
| Organization Tip | Description |
|---|---|
| Top Shelf | Keeps temps consistent. |
| Clear Containers | See contents without guessing. |
| Label Jars | Handy for dates and lists. |
| Group Similar Items | Makes fridge raiding faster. |
| Avoid Overcrowding | Stops smash-ups and keeps air moving. |
These moves will have your fridge looking sharp and your pickles easy to get at.
Storing Pickled Brussels Sprouts with Other Foods
Mindful placement is important when stashing your pickled Brussels sprouts among other foods. Here's the lowdown:
- Avoid Strong Odors: Don't let your pickles get cozy with stinky foods like fish or garlic—they're chatty and love sharing scents.
- Cozy Up with Other Pickles: Keep the veggie pickle squad together for their own secure section.
- Separate from Fresh Produce: Fresh fruits and veggies have a gassy habit that doesn’t jive with your pickles, so keep them on separate floors.
- Seal Containers Properly: Crank those lids tight so your pickles stay fresh and uncontaminated.
| Storage Guideline | Description |
|---|---|
| Avoid Strong Odors | Keeps unwanted scents at bay. |
| Share Space with Pickles | Keeps a uniform vibe. |
| Separate from Fresh Produce | Stops spoilage from gassy neighbors. |
| Seal Containers Properly | Locks in freshness and keeps them safe. |
By using these quick-to-apply tips, your pickled Brussels sprouts will stay crunchy and tasty while jockeying for room with everything else in your fridge. Want more food storage advice? Check out our piece on how long does quiche last?.
Creative Ways to Use Pickled Brussels Sprouts
Some people think Brussels sprouts aren't their jam - but catch them pickled, and watch the tables turn. These sprightly morsels aren't just a foodie's delight; they're quite the snack and more! Let me take you on a fun, flavorful tour of how to sneak these tangy wonders into your meals and wow your taste buds.
Culinary Ideas and Recipes
-
Salads: Toss pickled Brussels sprouts into your next salad for a zesty surprise. They play well with greens, avocados, and a sprinkle of nuts - making for a smashing crunch and flavor combo.
-
Sandwiches and Wraps: Spread the love (and the Brussels sprouts) on your sandwiches or wraps. Their crunchy texture and zing add a layer of yum to meats, cheeses, or whatever you fancy.
-
Charcuterie Boards: Assemble a snazzy charcuterie board, and let pickled Brussels sprouts crash the party. Nestled among cheeses and cured meats, they steal the show with their bold personality.
-
Tacos: Elevate your taco game with a lively topping of pickled Brussels sprouts. Whether you're dining on pulled pork, fish, or sizzling mushrooms, they make everything pop.
-
Pasta Dishes: Give your pasta a zesty makeover by adding pickled Brussels sprouts for both bite and flavor. They're especially snazzy in creamy or lightly dressed pasta.
Pairing Pickled Brussels Sprouts with Other Dishes
Pairing up pickled Brussels sprouts with your favorite dishes will open up a whole new world of taste adventures. Check these out:
| Food Group | Linked Happiness |
|---|---|
| Proteins | Grilled chicken, beef brisket, pork belly, tofu |
| Greens | Spinach, arugula, kale, mixed lettuce |
| Grains | Quinoa, farro, couscous, rice |
| Cheeses | Goat cheese, feta, sharp cheddar, blue cheese |
| Sauces & Spreads | Hummus, mustard, aioli, vinaigrettes |
So don't just dip your toe in the pickled Brussels pool; dive right in and mix and match them in your meals throughout your week. If you're dying for tips on storing these tangy treats, check out our article on pickled brussels sprouts: fridge storage tips you need.
Tips for Making Homemade Pickled Brussels Sprouts
Pickling Brussels sprouts at home ain't just for old folks. It makes them taste better and keeps 'em fresh longer. We’ll walk you through picking the right stuff and how to pickle like a pro.
Ingredient Selection and Preparation
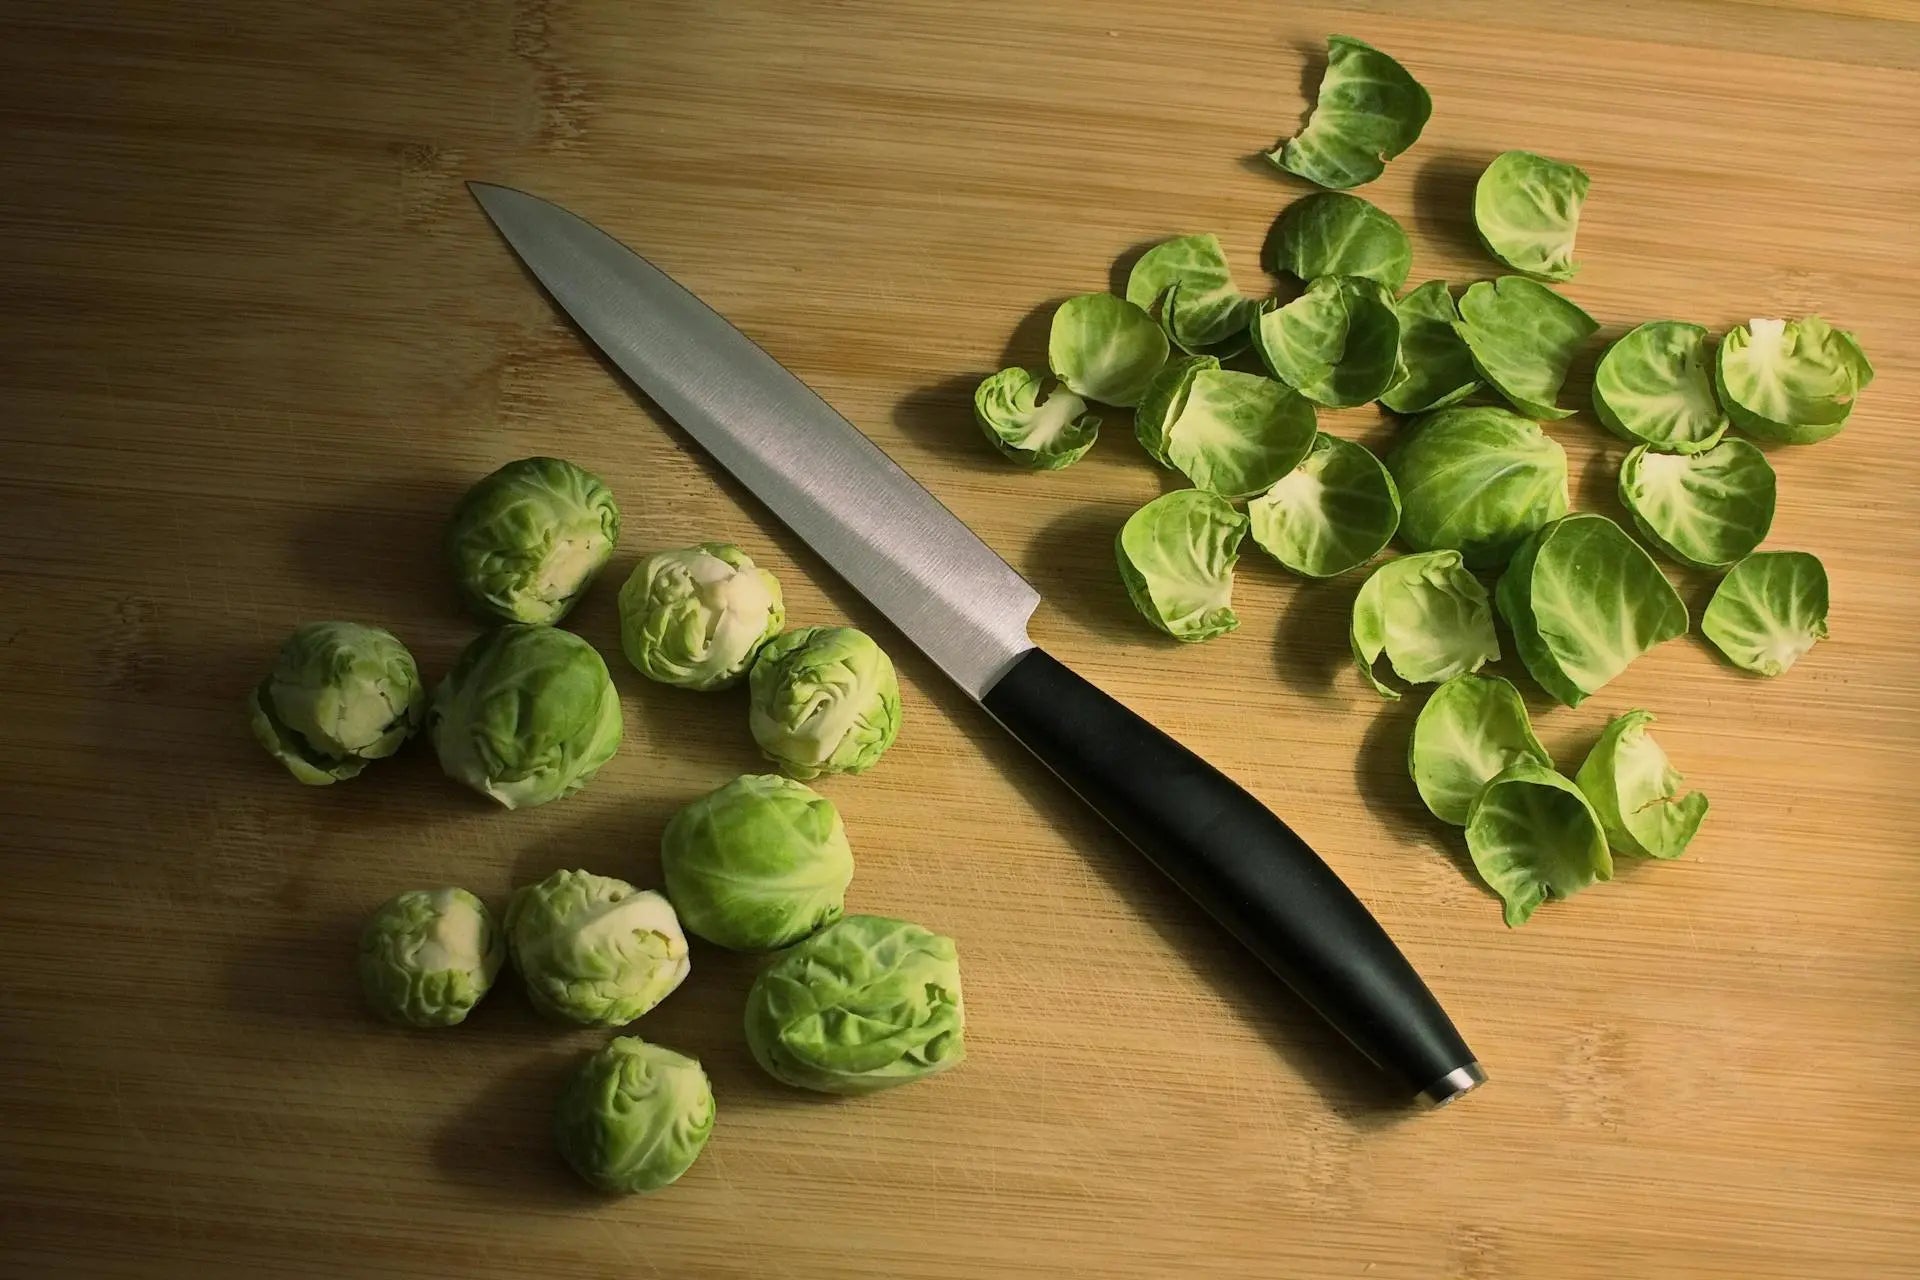
First off, get the freshest Brussels you can find – they should be green and not turning yellow or sad-looking. Here's your shopping list for mind-blowing pickles:
| Ingredient | What You Need |
|---|---|
| Brussels Sprouts | 1 pound, trimmed and cut in half |
| Vinegar | 2 cups - white or apple cider, your call |
| Water | 1 cup (to take a bit of the edge off the vinegar) |
| Salt | 1 tablespoon, kosher or sea (go big or go home) |
| Sugar | 1 tablespoon (optional, if you like it sweet) |
| Spices | 1 teaspoon (mustard, dill seeds, or peppercorns) |
| Garlic | 3 cloves, peeled and sliced |
| Extra Flavors | Optional (try onions, chili flakes, go wild) |
Got it? Good. Now wash them sprouts like they owe you money. Cut off those woody ends and slice them in half. As for the jars, give 'em a hot bath in boiling water to keep things safe and sound.
Step-by-Step Pickling Process
Here’s the lowdown on turning those sprouts into something amazing:
-
Make the Brine: Take a saucepan and mix vinegar, water, salt, sugar, and spices. Heat it until you’ve dissolved the salt and sugar like a magician making them disappear.
-
Pack the Jars: Fill your sterilized jars with Brussels sprouts. Throw in garlic and anything else you’re feeling today.
-
Pour the Brine: Carefully pour the hot brine into the jars, making sure the sprouts get a nice bath. Leave about half an inch at the top to keep things chill.
-
Seal the Jars: Clean the jar rims like you’re wiping a TV screen and put the lids on tight. Keep the air out or you’ll be playing spoilage roulette.
-
Cool and Refrigerate: Let them cool off for an hour on the counter before popping them into the fridge. Give them 48 hours to soak up all that flavor before digging in.
-
Storage Tips: Keep those jars in the fridge and they’ll last you a few weeks – just make sure they're closed tight and check for any funky smells or appearances before eating.
These pickled beauties can take your meals up a notch. Want more life-changing hacks? Check out our pieces on organizing your fridge and energy-saving fridges for 2024. Get your storage game strong and keep things fresh all year round!