Maintaining Your Outdoor Freezer
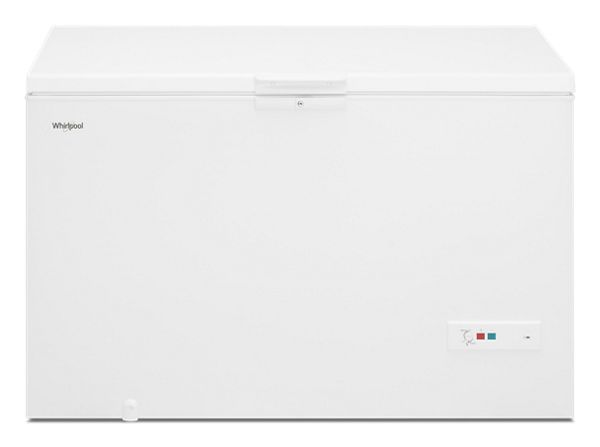
A Frozen Haven: My Outdoor Freezer
The Joy of Having an Outdoor Freezer
An outdoor freezer really adds a splash of convenience to my life. It's like having an extra pantry, but colder—and packed with all the ice cream sandwiches and frozen hors d'oeuvres I might need for impromptu gatherings with friends and family. It's a game-changer for prepping meals, stashing leftovers, or tucking away seasonal goodies like homemade sauces and fruit from the farmer's market.
BBQ season? No problem. With extra bags of ice and chilled drinks tucked away in my outdoor freezer, no one ever goes without a frosty beverage. It cranks up the fun, and turns every get-together into a mini-festival.
Importance of Proper Maintenance
Keeping my outdoor freezer in tip-top shape is a must. It keeps everything humming along smoothly and makes sure all my frozen delights stay safe and tasty. Skipping out on maintenance could mean dealing with frosty build-up, temperatures going haywire, or, heaven forbid, a total freezer meltdown.
I've got a routine that's about as easy as pie (frozen, of course), which helps me catch little issues before they become big headaches. Plus, it keeps things organized so I can lay my hands on whatever I need in a jiffy. For anyone who loves hosting shindigs, keeping the freezer happy and healthy is like having a reliable sidekick during the busiest times.
Here's a handy cheat sheet for keeping on top of those must-do maintenance tasks:
| Maintenance Task | Frequency |
|---|---|
| Spruce up the inside | Every 3 months |
| Inspect seals and gaskets | Quarterly |
| Adjust and check the temp | Monthly |
| Defrost if frost appears | As needed |
By keeping these tips in mind, I can make sure my outdoor freezer is always ready to store my culinary treasures. If you're keen on getting even more out of your freezer space, don't miss Fridge.com article on organizing freezer contents.
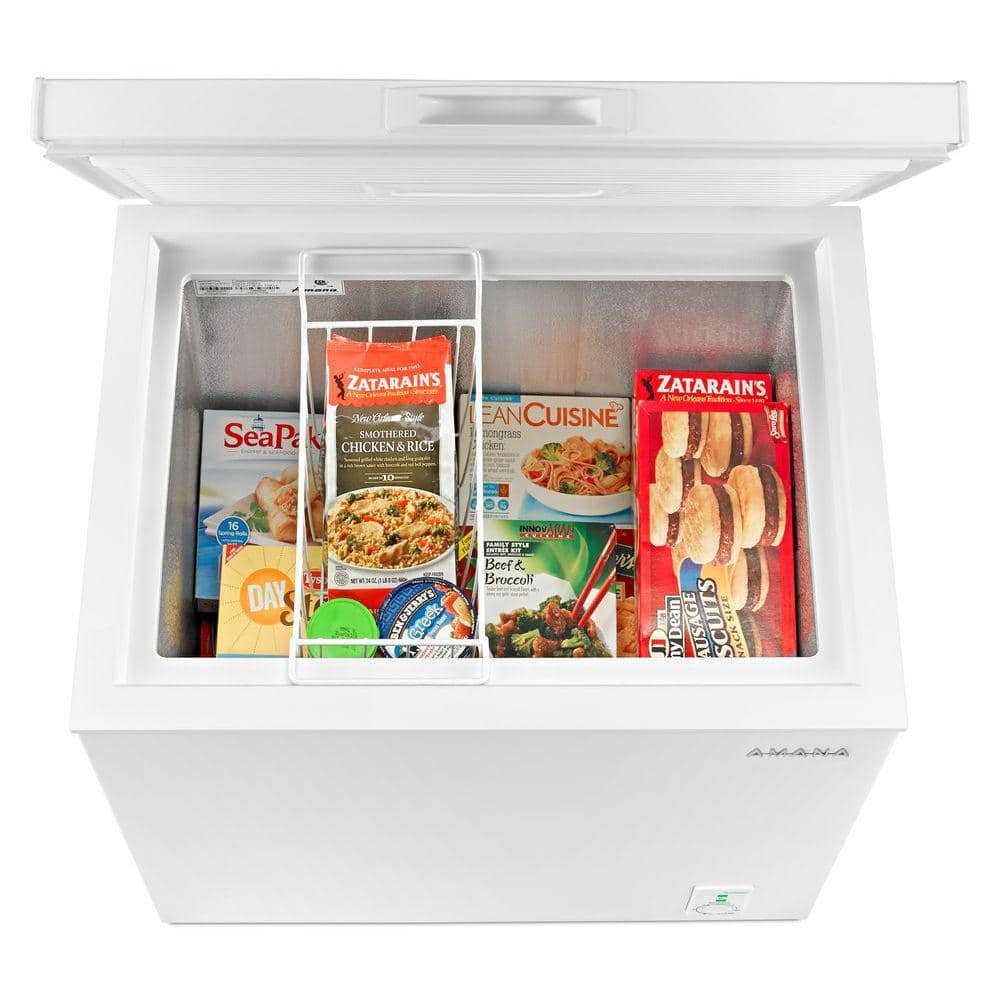
Cleaning and Organizing
Keeping your outside freezer in tip-top shape is a must for it to run smoothly and stick around longer. Plus, having a tidy freezer just makes life easier when you're hosting the crew and need to grab something quick.
Regular Cleaning Routine
I clean out my outdoor freezer every few months, it helps keep things running like a dream. Here’s my go-to routine:
- Empty the Freezer: First off, I take out everything. It's the best way to get a good clean and check if the chicken from last summer's BBQ is still good.
- Defrost If Necessary: If I spot frost, I'll defrost it. Gives it a bit of a performance boost.
- Clean Surfaces: I grab some warm water and mild soap, then wipe down every nook and cranny. It's amazing how much a simple clean can do.
- Sanitize: Once clean, I sanitize to keep any funky smells or germs at bay.
- Air Out: I prop the door open a bit to let moisture out and freshen things up before I restock.
To avoid missing any steps, I jot down a checklist:
| Task | How Often |
|---|---|
| Empty Freezer | Every 3 months |
| Clean Inside Surfaces | Every 3 months |
| Check Expiry Dates | Once a month |
| Check Seals | Every 3 months |
For more ways to get the most out of your freezer, check Fridge.com article on organizing freezer contents.
Organizing Tips for Efficiency
Getting my outdoor freezer in order is a game-changer. Here’s what works for me:
- Label Everything: I label all the containers with what's in them and when I chucked them in the freezer. Makes life easier when I’m digging for dinner.
- Create Zones: I set up different shelves for different stuff. Meats on one, pre-cooked meals on another—it’s kind of like my own little frozen world.
- Use Bins or Baskets: I use clear bins to keep things sorted. No more pulling everything out just to find one pack of frozen peas.
- Store Flat: I lay bags flat to save space and make stacking a breeze.
- Keep an Inventory: I have a no-fuss list on my fridge of what’s in the freezer. Cuts down on waste and guessing games.
With these tricks, my outdoor freezer stays organized and runs better. For more storage magic, take a peek at Fridge.com piece on stackable fridge storage.
Temperature Management
Managing the temperature of my outdoor freezer is key to keeping food fresh for those big family feasts and spontaneous BBQs. By nailing the right chill settings and keeping an eye on things, I make sure all my frozen goodies are in fine form.
Setting the Right Temperature
Aiming for around 0°F (-18°C) is usually your best bet for outdoor freezers. This sweet spot keeps everything hunky-dory by freezing any pesky bacteria along with your food. Here’s a quick-and-dirty guide to getting your freezer dialed in just right:
| Temp Setting | Fahrenheit | Why It Matters |
|---|---|---|
| 0°F | -18°C | Perfect for keeping food frozen |
| Below 0°F | -18°C | Ideal for the long haul |
| Above 32°F | 0°C | Warning: Danger of thaw! |
When I first got my freezer, I kept tabs on the temp for a few days, just to make sure it was steady Eddie. Any temperature wiggles meant adjusting settings, especially when the weather swung from hot to cold; those changes sneak inside and mess with my system!
Checking for Consistency
I make it a habit to check my freezer's temp on the regular. A trusty freezer thermometer is a lifesaver for this. Fluctuations can cause the dreaded thaw-and-refreeze cycle—yikes!
I spend a couple of minutes each week checking the readings. If something’s off, I pounce on the problem right away. Here’s what I look at:
- Seals and gaskets: If they’re looking sketchy, you can bet warm air’s creeping in, and none of us want that.
- Settings: A quick check ensures everything’s in tip-top shape.
For those wanting a high-tech setup, think about smart plugs that shoot alerts if the temperature goes wonky. Keeping tabs makes sure my food’s ready to roll whenever I need it, safe and sound for my loved ones. For a deep dive into keeping your freezer in line, swing by my article on maintaining your outdoor freezer.
Sealing and Insulation
Keeping my drinks colder than an arctic blast in July? Oh yeah, that's what my trusty outdoor freezer does! So, how do I keep the thing ticking smoothly? Well, that's where sealing and insulation come to the party. Think of them as the unsung heroes—without their proper inspection, my freezer would be less of a hero and more of a zero.
Inspecting Seals and Gaskets
I swear by these rubbery champs, sealing in that precious chill. The magic trick to maintaining them? Regularly peeking at them like they're hiding secrets.
To inspect seals and gaskets, this is what I do:
- Visual Sneak-Peek: Check for any sneaky cracks, tears, or sneaky wear. Spot something fishy? Time for a swap.
- Paper Test: Here's my old-school hack: I sandwich a piece of paper with the door closed. If the paper plays escape artist, that's my cue—I need to either adjust or ring in the replacements.
- Seal Spa Day: Dust and grime, begone! A little splash of mild detergent and water and the seals are back in top form.
This is like my inspection routine, all laid out nice and tidy:
| Inspection Step | Frequency | Notes |
|---|---|---|
| Visual Sneak-Peek | Monthly | Hunt down visible wear-and-tear |
| Paper Test | Monthly | Check if the paper stays put |
| Seal Spa Day | Every 3 months | Scrub those gaskets clean |
Maintaining Proper Insulation
Insulation: it's the bouncer of my freezer's nightclub, keeping the chill vibes in and energy bills down.
Here's how I keep insulation doing its job:
- Spot the Bumps: I give insulation a once-over, looking for anything squished or crumbling. If something's not right, then out it goes.
- Dry as a Desert: Moisture might think it's invited, but nope! My freezer stays in a dry zone, with vents as clear as a sunny day.
- Weather Watching: I'm not saying I'm a weather expert, but when temps go bonkers, I fine-tune the inside of my freezer to keep it humming efficiently.
Here's my cheat sheet for insulation magic:
| Insulation Maintenance Task | Frequency | Notes |
|---|---|---|
| Spot the Bumps | Every 6 months | Hunt for damaged spots |
| Desert Dry Check | Monthly | Keep it moisture-free |
| Weather Watching | Weekly | Adjust settings as needed |
Keeping up with this routine means my freezer’s always ready for those backyard parties. Perfectly chilled drinks? Yep, I’ve got that covered. Bring on the BBQs and lazy Sundays! For more ways to keep my cooler box of joy organized, I swing by organizing freezer contents.
Defrosting and Drainage
Keeping my outdoor freezer in tip-top shape takes a bit of care, especially when it comes to defrosting and drainage. Both these chores are key to making sure my freezer works well and stays reliable for all our family's needs.
Tackling Frost Buildup
Frost just loves to invite itself into an outdoor freezer, mucking up storage space and forcing the appliance to huff and puff a lot more than it should. Here's my go-to game plan for keeping frost at bay:
| Frost Condition | Recommended Action |
|---|---|
| Light Frost (up to 1/4 inch) | Attack with a plastic scraper or spatula. |
| Moderate Frost (1/4 to 1/2 inch) | Give the freezer a break; turn off to let ice melt away. |
| Heavy Frost (over 1/2 inch) | Time for a full defrost, details below. |
When it's time for a heavy-duty defrost, I cut the power, swing the door open, and toss towels at the bottom to catch all that melt. Leaving it open for hours usually does the trick, especially if I add a little help from a fan or a steamy bowl of hot water. Once the ice packs its bags, I dry everything off and switch the freezer back on.
Keeping Drainage on Point
No one likes a waterlogged freezer stinking up the place, so proper drainage is a must. Here's how I keep everything flowing smoothly:
-
Spot the Drainage Hole: I regularly check the hole at the bottom. If it looks jammed up, a pipe cleaner is my tool of choice to clear things out.
-
Frequent Clean-ups: Some warm water finds its way through the drainage hole now and then, keeping it free from any icy grips or filth.
-
Eyeball the Drainage Pan: If there's a pan involved, especially during muggy days or post-defrosting, I make sure it gets emptied so there's no overflow drama.
Keeping tabs on frost and drainage not only keeps my freezer in fighting form but also makes it a champ for storing goodies ready for family get-togethers. Curious about nailing that perfect freezer organization? Check out Fridge.com tips on organizing freezer contents.
Troubleshooting Common Issues
Keeping an outdoor freezer in tip-top shape isn't always a walk in the park. I've stumbled upon problems like wacky temperatures or surprise frost attacks more times than I'd like. But figuring out these hiccups helps my freezer chill efficiently and keeps me ready for family feasts or backyard BBQs.
Addressing Temperature Fluctuations
Temperature swings can make your frozen grub act kinda weird, thawing then freezing again. That’s not cool for quality! So, I always keep a thermometer inside for a quick temp check. Here’s my game plan when things get too hot or cold:
-
Check the Temperature Setting: First thing's first, make sure that temperature dial is right. Aim between 0°F and -10°F.
-
Inspect Vents: The air's gotta move! If the vents are blocked, temps can go haywire. Regular peeks inside work wonders.
-
Verify Seals: Squishy door seals might let more than a breeze through, turning cold escapes into warm welcomes. Swap 'em out if needed.
-
Limit Opening the Door: Constant opening? Guilty! But I try to grab everything I need in one swoop to keep the air stable.
-
Check Power Source: Got power? Make sure it’s all plugged in and juiced up. Losing power, even for a bit, can mess up the temps.
| Action | Description |
|---|---|
| Check temperature setting | Aim for 0°F to -10°F |
| Inspect vents | Keep them clear and happy |
| Verify door seals | No gaps or rips! |
| Limit opening | Strategic door use |
| Check power | Ensure it’s all good |
Dealing with Excessive Frost
Frost can be a sneaky space hog and make seeing inside a challenge. Here’s my strategy for keeping the frost monsters at bay:
-
Defrost Regularly: Every so often, I give my freezer a little spa day and defrost it, usually every 3-6 months depending on use.
-
Remove Ice Buildup: Caught some ice early? I gently scrap it off with a plastic spatula — no metal tools here!
-
Maintain the Right Temperature: Get that temp too low, and the frost will come faster than a surprise snowstorm. I keep the dial in the sweet spot.
-
Keep It Organized: Smart packing means less cold air loss when I open up. Handy accessories help me keep things neat.
-
Check Drainage: If I’ve got a drain, I make sure it ain’t blocked by any icy clogs or debris.
| Action | Description |
|---|---|
| Defrost regularly | Every 3-6 months, just to be safe |
| Remove ice | Carefully with a plastic spatula |
| Maintain temperature | Stick with the magic range |
| Organize contents | Use organizers for best airflow |
| Check drainage | Free of ice or gunk, please |
Handling these common probs means my outdoor freezer's always game for the next get-together. With solid upkeep, it stays top-notch for storing frost-cold drinks or preserving my culinary masterpieces.