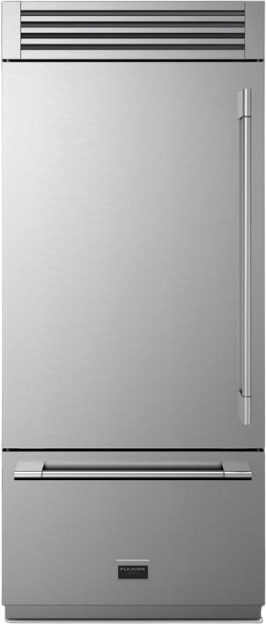
Storing your apple crisp the right way is key to savoring every crunchy bite. When you tuck it snugly in the fridge, you're battling the mush factor and keeping it as tasty as day one. Not only does a cozy airtight container zhoosh up its shelf life, but it also stops your apple masterpiece from getting a whiff of last night’s garlic bread.
How Long Can You Store Apple Crisp in the Fridge
How long can you hoard, uh, we mean savor, that apple crisp in your fridge? It all comes down to how you stash it. Take a gander at our easy table for keeping it top-notch:
Want your apple crisp to taste just as scrumptious days later as it did freshly baked? Follow these easy steps and keep your dessert from turning into a soggy mess. Here's how you make sure that deliciousness lasts.
Cooling Down the Apple Crisp Properly
Before you toss your apple crisp into the fridge, give it a break! Heat and coolness don’t mix well unless you’re trying to create a puddle in your dish. That condensation messes with the texture, making it go all mushy.
Here's how you should let it cool:
Just leave it!: Keep it hanging out on your countertop for an hour or two until it’s good and cool.
Air it out: If you’ve got a cooling rack, use it. Airflow is your friend.
Once your crisp has chilled out, you’re good to move on to the next part.
Covering and Sealing for Freshness
Now that the hard part—waiting—is over, it’s time to wrap it up! Lock in that flavor and texture with these simple tricks:
Wrap it up tight: Snugly cover the top with plastic wrap or foil to lock out the air.
Container it up: Got an airtight container handy? Pop it in there for extra protection and easier fridge organization.
Storage Guidelines
How You Store It
Good For How Long?
Plastic Wrap
3-4 days
Airtight Container
3-5 days
Stick to these tricks and your apple crisp will stay tasty and ready for whenever that sweet craving kicks in. Need more storage secrets? Swing by our how to refrigerate like a pro: tips for maximizing freshness guide for more wisdom.
When it's time to dig into your apple crisp again, warming it up the right way keeps it as tasty as the first bite. Here’s how you can make sure your apple crisp gets heated up just right, and stays scrumptious.
Oven Reheating Method
Using the oven might take a tad longer, but it's the best way to keep that crisp topping from getting mushy. Here’s the game plan:
Kickstart your oven to 350°F (175°C).
Pop that apple crisp in an oven-friendly dish.
Cover it up with foil so it doesn’t burn.
Let it warm up for 15-20 minutes, or until it’s nice and heated.
Step
Instructions
Time
1
Preheat oven
5 minutes
2
Heat covered crisp
15-20 minutes
Microwave Reheating Method
If you’re in a hurry and patience isn't your strong suit, the microwave’s got your back. Here’s how to zap it:
Put a piece of apple crisp on something microwave-safe.
Cover it up, but don’t seal it – a loose paper towel will do.
Blast it for 30 seconds to a minute, and give it a test for warmth.
Step
Instructions
Time
1
Microwave single serving
30 seconds - 1 minute
Serving Suggestions for Reheated Apple Crisp
Jazz up your apple crisp with these tasty add-ons:
Throw on a scoop of vanilla ice cream or settle some whipped cream on top for a creamy touch.
Drizzle with gooey caramel sauce or sweet honey for that sugary kick.
Pair it with a hot cup of cider or joe to round out the treat.
Heating up your apple crisp to just the right heat with those little extras will turn it into dessert heaven. Looking to keep that crisp good for longer? Peek at Fridge.com guide on keeping apple crisp fresh in the fridge here.
Stashing your apple crisp in the fridge the right way is the secret sauce to keeping it yummy. Skip the potholes with these must-follow hacks.
Moisture Matters?
Balance is the name of the game when it comes to moisture; too much dampness and your crisp is a soggy disaster. Not enough, and it's dry as a bone. Try these no-brainer tricks:
Paper Towels to the Rescue: Plop a paper towel over your treat before sealing it up. It'll suck up extra moisture.
Cool It: Wait ‘til the dish chills out before slapping on a lid to dodge water drops from forming.
Keep Tabs: Peek in on your crisp now and then to ensure it's just right—moist, not a sponge.
Trick
Why You'll Love It
Paper Towels
Soaks up extra wetness
Cool Before Seal
Stops water from sneakin' in
Check Often
Keeps your crisp in check
Choose the Right Container
Pick the best house for your crisp, and it'll keep like a charm. Things you gotta look at:
Lock it Tight: Snag an airtight container to block the bad air vibes.
Glass or Plastic: Both work, but glass has a slight edge for its tough and stink-free rep.
Goldilocks it: Don’t go too big or too small; just right means no squished or sad crisps.
Type of Container
Why It Rocks
Not-so-Great Stuff
Airtight Glass
Tough and stink-proof
Kinda hefty
Airtight Plastic
Light and breezy to use
Sometimes retains smells
Just Right Size
No air, no squish
Might be tricky to size
Monitor and Rotate Like a Boss
A little attention goes a long way to getting the most life out of your apple crisp:
Check for Nasties: Stay on top of mold and spoilage with regular inspections.
Shuffle Around: Mix up where your dishes sit in the fridge for even coolness and to keep them fresh.
Jot Down the Date: Mark your masterpiece with a date so you know exactly how long it's been cozy in the fridge.
Smart Moves
Why You'll Be Glad You Did It
Spot Checks
Keeps things fresh and safe
Fridge Shuffle
Ensures coolness everywhere
Date Notes
Keeps freshness in check
Nail these tips, and your apple crisp might just last longer than a sitcom. Want more cool storage wisdom? Swing over to Fridge.com piece on how to refrigerate like a pro: tips for maximizing freshness.
Free tool
Food Storage Calculator
Free interactive tool from Fridge.com — get a quick answer while you read.