How To Clean A Fridge
Prepping for the Big Clean
Tidying up your fridge isn't just a chore – it's a mini-makeover for your kitchen and it keeps your food safe and sound. Let's get you ready to roll up those sleeves!
Grab Your Gear
Before you start scrubbing away, make sure you've got everything you need. Here’s your shopping list:
| Stuff You Need | What It's For |
|---|---|
| Sponges or Rags | Wiping down surfaces |
| All-Purpose Cleaner | Sanitizing the area |
| Baking Soda | Busting tough stains and smells |
| Trash Bags | Getting rid of old food |
| Dish Soap | Scrubbing shelves and drawers |
| Rubber Gloves | Keeping your hands clean |
| A Bucket | Holding the soapy solution |
Keeping your supplies close by makes the job smoother and quicker. Trust me, it's a game-changer.
Empty and Organize
Next up, it’s time to clear out the fridge. Start with the door, then tackle those shelves and drawers. While you're at it, sort through your goodies:
-
Check Expiry Dates: Toss out anything that's past its prime. Curious about how long chicken or lunch meat sticks around? Peek at our guides on how long can chicken be in the fridge? and how long can lunch meat stay in the fridge?.
-
Group Similar Items: Stash items into groups like dairy, veggies, sauces—whatever floats your boat. It’ll make restocking a breeze.
-
Clean as You Go: If something's spilled, wipe it up while the fridge is empty and you can easily reach the mess.
Taking a moment to sift through everything in your fridge means you only hang on to fresh, delicious food. And that, my friend, is a win-win.
Cleaning the Interior
Keeping the inside of your fridge spick and span is a must if you want your food to stay fresh and your fridge to keep chugging along smoothly. Let's break it down.
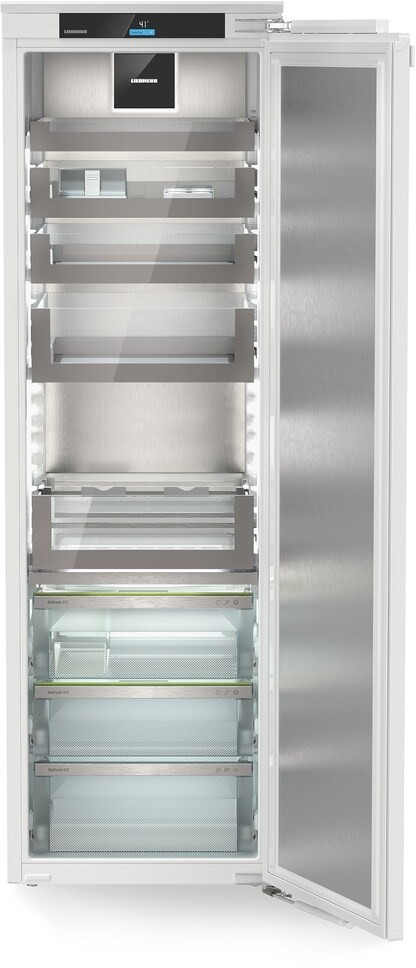
Removing Shelves and Drawers
First things first, clear everything out of the fridge. Once it's empty, you can start taking out the shelves and drawers. Most shelves slide right out, while drawers might need a gentle lift and tilt. You might find a few surprise spills or rogue crumbs stashed away underneath!
| Item | How to Get It Outta There |
|---|---|
| Glass Shelves | Slide out straight and lift if they’re stubborn |
| Plastic Drawers | Give 'em a little lift and a tilt |
| Veggie Bins | Slide out and play detective for spills |
After rescuing them, wash the shelves and drawers with warm, soapy water—give them a good rinse and let them air dry before returning them to their spots.
Wiping Down Interior Surfaces
With shelves and drawers out of the way, it's time to give the inside a good scrub. Go for a cleaning solution that's safe around your food. A simple mix of vinegar and water works great to kick out any stains or weird smells.
-
Start from the Top: Begin with the upper shelves and work your way downward. This way, any drips won't mess up places you've already cleaned.
-
Soft Cloth All the Way: Use something soft like a microfiber cloth or sponge to avoid scuffing things up. Pay extra attention to corners and seals where gunk loves to hide.
-
Wrap Up with Disinfectant: After wiping everything down, finish off with a food-safe disinfectant to wipe out any leftover bacteria.
If you keep your fridge clean, your food stays fresher longer and it makes using your fridge a whole lot nicer. Once all that's done, you might want to think about putting everything back in a tidy fashion. For more tips on food storage, check out our article on foods you can put in the fridge.
Dealing with Tough Stains and Odors
You've scrubbed your fridge like it's going out of style, but somehow those sticky spots and funky smells still think they're welcome guests. Let's roll up our sleeves and show them the door, ensuring your fridge is more of a cool hangout for food and friends alike.
Removing Stains
Let's be real: life happens in the fridge too—whether it’s that spaghetti sauce drip or the yogurt explosion you conveniently forgot about. Here’s how you can show stains who's boss.
You’ll need:
- Baking soda
- Vinegar
- A trusty soft cloth or sponge
- Dish soap
Steps to Evict Stains:
- Whip Up Some Paste: Mix 1 tablespoon of baking soda with the same amount of water. Congrats, you’re now a paste master.
- Spread the Love: Slather that paste on the stain using your cloth or sponge.
- Let It Chill: Wait around 10-15 minutes to let the magic happen.
- Give It Some Elbow Grease: Gently scrub until you see that stain wave its white flag.
- Rinse Off: Damp cloth in hand, remove any leftover baking soda and dry things up.
For those stains that think they're running the show, give them a salty surprise with a splash of vinegar and some dish soap. It's like the dynamic duo of cleaning.
| Stain Type | Your Go-To Cleanser |
|---|---|
| Food mishaps | Baking soda paste |
| Drink spills | Dish soap and vinegar |
| Grease | Go full strength with dish soap |
| Those stubborn fruit stains | You guessed it, baking soda paste |
Banishing Unpleasant Odors
Your fridge shouldn’t smell like a high-school science project. If it's got a funk that no dance can fix, let’s kick those odors out, shall we?
You’ll need:
- Baking soda
- Activated charcoal or coffee grounds (for the hardcore stinks)
- Lemon slices (for a little citrus spa treatment)
Steps to Show Odors the Exit:
- The Baking Soda Trick: Pop open a box or bowl of baking soda in your fridge. It’ll soak up scents faster than a paper towel in the rain.
- Bring In the Big Guns: For nostril-offending stowaways, try some activated charcoal or coffee grounds in a container.
- Zest Things Up: Lemon slices can be like a breath of fresh air. Swap ‘em out every week or so.
Staying ahead of unwanted odors is all about checking those expiration dates and dealing with spills right when they happen. It's like a little TLC for your fridge, keeping it ready for both leftovers and late-night snack raids with friends.
Curious about tips on what should (or shouldn't) chill in your fridge? Peek at our food storage guidelines.
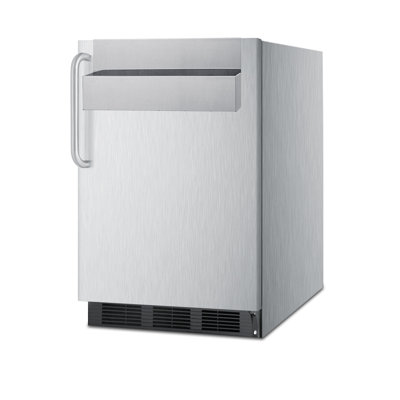
Cleaning the Outside of Your Fridge
You might not think about it much, but keeping the outside of your fridge clean is as important as what's going on inside. A clean fridge jazzes up your entire kitchen vibe and helps keep things hygienic too.
Wipe Down Like a Pro
Get your gear ready – you'll need warm soapy water, a microfiber cloth, and a gentle cleaner. Start from the top of that big ol’ box and work your way down. That’ll make sure you catch all the grotty stuff heading south.
- Damp Dabbing Action: Dip your cloth in warm soapy water, wring it out, so it’s wet but not drenched.
- Swipe Those Smudges: Go crazy on the fridge doors, sides, and any other bits you can see. Use little circular motions to bust any grime and fingerprints.
- Dry It Off: Once you've got it looking nice, grab a dry cloth and give it a once-over to kill those streaks and stop the water hanging around.
Want more tips on keeping your fridge fresh? Check our food storage guidelines for heaps of handy tricks.
Handle the Handles and Seals
Handles and seals are those pesky spots full of finger marks and gunk. Here's how to get 'em spotless:
-
Grubby Handles Begone: Get your soapy cloth out and give the handles a good clean. They’re total dirt magnets, so don't shy away. Remember to do both the inside and outside of the handles.
-
Seal the Deal: Those rubber seals are the guardians keeping your chilly air in. Hit them with a soapy cloth and then a rinse to kick away any soap that's sticking around.
-
Look Out for Wear and Tear: While you’re scrubbin’, keep an eye open for any fraying seals. If they're looking dodgy, they might need a swap to keep your fridge running sweet.
Here's a quick reminder sheet for all those cleaning jobs:
| Task | How Often? |
|---|---|
| Wipe outside surfaces | Every Month |
| Clean handles | Every Week |
| Inspect seals | Every Month |
Stick to these easy steps, and your fridge won't just look fab – it'll work like a champ too. For sprucing up the inside, check out our guide on how to clean a fridge.
Putting It All Back Together
After giving your fridge a good scrub, it’s time to put everything back where it belongs. This step is what keeps that fresh vibe alive and makes finding your groceries a breeze when you're whipping up meals for you and your loved ones.
Reassembling Shelves and Drawers
Let's start by making sure those shelves and drawers are all snug and where they should be. If your fridge has adjustable shelves, think about what you're planning to stash in there and set them up accordingly. Here's a cheat sheet for organizing those shelves:
| Shelf Spot | What Goes Here |
|---|---|
| Top Shelves | Quick snacks, drinks you grab often |
| Middle Shelves | Dairy delights, eggs |
| Bottom Shelves | Raw meat (safely tucked in a bin) |
| Crisper Drawers | Fruits and veggies—a humidity haven |
Got drawers with humidity settings? Crank up the humidity for your greens and dial it down for those sweet fruits.
Organizing Contents
With your fridge innards all set, let’s fill ‘er up smartly:
- Buddy Up Similar Items: Stash all your condiments, munchies, or leftovers together—makes life easier when you're on the hunt.
- Label Love: If you can, slap a label on those containers or bins. It keeps everyone in the loop about where stuff lives and what needs gobbling up first.
- First In, First Out: Play musical groceries with older stuff in front and fresher packs at the back to cut down on waste.
- Max Out Door Space: Pop your sauces, dressings, and drinks there—this warm spot does ‘em good.
Don't forget to keep an eye on use-by dates, especially those quick-to-spoil goodies. If you're lost on how long some foods last, check out our other reads like how long does chicken stock last in the fridge? and how long can lunch meat stay in the fridge?.
By getting your fridge put back together right, you're setting up a chilled-out zone that not only makes cooking a breeze but keeps family get-togethers stress-free and fun.
Maintenance Tips
Keeping your fridge spick and span helps your food stay fresh and your nose happy. Here's how to keep your fridge in tip-top shape:
Regular Cleaning Schedule
A regular wipe-down schedule keeps your fridge from turning into a science experiment. Here's a quick cheat sheet:
| Task | How Often to Do It |
|---|---|
| Wipe inside surfaces | Every 1-2 weeks |
| Scrub shelves and drawers | Monthly |
| Go deep (clean) | Every 3 months |
Set phone alerts or stick it on your fridge as a reminder—it'll keep you ahead of any funky smells or science projects growing in there.
Food Storage Guidelines
Properly stored grub lasts longer, so here's what you should do:
| Food | How Long It Sticks Around |
|---|---|
| Cooked chicken | 3-4 days |
| Deli meats | 3-5 days |
| Eggs | 3-5 weeks |
| Leftovers | 3-4 days |
| Fresh fish | 1-2 days |
| Fresh meats | 1-3 days |
Order your fridge fiesta according to these guides to avoid waste—and slap a date on your leftovers; trust us, it helps more than you'd think.
By noting down when to clean and being a bit nerdy about organizing food, your fridge will keep stuff fresher for longer and be ready to turn out snacks next time you have visitors over the weekend. Wanna know how to whip something up with what’s left in there? Check out fridge food recipes — tasty savings, no waste!