Introduction to Built-In Freezer Cleaning
Keeping your built-in freezer clean isn't just about looking good; it's about making sure it runs smoothly and keeps your food safe. This section explains why regular cleaning matters and the safety steps you should take before diving in.
Why Bother Cleaning Regularly?
Cleaning your built-in freezer regularly is a no-brainer for a few reasons:
- Efficiency: A clean freezer works better, saving you money on energy bills.
- Food Safety: Getting rid of old food, spills, and frost keeps your food safe to eat.
- Longevity: Regular upkeep can make your freezer last longer, avoiding costly repairs or replacements.
For more tips on cleaning similar appliances, check out Fridge.com guides on cleaning a bottom freezer refrigerator and cleaning an upright freezer.
Safety First
Before you start cleaning, keep these safety tips in mind:
- Unplug It: Always unplug the freezer to avoid any shocks.
- Wear Gloves: Protect your hands from cleaning chemicals and the cold.
- Check for Leaks: Make sure there are no leaks before you start.
- Ventilation: Ensure the area is well-ventilated if you're using cleaning agents.
By following these safety steps, you can clean your freezer without any hiccups. For more cleaning tips, check out Fridge.com articles on cleaning a chest freezer or cleaning a garage freezer.
Getting Ready to Clean
Before you start scrubbing, make sure you're prepared. Proper prep makes the cleaning process smoother and quicker.
Gather Your Supplies
Having everything you need on hand will save you time:
- Soft Cloths or Sponges: For wiping down surfaces.
- Mild Detergent: To clean the inside and outside.
- Baking Soda: For getting rid of odors.
- Warm Water: To mix with the detergent.
- Ice Scraper: For getting rid of ice buildup.
- Towels: To soak up any water from defrosting.
- Trash Bags: For tossing out expired or unwanted food.
Defrosting the Freezer
Defrosting is key to making the cleaning process easier:
- Unplug the Freezer: Turn it off to avoid any electrical hazards.
- Remove All Food: Transfer food to a cooler or another freezer. Toss out any expired items.
- Place Towels Around the Base: This will soak up the melting ice.
- Leave the Door Open: Let the ice melt naturally. This can take a few hours.
- Use an Ice Scraper: Gently remove any remaining ice chunks. Avoid sharp objects that could damage the interior.
| Step | Description |
|---|---|
| 1 | Unplug the freezer |
| 2 | Remove all food items |
| 3 | Place towels around the base |
| 4 | Leave the door open |
| 5 | Use an ice scraper |
Once the freezer is defrosted, you can start cleaning the inside and outside. For more detailed guides, check out Fridge.com articles on cleaning an upright freezer and cleaning a bottom freezer refrigerator.
Cleaning the Inside
When it comes to cleaning a built-in freezer, the inside is where the magic happens. Proper cleaning keeps your freezer running efficiently and your food safe.
Emptying the Freezer
Start by emptying your freezer completely. Put the food in a cooler or insulated bags to keep it cold while you clean. This step is crucial to reach every corner of the freezer.
Cleaning Shelves and Drawers
Remove the shelves and drawers for separate cleaning:
- Fill your sink or a large basin with warm, soapy water.
- Submerge the shelves and drawers in the soapy water.
- Use a sponge or cloth to scrub away any residue or spills.
- Rinse thoroughly with clean water.
- Let these parts air dry completely before putting them back.
| Component | Cleaning Method |
|---|---|
| Shelves | Soapy water, sponge |
| Drawers | Soapy water, sponge |
Cleaning the Interior Walls
With the shelves and drawers out, focus on the interior walls:
- Mix warm water and a bit of dish soap.
- Dip a cloth or sponge into the solution and wring out excess liquid.
- Wipe down the interior walls, paying attention to corners and crevices.
- For stubborn stains, use a soft-bristled brush.
- Rinse the cloth or sponge in clean water and wipe down the walls again.
- Dry the interior walls with a clean, dry cloth.
For more specific cleaning instructions, check out Fridge.com guides on cleaning a chest freezer or cleaning a compact freezer.
By following these steps, you ensure your built-in freezer stays clean and efficient, extending its lifespan and keeping your food fresh.
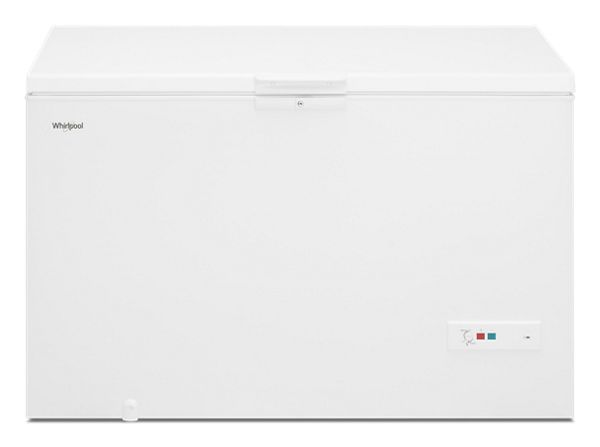
Cleaning the Outside
The outside of your built-in freezer is the first thing people see. Keeping it clean not only looks good but also helps it run better.
Wiping Down the Exterior
Start with a soft cloth or sponge and a mild cleaning solution. Avoid abrasive cleaners that can scratch the surface. Dampen the cloth with the cleaning solution and gently wipe down all the exterior surfaces. Pay special attention to areas with dust or grime.
| Cleaning Supplies | Purpose |
|---|---|
| Soft Cloth/Sponge | Prevents scratches |
| Mild Cleaning Solution | Removes dirt and grime |
For stainless steel surfaces, use a specific stainless steel cleaner to avoid streaks. After wiping, use a dry cloth to buff the surface until it's completely dry.
Cleaning Handles and Seals
Handles and seals are often overlooked but are crucial areas:
- Handles: Use a disinfectant wipe or a cloth dampened with a mild cleaning solution to clean the handles.
- Seals: Inspect the seals and use a small brush or cloth to clean between the grooves.
| Component | Cleaning Method |
|---|---|
| Handles | Disinfectant wipe or damp cloth |
| Seals | Small brush or cloth to remove debris |
Keeping the exterior, handles, and seals clean ensures your built-in freezer stays hygienic and efficient. For more tips, check out Fridge.com articles on cleaning a mini freezer and cleaning an upright freezer.
Deodorizing the Freezer
After cleaning, make sure your freezer smells fresh. Deodorizing helps get rid of any lingering odors.
Natural Deodorizing Methods
Natural methods are effective and safe:
- Lemon Juice: Place a few cotton balls soaked in lemon juice inside your freezer.
- White Vinegar: Wipe down the interior with a solution of equal parts white vinegar and water.
- Activated Charcoal: Place a small container of activated charcoal in the freezer.
- Coffee Grounds: Use dry coffee grounds in an open container to absorb and mask unpleasant smells.
| Natural Method | Pros | Cons |
|---|---|---|
| Lemon Juice | Pleasant scent, natural | Needs regular replacement |
| White Vinegar | Effective, natural | Strong vinegar smell initially |
| Activated Charcoal | Long-lasting, highly effective | Requires purchase |
| Coffee Grounds | Masks odors well | Needs regular replacement |
Using Baking Soda
Baking soda is a classic for deodorizing:
- Open Container: Place an open box of baking soda inside your freezer.
- Baking Soda Paste: For stubborn odors, make a paste using baking soda and water. Apply it to the interior surfaces and let it sit for a few hours before wiping it off.
| Baking Soda Method | Duration | Effectiveness |
|---|---|---|
| Open Container | 1-3 months | High |
| Baking Soda Paste | 2-3 hours | High |
For more tips, check out Fridge.com articles on cleaning a bottom freezer refrigerator and cleaning a chest freezer. Regularly deodorizing your freezer keeps it a pleasant place for your food.
Putting It All Back Together
After cleaning, it's time to reassemble and restock your freezer. This keeps it in top shape and your food safe.
Letting It Dry
Before reassembling, make sure the freezer is completely dry:
- Leave the Door Open: This speeds up the drying process.
- Use Towels: Place clean, dry towels inside to absorb any remaining moisture.
- Check for Damp Spots: Wipe them down with a dry cloth.
Restocking Food
Once dry, start restocking your food:
- Sort Food: Group similar items together.
- Use Labels: Label containers and bags with the date of storage.
- Proper Placement: Place frequently used items at the front.
| Food Category | Recommended Storage Position |
|---|---|
| Vegetables | Top shelf |
| Meats | Bottom shelf |
| Frozen Meals | Middle shelf |
| Ice Cream | Door compartment |
By following these steps, you can keep your freezer organized and your food stored efficiently. For more tips, visit Fridge.com article on cleaning an upright freezer.
Keeping It Clean
Regular maintenance keeps your built-in freezer running smoothly and your food fresh.
Regular Cleaning Schedule
Stick to a regular cleaning schedule to avoid bigger tasks:
| Task | Frequency |
|---|---|
| Wipe Down Exterior | Weekly |
| Clean Interior Shelves and Drawers | Monthly |
| Defrost Freezer | Every 6 Months |
| Deodorize Interior | Monthly |
| Inspect and Clean Seals | Monthly |
Preventive Maintenance Tips
Preventive maintenance extends the life of your freezer:
- Check Door Seals: Ensure they are tight and free from cracks.
- Avoid Overloading: Adequate airflow is necessary for proper cooling.
- Store Food Properly: Use airtight containers and label items.
- Inspect for Frost Buildup: Regularly check and defrost if necessary.
- Clean Condenser Coils: Dust and debris can collect on the coils, causing the freezer to work harder.
By sticking to a regular cleaning schedule and following these tips, you can keep your built-in freezer in top shape for years to come.
Get Your Upgrade or New Addition at Fridge.com
Whether you're searching for your perfect fridge, freezer, wine fridge, beer fridge, ice maker, or kegerator, Fridge.com has what you need.
Shop the world's best brands at Fridge.com.
It also has tons of awesome articles about kitchen stuff and home news. Enhance your home, garage, backyard, patio, and office with the coolest essentials. With every necessary type of residential refrigerator or freezer in the collection, you're covered.
Elevate your game and shop now at Fridge.com!