Getting Ready to Move Your Ice Maker
Moving an ice maker can be a bit of a hassle, but with the right prep, it can be a breeze. Let's walk through how to check out your ice maker and gather what you need to make the move easy-peasy.
Checking Out Your Ice Maker
First things first, you need to give your ice maker a once-over. This will help you spot any issues and get ready for the move.
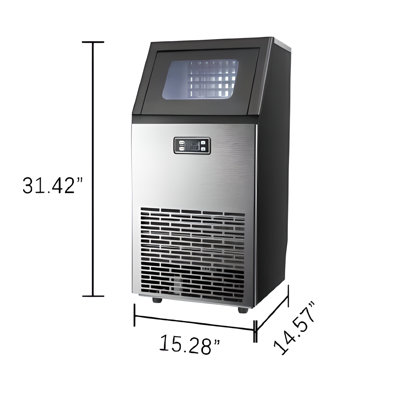
- Size and Weight: Measure your ice maker and find out how heavy it is. This will tell you if you need an extra pair of hands or special gear.
- Look for Damage: Check for any cracks, dents, or other damage that could make moving tricky.
- Read the Manual: Dig out the user manual. It might have some tips or warnings about moving your specific model.
- Find Connection Points: See where the ice maker hooks up to the water and power. You'll need to disconnect these before moving.
Gathering Your Gear
Having the right tools and supplies will make moving your ice maker a lot easier. Here's what you'll need:
- Wrench: To disconnect water lines.
- Screwdriver: For taking out screws and securing parts.
- Pliers: Handy for gripping and adjusting small parts.
- Moving Blankets: To keep your ice maker safe during the move.
- Packing Tape: For securing loose parts and wrapping the ice maker.
- Dolly or Hand Truck: To move the ice maker without breaking your back.
- Rubber Gloves: For a better grip and to protect your hands.
| Tool/Material | What It's For |
|---|---|
| Wrench | Disconnecting water lines |
| Screwdriver | Removing screws, securing parts |
| Pliers | Gripping and adjusting components |
| Moving Blankets | Protecting the ice maker during transport |
| Packing Tape | Securing loose parts and wrapping |
| Dolly or Hand Truck | Safe movement of the ice maker |
| Rubber Gloves | Better grip and hand protection |
By checking out your ice maker and gathering the right tools, you'll be all set for a smooth move. Need more tips on moving other types of fridges? Check out our guides on how to move a 2-door refrigerator and how to move a compact refrigerator.
Disconnecting the Ice Maker
Turning Off the Water Supply
First things first, let's cut off the water supply to your ice maker. Find the water supply valve, usually hiding behind the fridge or under the sink. Give it a good twist clockwise to stop the water flow. This will save you from any unwanted puddles or spills during the move.
| Step | Action |
|---|---|
| 1 | Find the water supply valve. |
| 2 | Twist the valve clockwise to shut off the water. |
| 3 | Double-check by trying to dispense water from the ice maker. |
Unplugging the Ice Maker
Next up, unplug the ice maker. This is super important for safety and to avoid any electrical mishaps. Look for the power cord at the back of the fridge and gently pull it out from the outlet.
| Step | Action |
|---|---|
| 1 | Find the power cord at the back of the fridge. |
| 2 | Gently pull the power cord out from the outlet. |
| 3 | Secure the power cord so it doesn't dangle or get damaged during the move. |
And there you have it! You've successfully disconnected your ice maker. Want more tips? Check out our guides on how to move a built-in ice maker and how to move a top freezer refrigerator.
Taking Out the Ice Maker
Moving an ice maker can be a bit tricky, but if you do it right, you won't break anything, and it'll be a breeze to set up again.
Unhooking the Ice Maker from the Fridge
Here's how to unhook your ice maker:
- Turn Off the Ice Maker: Make sure it's off so it stops making ice.
- Cut the Power: Unplug the fridge or flip the circuit breaker to avoid any shocks.
- Remove the Ice Bin: Take out the ice bin so you can get to the ice maker easily and avoid any spills.
- Find the Screws: Look for screws or clips holding the ice maker. They're usually on the sides or top.
- Unscrew Carefully: Use a screwdriver to take out the screws. Hold the ice maker steady so it doesn't fall.
- Unplug the Wires: Gently unplug the wiring harness connecting the ice maker to the fridge. Be careful not to break the connectors.
Follow these steps, and you'll have your ice maker out in no time. For more tips on moving different types of fridges, check out our guides on moving a 2-door fridge and moving a French door fridge.
Keeping Loose Parts Safe
Once you've got the ice maker out, you need to make sure all the bits and pieces are secure for the move.
- Bag and Label Small Parts: Put screws, clips, and small parts in a labeled bag. This way, you won't lose them.
- Secure the Wires: Use zip ties or tape to bundle the wiring harness so it doesn't dangle and get damaged.
- Wrap the Ice Maker: Use bubble wrap or a soft cloth to protect the ice maker from bumps and scratches.
- Stabilize Moving Parts: If there are any moving parts like the ice tray or water valve, secure them with tape or padding.
| Step | Action |
|---|---|
| 1 | Bag and label small parts |
| 2 | Secure the wires |
| 3 | Wrap the ice maker |
| 4 | Stabilize moving parts |
By securing everything, you'll keep the ice maker safe and ready to go in its new spot. For more tips on moving other kitchen gadgets, check out our guide on moving a built-in ice maker.
Taking out and securing your ice maker is key to a smooth move. It keeps your appliance safe and ready for action in its new home, cutting down on the risk of damage and making sure it works perfectly when you set it up again.
Moving Your Ice Maker Without a Hitch
Got an ice maker that needs a new home? Let's make sure it gets there in one piece. Follow these steps to move your ice maker safely and easily.
Lifting and Moving the Ice Maker
Moving an ice maker isn't rocket science, but it does need some care. Here's how to do it right:
- Check the Weight: Know how heavy your ice maker is so you can plan accordingly.
- Lift Smart: Bend those knees, keep your back straight, and lift with your legs. No one wants a back injury.
- Ask for Help: If it's too heavy, don't be a hero. Get someone to help you out.
- Use a Dolly or Cart: Make life easier by using a dolly or cart to move the ice maker.
| Ice Maker Weight | How to Lift |
|---|---|
| Less than 50 lbs | One person can handle it |
| 50 - 100 lbs | Two people should lift it |
| Over 100 lbs | Use a dolly or cart |
Keeping the Ice Maker Safe During the Move
You don't want your ice maker to get banged up on the way. Here's how to keep it safe:
- Wrap It Up: Use moving blankets or bubble wrap to cover the ice maker. Secure it with tape or straps.
- Secure Loose Parts: Take off any loose parts and pack them separately.
- Position It Right: Place the ice maker upright in your vehicle. Make sure it won't tip over.
- Watch the Temperature: Keep it away from extreme heat or cold to protect the internal parts.
Follow these steps, and your ice maker will arrive at its new spot without a scratch. Need more moving tips? Check out our guides on moving a 2-door refrigerator and moving a beverage cooler.
Setting Up Your Ice Maker in a New Spot
Picking the Perfect Place
Moving your ice maker? Let's make sure it lands in the right spot. Here’s what you need to keep in mind:
- Close to Water: Make sure it's near a water source for easy hookup.
- Power Outlet: You’ll need a nearby plug to power it up.
- Breathing Room: Give it some space to breathe—good ventilation keeps it from overheating.
- Flat Ground: A stable, level surface keeps it running smoothly without annoying shakes.
| What to Look For | Why It Matters |
|---|---|
| Close to Water | Easy water connection |
| Power Outlet Nearby | Quick and easy power access |
| Good Ventilation | Prevents overheating |
| Flat Surface | Smooth operation, no vibrations |
Hooking Up Your Ice Maker
Found the perfect spot? Awesome. Here’s how to get it up and running:
- Place the Ice Maker: Set it down in your chosen spot, making sure it’s level and steady.
-
Connect the Water Supply:
- Hook the water line to the ice maker's inlet valve.
- Tighten it up to avoid any leaks.
- Plug It In: Connect the power cord to a nearby outlet.
- Turn On the Water: Open the water valve to let the water flow into the ice maker.
- Check for Leaks: Look over all connections to ensure there are no leaks.
- Power Up: Turn on the ice maker and let it start making ice.
Need more tips on moving different types of fridges? Check out our guides on moving a 2-door fridge and moving a French door fridge.
Testing Your Ice Maker
So, you’ve moved and reinstalled your ice maker. Now, let's make sure it’s ready to churn out those frosty cubes. Here’s how to check if everything's running smoothly and what to do if it’s not.
Making Sure It Works
Follow these steps to see if your ice maker is up and running:
- Hook Up the Water: Double-check that the water supply is connected and turned on.
- Power It Up: Plug in the ice maker and switch it on.
- Watch It Work: Let it run through a few cycles to see if it’s making ice like it should.
| Step | Action |
|---|---|
| 1 | Hook up the water |
| 2 | Plug in and power up |
| 3 | Watch it work |
If it’s making ice without a hitch, you’re good to go. If not, let’s troubleshoot.
Fixing Common Problems
Sometimes, things don’t go as planned. Here are some typical issues and how to fix them:
- No Ice:
- Make sure the water supply is on.
- Check for kinks in the water line.
- Confirm the ice maker is turned on.
- Slow Ice:
- Ensure the freezer is set to 0°F (-18°C).
- See if the water filter needs changing.
- Bad Ice Quality:
- Check and replace the water filter if needed.
- Clean the ice bin.
- Water Leaks:
- Inspect all connections for leaks.
- Make sure the ice maker is level.
| Problem | Cause | Fix |
|---|---|---|
| No Ice | Water supply off | Turn on water supply |
| No Ice | Kinked water line | Straighten water line |
| No Ice | Ice maker off | Turn on ice maker |
| Slow Ice | Freezer too warm | Set to 0°F (-18°C) |
| Slow Ice | Dirty filter | Replace water filter |
| Bad Ice Quality | Dirty filter | Replace water filter |
| Bad Ice Quality | Dirty bin | Clean ice bin |
| Water Leaks | Loose connections | Tighten connections |
| Water Leaks | Uneven ice maker | Level the ice maker |
By tackling these issues, you’ll have your ice maker working like a charm in no time. Need more tips on moving appliances? Check out our guides on moving a 2-door fridge and moving a compact fridge.
Keeping Your Ice Maker in Tip-Top Shape
Want your ice maker to last longer and work like a charm? A little TLC goes a long way. Regular cleaning and smart habits can keep it running smoothly and save you from headaches down the road.
Clean It Like You Mean It
Cleaning your ice maker isn't just about looks—it's about keeping it efficient and hygienic. Aim to give it a good scrub at least twice a year, or more if it's working overtime.
- Pull the Plug: Safety first! Unplug the ice maker before you start cleaning to avoid any nasty shocks.
- Empty It Out: Dump out the ice and drain any leftover water.
- Scrub the Inside: Grab some mild detergent and warm water. Give the interior a good wipe-down, but steer clear of harsh cleaners that could mess things up.
- Rinse and Dry: Rinse everything thoroughly with clean water and dry it off with a soft cloth.
- Descale It: Mineral buildup is the enemy. Use a descaling solution and follow the instructions to keep things running smoothly.
- Wipe the Outside: Don’t forget the exterior. A damp cloth should do the trick to keep it looking spiffy.
Tips to Keep It Running Smoothly
Want your ice maker to be the MVP of your kitchen for years? Follow these simple tips:
- Use Filtered Water: Filtered water means less gunk and better-tasting ice.
- Let It Breathe: Make sure there's enough airflow around the ice maker to prevent it from overheating.
- Check for Leaks: Keep an eye on the water supply lines and connections. A small leak can turn into a big problem.
- Don't Overload It: Overloading the ice bin can strain the motor. Give it some space to do its thing.
- Routine Check-Ups: Regularly inspect for any signs of wear and tear. Catching issues early can save you a lot of trouble.
By sticking to these tips, your ice maker will stay in great shape and keep churning out ice like a champ. Want more advice on moving and maintaining your kitchen appliances? Check out these handy guides:
- How to Move a Built-In Ice Maker
- How to Move a Mini Fridge
- How to Move a Deep Freezer
- How to Move a Side-by-Side Refrigerator
Keep your ice maker happy, and it'll keep you cool!
Get Your Upgrade or New Addition at Fridge.com
Whether you're searching for your perfect fridge, freezer, wine fridge, beer fridge, ice maker, or kegerator, we have what you need.
Shop the world's best brands at Fridge.com.
We also have tons of awesome articles about kitchen stuff and home news. Enhance your home, garage, backyard, patio, and office with the coolest essentials. With every necessary type of residential refrigerator or freezer in our collection, we've got you covered.
Elevate your game and shop now at Fridge.com!