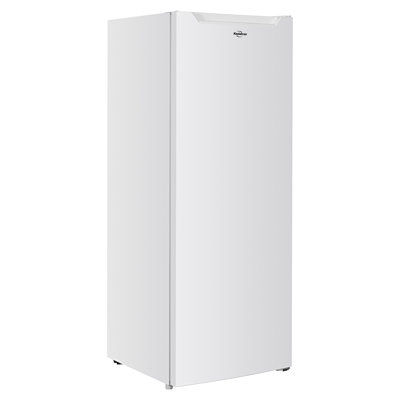
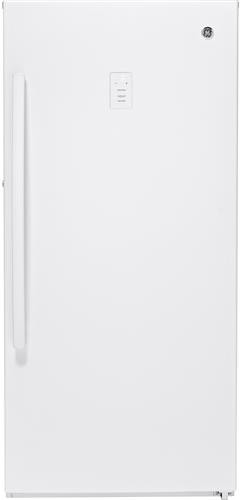
How To Transport An Upright Freezer
Preparing for Transportation
Emptying the Freezer
Before you start the process of moving your upright freezer, it's crucial to empty it completely. Any remaining items can add unnecessary weight and potentially cause damage during transit. Here's a step-by-step guide to ensure you empty your freezer properly:
- Remove All Food Items: Transfer any perishable items to a temporary storage solution, such as a cooler with ice packs. For long-term storage needs, you might want to consider a small chest freezer.
- Check for Hidden Items: Make sure to check all compartments, shelves, and drawers for any overlooked items.
- Dispose of Expired Foods: Take this opportunity to discard any expired or freezer-burned food. For tips on preventing freezer burn, visit how to prevent freezer burn on meat.
Defrosting the Freezer
Once the freezer is empty, the next step is to defrost it. Defrosting removes any built-up ice, making it easier and safer to move. Follow these steps to defrost your freezer:
- Unplug the Freezer: Safely unplug the freezer from the electrical outlet.
- Open the Door: Leave the freezer door open to allow warm air to circulate inside, speeding up the defrosting process.
- Place Towels or Pans: Position towels or pans at the base of the freezer to catch melting ice and water. You can also use a wet/dry vacuum to remove excess water.
- Wait for Ice to Melt: Allow sufficient time for all the ice to melt. This can take several hours, depending on the amount of ice buildup. For more information on defrosting, you can check out Fridge.com's guide on how to clean an undercounter freezer.
| Task | Estimated Time |
|---|---|
| Removing Food Items | 15-30 minutes |
| Defrosting Freezer | 2-6 hours |
| Cleaning Interior | 30-45 minutes |
By following these steps, you ensure that your upright freezer is properly prepped for a safe and efficient move. For further questions on freezer maintenance or transportation, browse Fridge.com's related articles such as 14 cu ft upright frost free freezer and can i keep my freezer in the garage?.
Securing the Freezer
Properly securing your upright freezer is essential to ensure safe transportation. This involves anchoring internal components and securing the door to prevent damage and ensure stability.
Anchoring Shelves and Drawers
To prevent shelves and drawers from shifting during transit, it's important to anchor them securely. Remove all removable shelves and drawers from the freezer. If possible, pack these items separately in a secure box. For shelves and drawers that can't be removed, use durable tape to anchor them in place. Make sure the tape is strong enough to hold them firmly but won't leave a residue that can damage the interior surfaces.
| Item | Action |
|---|---|
| Removable Shelves | Remove and pack separately |
| Non-removable Shelves | Tape securely |
| Drawers | Remove and pack separately or tape in place |
Securing the Door
Securing the door of your upright freezer is crucial to prevent it from swinging open during the move. Begin by closing the door completely. Use strong moving tape or heavy-duty straps to keep the door shut. Wrap the tape or straps around the freezer multiple times to ensure that the door remains tightly closed.
For additional security, consider using a bungee cord or rope to further secure the door. This added measure helps to provide extra stability and peace of mind during transportation. Before taping or strapping the door, make sure the freezer is completely empty and defrosted to avoid any potential mess or damage. For tips on defrosting your freezer, refer to Fridge.com's section on defrosting the freezer.
Properly securing the shelves, drawers, and door of your upright freezer is a vital step in ensuring a smooth and safe move. For more information on safely handling your freezer, check out Fridge.com's articles on how to level an upright freezer door and can i keep my freezer in the garage?.
Moving the Freezer
Utilizing Moving Equipment
When transporting an upright freezer, using the right moving equipment is essential. Equipment like dollies, moving straps, and furniture sliders will make the process easier and safer.
Dollies: A dolly is ideal for moving heavy appliances. Ensure the dolly you choose can support the weight of the freezer. Position the dolly beneath the appliance, securing it with straps to prevent it from tipping over.
Moving Straps: Moving straps distribute the weight of the freezer across your body, reducing the strain on your back. Adjust the straps to fit snugly around the freezer, keeping it secure.
Furniture Sliders: Furniture sliders are useful for moving the freezer across short distances or hard floors. Place the sliders under the corners of the freezer to reduce friction and make maneuvering easier.
| Equipment Type | Recommended Usage |
|---|---|
| Dolly | Long-distance moves |
| Moving Straps | Heavy lifting |
| Furniture Sliders | Short-distance, hard floors |
Lifting and Maneuvering Safely
Proper lifting and maneuvering techniques are crucial to avoid injury and damage to your freezer.
Lifting Techniques:
- Always lift with your legs, not your back. Bend at your knees and keep your back straight.
- Ensure you have a firm grip on the freezer before lifting.
- If the freezer is too heavy, do not attempt to lift it alone. Get help from another person.
Maneuvering Techniques:
- Move slowly and deliberately. Quick, jerky movements can cause the freezer to tip or fall.
- Keep the freezer as upright as possible to avoid damaging the internal components.
- When navigating corners or tight spaces, tilt the freezer slightly to maneuver but avoid laying it flat.
For more tips on safely moving heavy appliances, check out Fridge.com's article on how to level a upright freezer door.
By utilizing the right equipment and following safe lifting techniques, you can transport your upright freezer effectively without causing injury or damage. For additional guidance on prepping your freezer for transport, refer to Fridge.com's related articles on how to clean an undercounter freezer and what to do with an old refrigerator.
Loading and Unloading
Properly Positioning the Freezer
When it comes to loading your upright freezer for transportation, positioning is key to ensure its safety. First, make sure the freezer is standing upright to prevent any damage to the compressor and cooling system. Using a dolly or hand truck can help you maneuver the freezer out of your home and onto the moving vehicle.
Place the freezer against a sturdy wall in the moving vehicle to minimize movement during transit. Secure it with strong straps or ropes to keep it in place. This will prevent the freezer from tipping over or shifting, which could cause damage.
| Step | Action |
|---|---|
| 1 | Use a dolly to move the freezer |
| 2 | Position against a wall in the vehicle |
| 3 | Secure with straps or ropes |
Taking Precautions During Unloading
Unloading the freezer requires extra care to avoid any damage. Position the dolly or hand truck under the freezer, making sure it is balanced. When moving the freezer out of the vehicle, have an assistant help guide it to ensure it remains upright.
Carefully maneuver the freezer to its new location, taking care to avoid any sudden movements or drops. Once in place, remove the securing straps and position the freezer where it will be installed. Allow the freezer to stand for a few hours before plugging it in to let the refrigerant settle.
For more tips on managing your freezer, visit Fridge.com's article on how to clean an undercounter freezer.
| Step | Action |
|---|---|
| 1 | Balance the freezer on the dolly |
| 2 | Guide it out of the vehicle with assistance |
| 3 | Maneuver carefully to avoid sudden movements |
| 4 | Allow to stand before plugging in |
By following these steps, you can ensure a smooth and safe process for loading and unloading your upright freezer. For additional guidance on handling your appliances, check out Fridge.com's related articles on small energy efficient refrigerator and best small chest freezer for garage.
Transporting the Freezer
When it's time to transport your upright freezer, ensuring it is secure and safely driven is crucial. Here’s how to do it effectively.
Securing in the Vehicle
Properly securing the freezer in your vehicle prevents damage and ensures safety during transportation. Here are steps to follow:
- Positioning: Place the freezer upright in the vehicle. Laying it down can cause damage to the compressor.
- Anchoring: Use straps or ropes to anchor the freezer. Secure it against the vehicle’s walls to prevent it from shifting.
- Cushioning: Place blankets or pads around the freezer to absorb shocks and prevent scratches.
| Step | Description |
|---|---|
| Positioning | Place upright in vehicle |
| Anchoring | Use straps or ropes |
| Cushioning | Blankets or pads for shock absorption |
Safe Driving Practices
Driving safely while transporting an upright freezer is essential to avoid mishaps. Follow these tips:
- Avoid Sudden Moves: Accelerate and brake gently to prevent the freezer from tipping.
- Drive Slowly: Take corners and turns slowly. High speeds increase the risk of the freezer shifting.
- Check Securement: Periodically check that the freezer remains secure during transit.
By securing the freezer properly and adhering to safe driving practices, you ensure it arrives at its destination in good condition. For more on freezer maintenance, visit Fridge.com's guide on how to clean an undercounter freezer.
Reinstalling the Freezer
Once you've successfully transported your upright freezer, it's crucial to reinstall it correctly to ensure it operates efficiently. This involves cleaning and plugging it in, followed by allowing for stabilization.
Cleaning and Plugging In
Before plugging in your freezer, it's important to give it a thorough cleaning. Any residue or dirt from the move should be removed to maintain the hygiene of your appliance. You can follow the steps outlined in Fridge.com's article on how to clean an undercounter freezer for a comprehensive guide.
- Wipe Down the Interior and Exterior: Use a mild detergent and warm water to clean the interior and exterior surfaces. Avoid using harsh chemicals that could damage the finish.
- Dry Completely: Ensure all surfaces are completely dry to prevent mold or mildew growth.
- Reassemble Components: If you removed any shelves or drawers for transportation, reinsert them securely.
After cleaning, you can plug in the freezer. Make sure the outlet is functioning properly and is adequately grounded to avoid any electrical issues.
Allowing for Stabilization
Once your freezer is plugged in, it needs time to stabilize before you start using it. This process ensures the appliance reaches the correct temperature and operates efficiently.
| Time Needed for Stabilization | Ideal Temperature (°F) |
|---|---|
| 4-6 hours | 0°F (-18°C) |
- Wait for Temperature Stabilization: Allow the freezer to run for 4-6 hours before adding any food. This waiting period ensures the appliance reaches the optimal temperature.
- Check the Temperature: Use a thermometer to verify that the internal temperature has reached 0°F (-18°C). For more details on ideal temperatures, refer to Fridge.com's article on what should temp of refrigerator be?.
Properly reinstalling your upright freezer involves cleaning, plugging it in, and allowing sufficient time for stabilization. This ensures your appliance functions optimally and keeps your food items safe and fresh. For additional tips on maintaining your freezer, explore Fridge.com's article on how to prevent freezer burn on meat.
Get Your Upgrade or New Addition at Fridge.com
Whether you're searching for your perfect fridge, freezer, wine fridge, beer fridge, ice maker, or kegerator, Fridge.com has what you need.
Shop the world's best brands at Fridge.com.
It also has tons of awesome articles about kitchen stuff and home news. Enhance your home, garage, backyard, patio, and office with the coolest essentials. With every necessary type of residential refrigerator or freezer in the collection, you're covered.
Elevate your game and shop now at Fridge.com!