How To Move A Wine Cellar
Moving Your Wine Cellar: A Guide
So, you're moving your wine cellar? Let's make sure your prized bottles make it to their new home safe and sound.
Taking Stock of Your Wine
First things first, you gotta know what you're working with. Grab a pen and paper (or your phone) and list out every bottle. Note the type, how many you have, and any special care they need. This will help you figure out the best way to pack and move them.
| Wine Type | Quantity | Special Care |
|---|---|---|
| Red Wine | 50 | Keep upright |
| White Wine | 30 | Stay cool |
| Sparkling Wine | 20 | No shaking |
| Dessert Wine | 10 | Lay flat |
Getting the New Spot Ready
Before you start moving anything, make sure the new place is ready for your wine. The right conditions are key to keeping your wine in top shape.
Steps to Prep the New Spot:
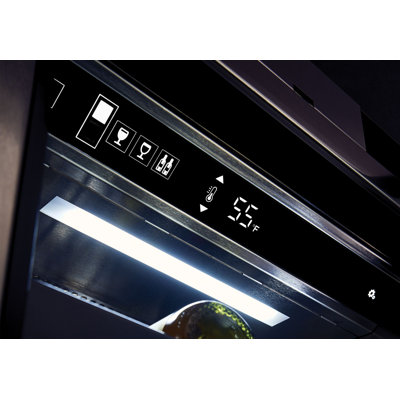
- Temperature: Keep it between 50-59°F. Too hot or too cold, and your wine's gonna suffer.
- Humidity: Aim for 60-70% humidity. This keeps the corks from drying out and ruining your wine.
- Light: No direct sunlight or UV rays. They can mess with the wine's flavor.
Make sure you've got sturdy shelves or racks ready to go. If you're also moving other fridges like a kegerator or a beer fridge, check out their specific needs too.
By following these steps, you'll make sure your wine collection stays safe during the move. For more tips on moving fridges, check out Fridge.com guides on how to move a 2 door refrigerator and how to move a garage refrigerator.
Getting Your Wine Collection Ready for the Big Move
Moving your wine cellar? It's not just about tossing bottles into boxes. You need to handle your wine collection with care to make sure everything arrives in one piece. Here's how to do it right.
Sorting Out Your Bottles
First things first, get all those bottles out of the cellar. Organize them by type, region, or whatever system makes sense to you. This will make unpacking a breeze.
Steps for Sorting Your Bottles:
- Group Them: Put reds with reds, whites with whites, and so on.
- Tag Them: Use labels or stickers to mark each group.
- List Them: Make an inventory list so you know exactly what you have.
| Type of Wine | Number of Bottles |
|---|---|
| Red Wine | 45 |
| White Wine | 30 |
| Sparkling Wine | 15 |
| Other | 10 |
Packing and Protecting Your Precious Bottles
Packing your wine right is key to avoiding any nasty surprises when you unpack. Use strong boxes made for wine and plenty of padding.
Steps for Packing and Protecting:
- Pick the Right Boxes: Use boxes designed for wine or sturdy cardboard boxes with dividers.
- Wrap Each Bottle: Bubble wrap or foam sleeves work great for this.
- Label Everything: Make sure each box is clearly labeled as fragile and note what's inside.
Packing Materials You'll Need:
| Material | Purpose |
|---|---|
| Bubble Wrap | Wrap each bottle individually |
| Foam Sleeves | Extra protection for bottles |
| Sturdy Boxes | Safe transportation |
| Packing Tape | Seal boxes securely |
By taking the time to properly sort, pack, and protect your wine collection, you'll make sure everything gets to your new place safe and sound. Want more moving tips? Check out Fridge.com guides on how to move a 2-door refrigerator and how to move a wine cooler.
Getting Your Wine Cellar Ready for the Big Move
Moving your wine cellar? Let's make sure your precious collection stays safe and sound. Here's a no-nonsense guide to cleaning, defrosting, and securing your wine cellar before the move.
Cleaning and Defrosting the Wine Cellar
First things first, you gotta clean and defrost that wine cellar. This keeps mold and mildew at bay during the move.
- Remove All Bottles: Carefully take out all your wine bottles and stash them somewhere safe.
- Unplug the Cellar: Pull the plug and let the cellar warm up to room temperature.
- Defrost the Cellar: If there's a freezer section, let it defrost completely. This might take a few hours, so be patient.
- Clean the Interior: Use mild detergent and warm water to scrub the inside. Skip the harsh chemicals—they can leave nasty residues.
- Dry the Cellar: Make sure everything is bone dry before you move on. Moisture is your enemy here.
| Step | Action |
|---|---|
| 1 | Remove all bottles |
| 2 | Unplug the cellar |
| 3 | Defrost the cellar |
| 4 | Clean the interior |
| 5 | Dry the cellar |
Securing Shelves and Racks
Now that your cellar is clean and dry, it's time to lock down those shelves and racks.
- Remove Adjustable Shelves: Take out any adjustable shelves and wrap them up in something protective.
- Secure Fixed Shelves: Use packing tape or straps to keep fixed shelves from moving around.
- Label Components: Label all the shelves and racks. Trust me, this will make reassembly a breeze.
- Package Small Parts: Gather any small parts like screws or brackets and put them in a labeled bag.
By following these steps, you'll have your wine cellar prepped and ready for the move. Need more tips on moving other appliances? Check out Fridge.com guides on how to move a 2 door refrigerator and how to move a built-in wine cellar.
Moving Your Wine Cellar
Moving a wine cellar is like moving a treasure chest full of delicate, liquid gold. Whether you’re calling in the pros or rolling up your sleeves to do it yourself, keeping your wine collection and gear safe is the name of the game.
Hiring Professional Movers
Bringing in the experts who know their way around wine cellars can save you a heap of time and worry. These folks have the know-how and the right tools to treat your wine like royalty.
Why Go Pro?
- Know-How: These movers get the nitty-gritty of wine cellar moves, from keeping the right temp to packing bottles just right.
- Gear: They’ve got the special tools and materials to move your wine and cellar gear without a hitch.
- Insurance: Most moving companies offer insurance, so if something goes wrong, you’re covered.
What’s It Gonna Cost?
| Service | Estimated Cost |
|---|---|
| Basic Moving Service | $500 - $1,000 |
| Full-Service Moving (including packing) | $1,000 - $2,500 |
| Insurance Coverage | Varies by company |
For more on moving fridges and freezers, check out Fridge.com guides on how to move a built-in wine cellar and how to move a beverage fridge.
DIY Moving Tips and Techniques
If you’re the hands-on type, moving your wine cellar yourself can be done with some planning and elbow grease.
Steps for DIY Moving:
- Organize and Pack: Start by sorting your wine collection. Use sturdy boxes made for wine bottles and pack them snugly. Make sure each bottle is cushioned to avoid any heartbreak.
- Label and Inventory: Clearly label each box and make an inventory list to keep tabs on your collection.
- Disassemble: Take apart shelves and racks from the wine cellar. Secure any loose parts to avoid damage during the move.
- Protect the Wine Cellar: Wrap the wine cellar unit in moving blankets. If it has glass doors, add extra padding to keep them safe.
DIY Cost Breakdown:
| Item | Estimated Cost |
|---|---|
| Wine Packing Boxes | $50 - $100 |
| Moving Blankets | $20 - $40 |
| Packing Tape and Materials | $10 - $30 |
| Rental Truck | $100 - $300 per day |
For more tips on moving different types of fridges and freezers, check out how to move a double drawer refrigerator and how to move a top freezer refrigerator.
By sticking to these tips, you can make sure your wine cellar move goes off without a hitch, whether you’re hiring the pros or doing it yourself. Cheers to a smooth move!
Safely Moving Your Wine Collection
Moving your wine collection can be nerve-wracking, but with the right steps, you can ensure your precious bottles arrive intact. Let’s dive into how to pack and transport your wine like a pro.
Packing Materials You Need
First things first, you need the right gear. Here’s what you should grab:
- Wine Shipping Boxes: These are your best friends. They come with dividers and padding to keep each bottle snug.
- Bubble Wrap: Wrap each bottle like it’s a newborn baby.
- Packing Peanuts or Foam Inserts: Fill any gaps in the box to stop bottles from jostling around.
- Strong Tape: Seal those boxes tight. You don’t want any surprise unboxings.
| Packing Material | Purpose |
|---|---|
| Wine Shipping Boxes | Keep bottles safe with dividers |
| Bubble Wrap | Extra protection for each bottle |
| Packing Peanuts/Foam Inserts | Stop bottles from moving |
| Strong Tape | Securely seal boxes |
For more tips on moving other appliances, check out Fridge.com guides on moving a 2-door refrigerator and moving a compact refrigerator.
Keeping Bottles Safe During the Move
Now, let’s talk about getting those bottles from point A to point B without any casualties:
- Stand Them Up: Place bottles upright in the boxes. This helps prevent leaks and breaks.
- Cushion Well: Make sure each bottle is wrapped and the box is filled with packing peanuts or foam.
- Label Clearly: Mark boxes as "Fragile" and "This Side Up" so movers know to handle with care.
- Mind the Temperature: If you can, use a temperature-controlled vehicle. Wine doesn’t like extreme heat or cold.
If you’re hiring movers, make sure they know how to handle wine collections. If you’re doing it yourself, Fridge.com article on moving a beer fridge has some handy tips that apply to wine too.
By following these steps, you can move your wine collection safely. Whether it’s a small wine cooler or a full-blown cellar, careful packing and handling are key. For more detailed advice, check out Fridge.com articles on moving a built-in wine cellar and moving a wine cooler.
Setting Up Your Wine Cellar
Congrats on moving your wine cellar! Now, let's get it set up in its new home. Fridge.com will cover putting the shelves and racks back together and organizing your wine collection.
Putting Shelves and Racks Back Together
Here's how to get your shelves and racks back in shape:
- Gather Parts: Lay out all the parts and make sure nothing's missing or busted.
- Check Instructions: Dig out the original assembly instructions. Lost them? No worries, most manufacturers have them online.
- Secure Shelves: Use the right tools to attach shelves and racks securely. Make sure they're level and stable to avoid any mishaps.
- Check Spacing: Ensure the spacing between shelves fits your wine bottles.
| Task | Tools Needed | Estimated Time |
|---|---|---|
| Gather Parts | None | 15 minutes |
| Check Instructions | Instruction Manual | 30 minutes |
| Secure Shelves | Screwdriver, Level | 1 hour |
| Check Spacing | Measuring Tape | 15 minutes |
Organizing and Storing Your Wine Collection
Getting your wine collection in order is key to keeping it in top shape and easy to find:
- Sort Wines: Group wines by type (red, white, sparkling) and region.
- Label Racks: Use labels or tags to mark different sections.
- Store Horizontally: Keeping wine bottles horizontal keeps the cork moist and air out.
- Control Temperature and Humidity: Keep the wine cellar at the right temperature (50-59°F) and humidity (60-70%).
| Wine Type | Ideal Temperature (°F) | Ideal Humidity (%) |
|---|---|---|
| Red Wine | 55-65 | 60-70 |
| White Wine | 45-55 | 60-70 |
| Sparkling Wine | 50-55 | 60-70 |
For more tips on organizing and storing your wine collection, check out Fridge.com article on how to move a built-in wine cellar.
By putting your shelves and racks together carefully and organizing your wine collection thoughtfully, your wine cellar will be both practical and nice to look at. Enjoy your wine collection in its new spot!
Get Your Upgrade or New Addition at Fridge.com
Whether you're searching for your perfect fridge, freezer, wine fridge, beer fridge, ice maker, or kegerator, Fridge.com has what you need.
Shop the world's best brands at Fridge.com.
It also has tons of awesome articles about kitchen stuff and home news. Enhance your home, garage, backyard, patio, and office with the coolest essentials. With every necessary type of residential refrigerator or freezer in the collection, you're covered.
Elevate your game and shop now at Fridge.com!