How To Clean A Freezer
Preparing to Clean Your Freezer
Before embarking on the task of cleaning your freezer, it's crucial to prepare adequately. This involves gathering all the necessary supplies and understanding safety precautions to ensure a smooth and safe cleaning process.
Gather Necessary Supplies
Start by assembling all the items you will need for cleaning your freezer. Here's a basic checklist to ensure you have everything on hand:
- Non-abrasive sponge or cloth
- Mild detergent or a mixture of baking soda and water
- Bucket or basin
- Towels or rags for drying and laying out frozen items
- Cooler or insulated bag to store frozen goods temporarily
- Ice scraper or plastic spatula for removing ice build-up
- Disposable gloves
Having these supplies ready will streamline the cleaning process and prevent any unnecessary interruptions.
Safety Precautions
Safety should always be a top priority when cleaning electrical appliances. Follow these safety tips to avoid any hazards:
- Unplug the Freezer: Always unplug your freezer before cleaning to prevent any risk of electric shock.
- Avoid Water Near Electrical Components: Be cautious not to allow water or cleaning solutions to come into contact with any electrical components.
- Wear Gloves: Protect your hands from cold temperatures and any sharp ice with a pair of gloves.
- Use Proper Tools for Ice Removal: Avoid using sharp metal objects to remove ice, which can damage the freezer's interior. Instead, use a plastic spatula or ice scraper.
- Avoid Slips and Falls: Melting ice can create slippery surfaces. Lay down towels to absorb excess water and prevent any accidents.
By adhering to these safety precautions, you can clean your freezer without putting yourself at risk. Once you have your supplies and understand the safety measures, you're ready to move on to emptying and defrosting the freezer, which is the next crucial step in the cleaning process.
Emptying and Defrosting the Freezer
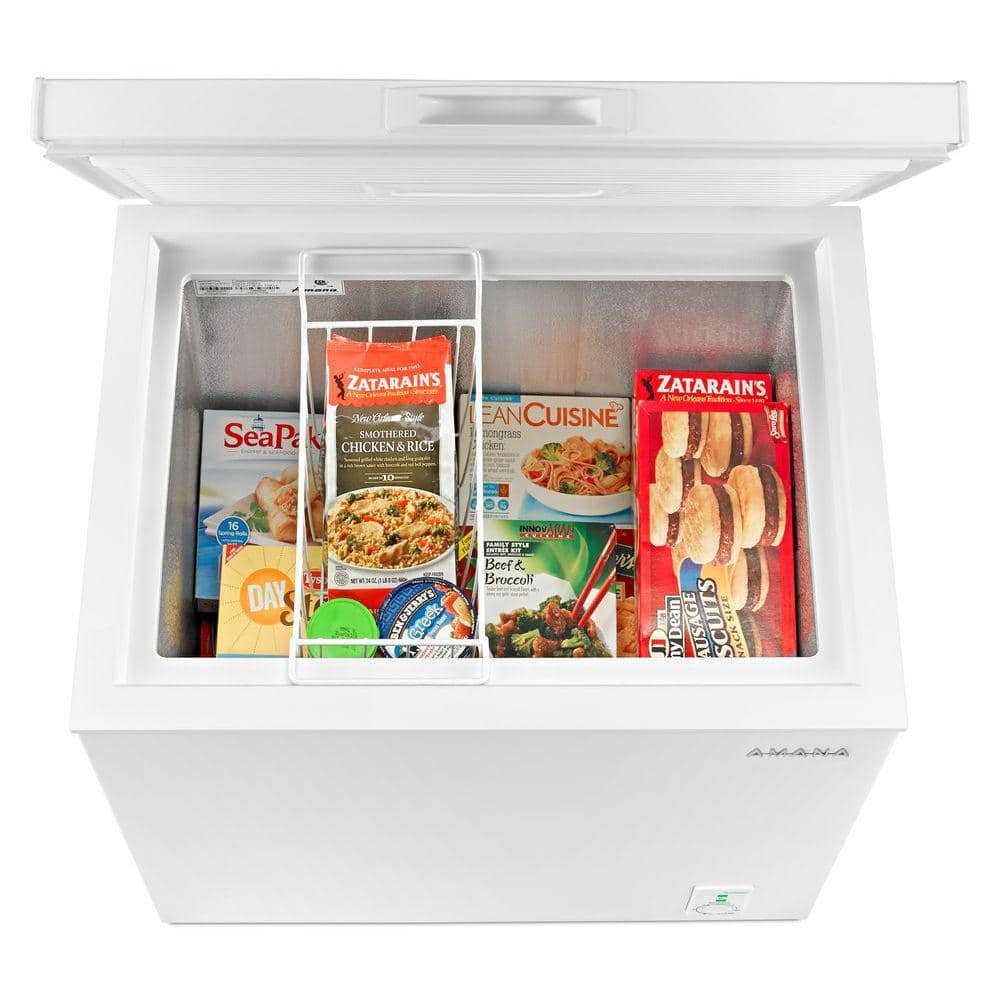
Removing Food and Ice Build-Up
Before you begin the process of defrosting your freezer, you'll need to remove all food items. This is an excellent opportunity to discard expired or freezer-burned food and take inventory of what you have. As you remove items, organize them into categories. This will not only help you keep track of your food but also make it easier to restock your freezer efficiently.
You may encounter significant ice build-up that needs to be removed. Avoid using sharp objects to chip away at the ice as this may damage the freezer. Instead, gently remove as much ice as possible by hand. If you have questions on how to freeze specific items properly, you can reference articles like how to freeze zucchini or how to freeze corn on the cob.
Defrosting the Freezer
Once the freezer is empty and ice build-up is removed, you can begin defrosting. Start by unplugging the freezer to avoid any electrical hazards. Leave the door open to allow the ice to melt naturally. Place towels around the base of the freezer to soak up any water that results from the melting ice. For faster defrosting, you can place a pot of hot water inside the freezer to accelerate the melting process.
Here is a simple table indicating the time it may take for the ice to melt at room temperature:
| Room Temperature | Estimated Defrosting Time |
|---|---|
| Cold (below 68°F) | 6-8 hours |
| Moderate (68°F to 72°F) | 4-6 hours |
| Warm (above 72°F) | 2-4 hours |
For those who need to defrost their freezer quickly, refer to Fridge.com article on how to defrost a freezer quickly. It is crucial to ensure that the freezer is completely defrosted and all ice has melted before moving on to cleaning the interior. Patience during this stage will result in a more thorough and efficient cleaning process.
Remember, defrosting your freezer is not only about cleanliness but also about efficiency. A build-up of ice can impact how well your freezer operates, even affecting how many watts a refrigerator uses. Defrosting is an essential part of freezer maintenance that can lead to energy savings and prolonged appliance life.
Cleaning the Interior
Once your freezer is emptied and defrosted, it's time to tackle the interior. To ensure a safe and effective cleaning process, follow these steps to wipe down surfaces and remove any lingering odors.
Wiping Down Surfaces
Begin by preparing a cleaning solution of warm water and mild dish soap or a mixture of equal parts water and white vinegar for a natural alternative. Dip a soft cloth or sponge into the solution and wring out excess liquid to avoid over-wetting the freezer surfaces.
Proceed to wipe down all interior surfaces, including walls, the floor of the freezer, and any removable shelves or drawers. Be thorough and reach into corners, crevices, and any nooks where debris or spills might have accumulated.
After scrubbing with the cleaning solution, it's essential to rinse the surfaces with a clean, damp cloth to remove any soap residue. Finish by drying all surfaces with a dry towel or microfiber cloth.
| Step | Tool | Solution | Action |
|---|---|---|---|
| 1 | Soft cloth/sponge | Warm water with mild dish soap or water/vinegar mix | Wipe down surfaces |
| 2 | Clean, damp cloth | Plain water | Rinse off cleaning solution |
| 3 | Dry towel/microfiber cloth | - | Dry surfaces |
Removing Lingering Odors
To tackle any persistent smells, sprinkle baking soda across the bottom of the freezer and let it sit for several hours, ideally overnight. Baking soda is a natural deodorizer and will absorb unwanted odors.
After the baking soda has done its work, use the soft cloth or sponge to wipe up the powder. If the smell persists, consider leaving an open container of baking soda inside the freezer during regular use to continuously combat odors.
For more stubborn odors, a mixture of baking soda and water can be used to create a paste. Apply this paste to the affected areas, allow it to sit for 10-15 minutes, and then wipe clean.
Additionally, periodically placing freshly ground coffee beans in a bowl inside the freezer can help absorb odors over time. The freezer environment can also benefit from the occasional wipe-down with vanilla extract or a piece of cotton soaked in lemon juice for a fresh scent.
Remember, maintaining your freezer's cleanliness can significantly reduce the frequency and intensity of unpleasant odors. For related tips on how to keep food fresh and odor-free, explore Fridge.com articles on how to freeze squash and how to store strawberries in the fridge.
By following these steps, you can ensure your freezer's interior is clean, hygienic, and odor-free. Regular cleaning not only helps maintain the quality of stored food but also extends the life of your appliance.
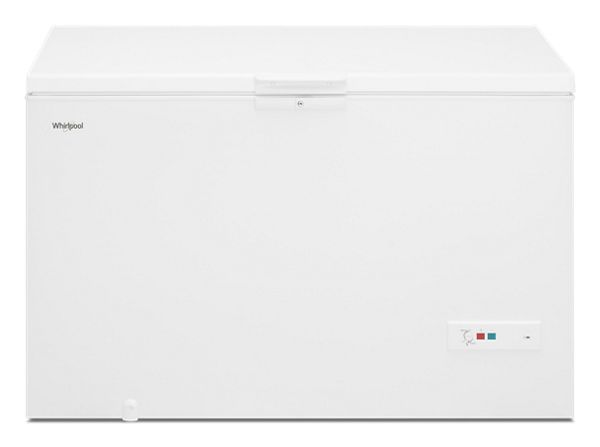
Cleaning the Freezer Exterior
While the interior of your freezer gets the most attention during cleaning, the exterior is just as important. A clean exterior not only maintains the appearance of your freezer but also contributes to its efficiency and longevity.
Wiping Down the Exterior
Begin by mixing a mild detergent with warm water to create a cleaning solution. Using a soft cloth, gently wipe down the entire exterior of the freezer. Pay special attention to areas that accumulate grime, such as the door handle and the top of the freezer, where dust tends to settle.
For stainless steel exteriors, use a cleaner specifically designed for stainless steel to avoid streaks or damage to the finish. Wipe in the direction of the grain to achieve a polished look. For textured surfaces, a soft-bristled brush can help to remove dirt from crevices.
Paying Attention to Seals and Handles
The seals around the freezer door are crucial for maintaining the appliance's efficiency. Carefully inspect the seals for any food particles or debris that could compromise their effectiveness. Clean the seals with the same mild detergent solution, but be sure to dry them thoroughly to prevent any moisture build-up, which can lead to mold.
Handles are high-touch areas and should be disinfected to prevent the spread of bacteria. A simple disinfectant or a solution of equal parts water and vinegar can be effective for sanitizing the handles. Again, ensure that they are dried properly to prevent any water spots or corrosion, especially if they are metal.
Keeping the exterior of your freezer clean is an integral part of freezer maintenance. It not only helps in preserving the appliance but also supports good hygiene in the kitchen. For more information on freezer care and management, explore articles like how to defrost a freezer quickly, which can save you time during the cleaning process, or how many watts does a refrigerator use? to understand more about your freezer's energy consumption.
Maintaining the Freezer
To ensure your freezer operates efficiently and your food remains preserved at optimal quality, it's vital to maintain a regular cleaning schedule and take measures to prevent future build-up.
Regular Cleaning Schedule
Creating a consistent cleaning schedule for your freezer is key to avoiding the accumulation of frost and food residue. Aim to perform a thorough cleaning, as described in the article on how to clean a freezer, every three to six months. Mark the dates on your calendar or set reminders to keep on track. A regular cleaning routine not only helps maintain your freezer's performance but also gives you the opportunity to check the inventory and rotate food items.
Preventing Future Build-Up
Preventing build-up of ice and frost can save you time and effort during your next cleaning session. Here are some strategies:
- Keep the Door Closed: Minimize the amount of time the freezer door is open to prevent warm air from entering and causing frost.
- Properly Seal Food Items: Use airtight containers or freezer-safe bags to store food. This not only prevents freezer burn but also reduces moisture levels inside the unit.
- Temperature Control: Ensure your freezer is set to the proper temperature, usually around 0°F (-18°C). This helps maintain the correct environment for food preservation and prevents excessive frost.
- Avoid Hot Foods: Let leftovers cool to room temperature before freezing them. Placing hot food directly into the freezer can raise the interior temperature and contribute to frost build-up.
- Regularly Check Seals: Inspect the door seals regularly to make sure they are clean and functioning properly. A poor seal can let in moist air and lead to frost.
- Defrost as Needed: If your freezer is not frost-free, you may need to defrost it manually when you notice a build-up. Follow guidelines on how to defrost a freezer quickly to speed up the process.
By adhering to these practices, you can maintain your freezer in top condition and prolong its lifespan. Remember, a clean and well-maintained freezer is more energy-efficient, saving you money on electric bills and reducing the need for repairs. For information on energy usage, see how many watts does a refrigerator use?.
By integrating these maintenance tips into your routine, you can ensure that your freezer remains clean, efficient, and ready to store all your favorite foods, from how to freeze spinach to how to freeze strawberries, keeping them fresh and delicious for when you need them.
Restocking Your Freezer
After the cleaning process, restocking your freezer is not just about putting food back in. It's an opportunity to organize and maintain order, ensuring that you can find items easily and that your freezer runs efficiently.
Organizing Food Items
Before placing anything back into your freezer, it's helpful to categorize your items. Group similar items together, such as meats, vegetables, and ready-to-eat meals. Consider using bins or baskets to keep categories separated.
Here's a simple guide to help you organize:
| Food Category | Storage Suggestion |
|---|---|
| Meats | Bottom shelf or drawer, in airtight containers |
| Vegetables | Middle shelf, possibly in stackable bins |
| Fruits | Beside vegetables, sorted by type |
| Ready Meals | Top shelf, labeled with dates |
| Breads | Door shelf, if available, to avoid squishing |
| Dairy | Near the back, where it's coldest |
When organizing, remember to place items that will be used soonest at the front. This is also a good time to check expiration dates and how long different foods last in the freezer.
Maintaining Order in Your Freezer
Maintaining order within your freezer will save you time and money by preventing food waste and minimizing energy consumption. Here are some tips for keeping your freezer organized:
- Use a first-in, first-out system to ensure older items get used before newer ones.
- Label and date all food items, especially those you freeze yourself, such as how to freeze zucchini or how to freeze squash.
- Keep an inventory list on or near the freezer to track what you have.
- Avoid overfilling to ensure proper air circulation and to prevent how long can fridge go without power from affecting your food's temperature.
- Regularly check for items that need to be used up and plan meals around them.
By following these steps, you'll maintain an organized freezer that makes meal planning easier and helps your freezer run more efficiently, potentially lowering how many watts does a refrigerator use.
Remember, an organized freezer is the key to efficient food storage and waste reduction. Plus, it makes the process of how to clean a freezer much easier when the time comes again.
Get Your Upgrade or New Addition at Fridge.com
Whether you're searching for your perfect fridge, freezer, wine fridge, beer fridge, ice maker, or kegerator, Fridge.com has what you need.
Shop the world's best brands at Fridge.com.
It also has tons of awesome articles about kitchen stuff and home news. Enhance your home, garage, backyard, patio, and office with the coolest essentials. With every necessary type of residential refrigerator or freezer in the collection, you're covered.
Elevate your game and shop now at Fridge.com!