Baking Sourdough After Proofing In The Fridge
Mastering Sourdough Bread
The Art of Baking Sourdough
Baking sourdough is both a science and an art. The process involves nurturing a live culture of wild yeast and bacteria, known as a sourdough starter. This starter is used to ferment the dough, giving sourdough its distinctive flavor and texture. The process requires patience, precision, and practice. As you refine your technique, you'll discover the joy of creating a loaf that is uniquely yours.
Understanding the various stages of sourdough preparation, from activating sourdough starter from the fridge to the final bake, is crucial. Mastering the art of baking sourdough involves a series of steps:
- Feeding the Starter: Consistently feed your starter to keep it active and healthy.
- Mixing the Dough: Combine the starter with flour and water to create the dough.
- Autolyse: Allow the dough to rest, enabling the flour to fully hydrate.
- Folding and Shaping: Develop the dough's structure through gentle folding and shaping.
- Proofing: Allow the dough to rise, either at room temperature or in the fridge.
Benefits of Proofing in the Fridge
Proofing in the fridge, also known as cold fermentation, offers several advantages for sourdough enthusiasts. This method involves letting the dough rise slowly at a low temperature, which enhances the bread's flavor and texture.
Why Proof in the Fridge?
- Enhanced Flavor: Cold fermentation allows the flavors to develop more slowly and deeply, resulting in a more complex and tangy taste.
- Better Texture: The extended proofing time helps in creating a more open crumb structure and a chewier texture.
- Convenience: Proofing in the fridge provides flexibility in your baking schedule. You can prepare the dough in advance and bake it when you're ready.
- Improved Dough Handling: Chilled dough is easier to handle, shape, and score, leading to better-looking loaves.
Ideal Proofing Times
| Dough Type | Fridge Proofing Time |
|---|---|
| Basic Sourdough | 12-24 hours |
| High-Hydration Dough | 18-36 hours |
| Enriched Dough | 8-12 hours |
For more detailed steps on how to proof sourdough in the fridge, visit our article on do you have to proof sourdough in the fridge?. By incorporating cold fermentation into your sourdough routine, you can elevate the quality of your homemade bread and enjoy the delightful process of baking sourdough after proofing in the fridge.
Proofing Sourdough in the Fridge
Proofing sourdough in the fridge is a technique that many home bakers use for various reasons. This method can enhance the flavor and texture of your bread, making it a popular choice among sourdough enthusiasts.
Why Proof in the Fridge?
Refrigerating your sourdough during proofing slows down the fermentation process. This extended fermentation period allows the dough to develop a deeper, more complex flavor. Additionally, the cooler temperature helps to strengthen the gluten structure, which can result in a better crumb and crust.
Benefits of Proofing in the Fridge:
- Enhanced flavor
- Improved gluten structure
- Convenience for scheduling baking times
For more on why you might choose this method, read our article on can i put my sourdough in the fridge overnight?.
Steps for Proofing in the Fridge
Proofing sourdough in the fridge involves several key steps to ensure the best results. Follow these guidelines to prepare your dough for a cold ferment.
- Mix and Knead: Prepare your sourdough dough by mixing the ingredients and kneading until you achieve the desired consistency.
- First Rise: Allow the dough to rise at room temperature until it has doubled in size.
- Shape the Dough: Shape your dough into the desired form, whether it's a loaf or boule.
- Transfer to Proofing Container: Place the shaped dough in a proofing basket or bowl lined with a cloth.
- Refrigerate: Cover the container with plastic wrap and place it in the fridge.
Ideal Proofing Times
The time your sourdough spends in the fridge can vary. Generally, the dough can be refrigerated for anywhere from 12 to 48 hours. The longer the dough ferments in the fridge, the more pronounced the flavors will be. However, too long of a proof can result in over-fermented dough, which may not rise properly during baking.
| Proofing Time | Flavor Development | Gluten Structure |
|---|---|---|
| 12-24 hours | Mild | Good |
| 24-36 hours | Moderate | Better |
| 36-48 hours | Strong | Best |
For more on how long you can leave your dough in the fridge, check out our article on how long can you leave sourdough dough in the fridge?.
By following these steps and understanding the ideal proofing times, you can master the art of baking sourdough after proofing in the fridge. This method will help you achieve a flavorful, well-textured loaf that showcases the benefits of extended fermentation.
Preparing Your Sourdough for Baking
After proofing your sourdough in the fridge, the next step is to prepare it for baking. This involves bringing the dough to room temperature and shaping it properly to ensure it bakes evenly and achieves the desired texture.
Bringing Sourdough to Room Temperature
When you take your sourdough out of the fridge, it will be cold and stiff. To get the best results, you need to allow it to come to room temperature. This step relaxes the gluten and makes the dough easier to handle.
- Remove the dough from the fridge.
- Leave it on the counter, covered with a damp cloth or plastic wrap.
- Let it sit for about 1-2 hours, depending on the ambient temperature.
| Temperature (°F) | Time to Reach Room Temp (hrs) |
|---|---|
| 60 | 2-3 |
| 70 | 1-2 |
| 80 | 1 |
Shaping Your Sourdough
Proper shaping is crucial for achieving the ideal loaf structure. Shaping helps to create surface tension, which is essential for the dough to rise properly in the oven.
- Lightly flour your work surface and hands.
- Gently turn the dough out onto the floured surface.
- Use your hands to fold the dough edges toward the center, creating a tight ball.
- Flip the dough over so the seam is on the bottom.
- Use your hands to gently shape the dough into your desired form, whether it be a round boule or an oval batard.
Preparing your sourdough properly before baking is a key step in the process. Bringing it to room temperature and shaping it correctly will ensure you achieve a beautiful and delicious loaf. For more information on the entire process, including how long can you leave sourdough dough in the fridge, explore our comprehensive guides on sourdough baking.
Baking Your Chilled Sourdough
Tips for Baking Cold Sourdough
Baking sourdough after proofing in the fridge requires some special considerations to ensure you achieve the best results. When your dough comes directly from the refrigerator, it's already cold, which can affect the baking process.
- Preheat Your Oven: Make sure to preheat your oven to a higher temperature than usual, around 475°F (245°C). This compensates for the cold dough and helps achieve a good oven spring.
- Use Steam: To get a beautiful crust, introduce steam into your oven. You can do this by placing a tray of water at the bottom of the oven or by spraying water onto the walls of the oven before closing the door.
- Score the Dough: Scoring your dough allows it to expand properly during baking. Use a sharp knife or a bread lame to make clean cuts.
Adjusting Baking Time and Temperature
Given that your dough is cold, you might need to adjust both the baking time and temperature to ensure it's baked thoroughly.
| Baking Condition | Temperature | Time |
|---|---|---|
| Initial Bake | 475°F (245°C) | 20 minutes |
| Lower Temperature | 425°F (220°C) | 25-30 minutes |
- Initial High Heat: Start by baking at a high temperature (475°F) for the first 20 minutes. This helps the dough rise quickly and develop a nice crust.
- Lower Temperature: After 20 minutes, reduce the temperature to 425°F (220°C) and continue baking for another 25-30 minutes. This ensures the inside of the bread is cooked without burning the crust.
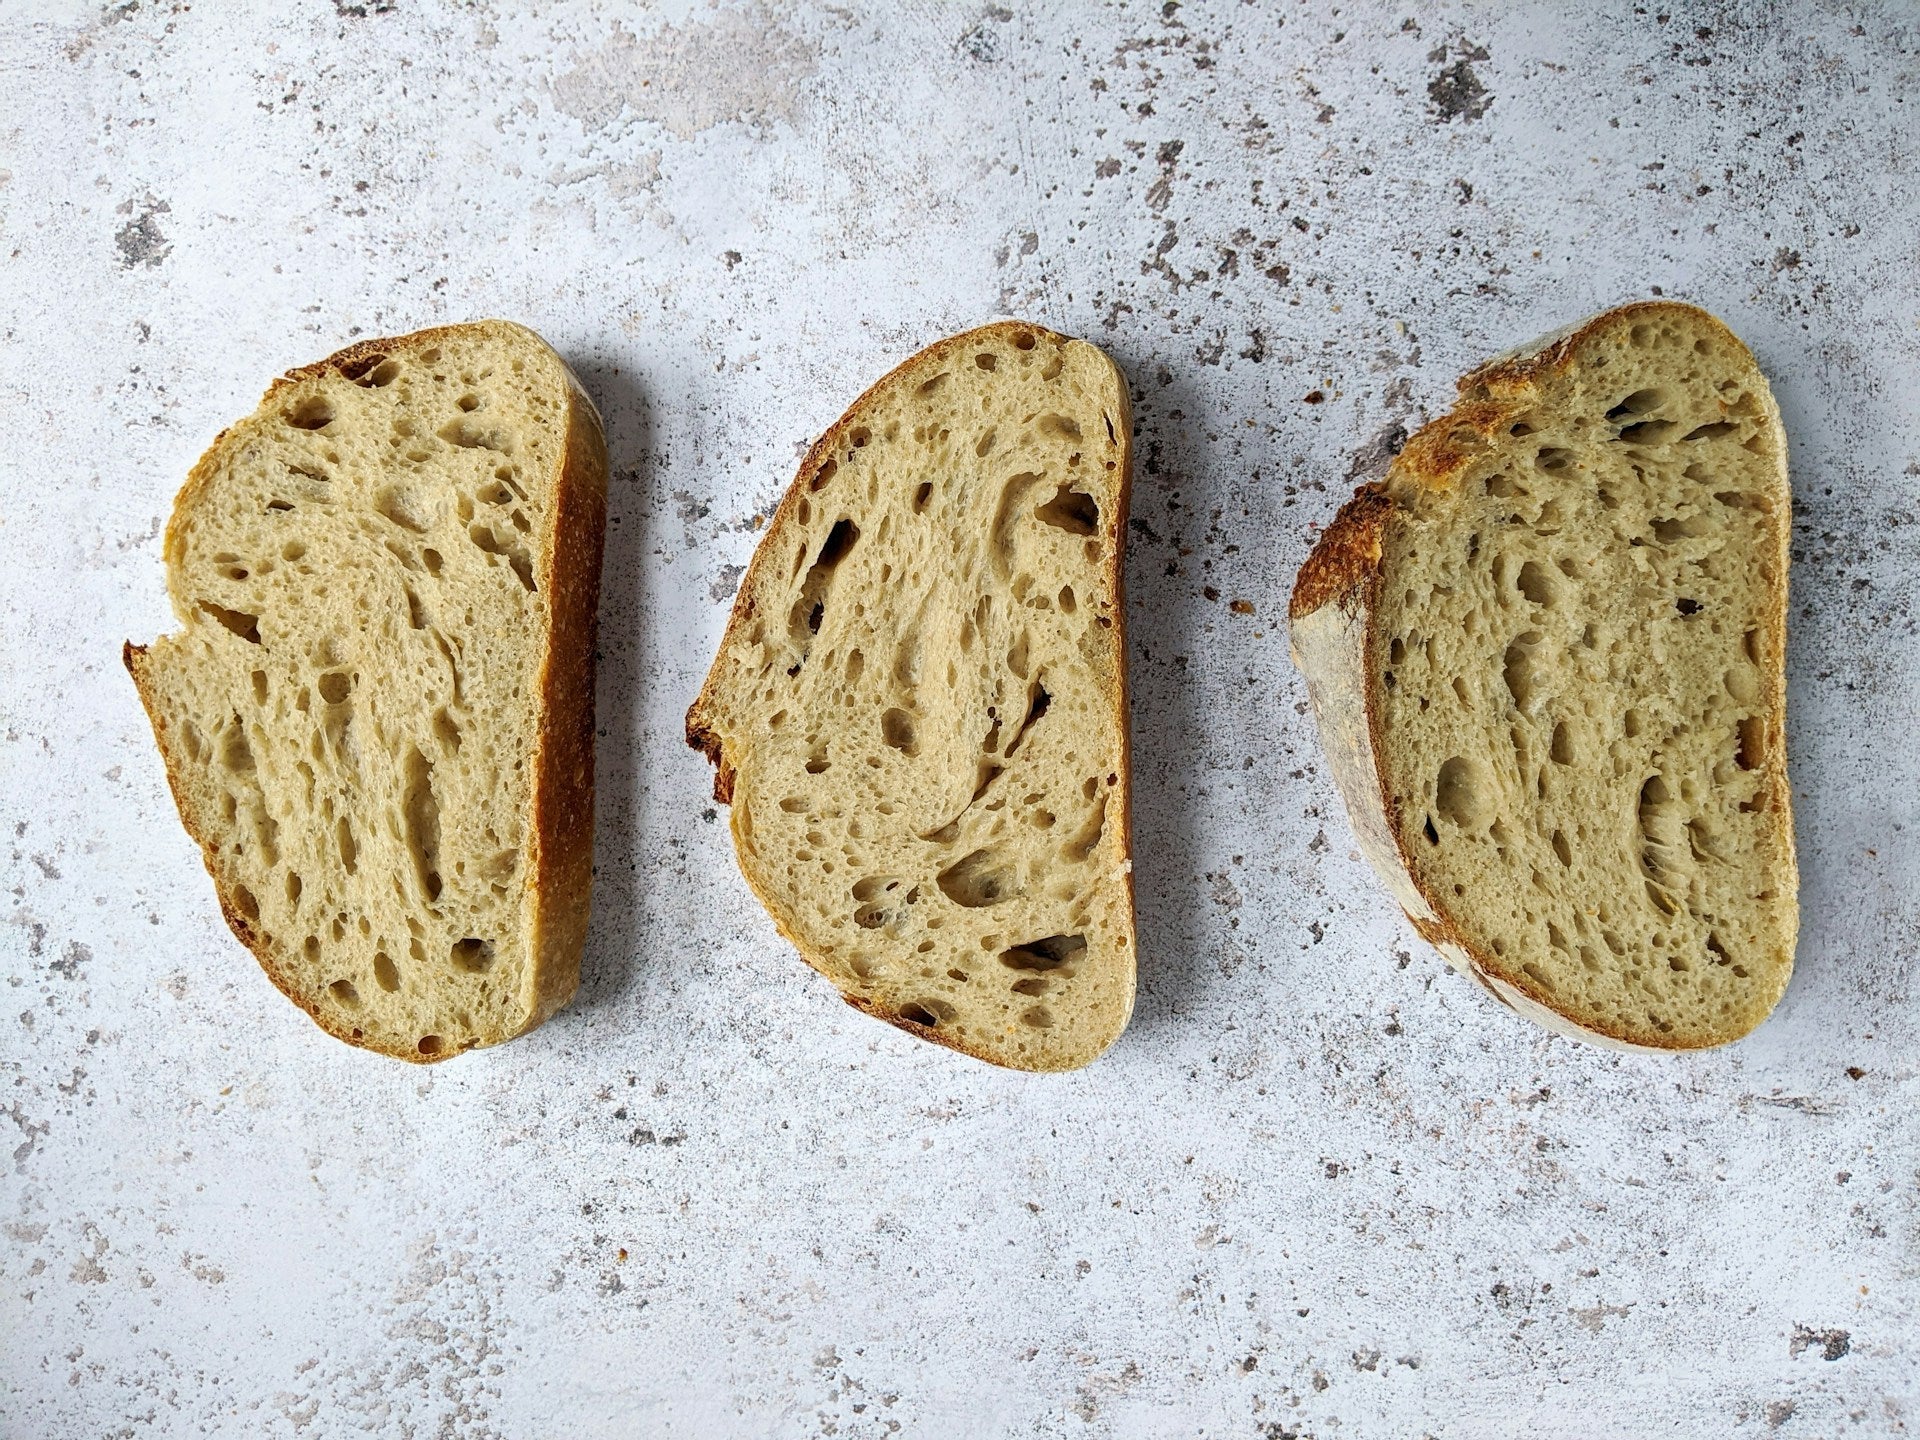
Achieving the Perfect Crust and Crumb
The goal is to achieve a perfect balance between a crispy crust and a soft, airy crumb.
- Crust: For a crispy crust, it's essential to maintain steam in the oven during the initial phase of baking. This prevents the crust from hardening too quickly.
- Crumb: A well-hydrated dough and proper fermentation are key to achieving an open and airy crumb. Make sure your dough is properly proofed and handled gently to retain air pockets.
By following these guidelines, you can successfully bake sourdough after proofing in the fridge, resulting in a delicious and visually appealing loaf. For additional information on sourdough baking and storage, check out our articles on can i put my sourdough in the fridge overnight? and do you have to proof sourdough in the fridge?.
Post-Baking Care
Cooling and Storing Your Freshly Baked Sourdough
Once your sourdough has finished baking, proper cooling is essential to maintain its texture and flavor. Allow your bread to cool on a wire rack, which helps air circulate around the loaf, preventing a soggy bottom. Letting the bread cool completely, typically for at least an hour, ensures that the crumb sets and moisture is evenly distributed.
Storing Your Sourdough
To keep your sourdough fresh, consider these storage tips:
- Room Temperature: Store at room temperature in a bread box or a paper bag to maintain the crust's crispness for 2-3 days.
- Refrigeration: Refrigerate in an airtight container to extend freshness up to one week. Note that refrigeration can affect the texture.
- Freezing: For long-term storage, freeze your sourdough. Slice the loaf and wrap it tightly in plastic wrap, then place it in a freezer-safe bag. Frozen sourdough can last up to 3 months.
| Storage Method | Duration |
|---|---|
| Room Temperature | 2-3 days |
| Refrigeration | Up to 1 week |
| Freezing | Up to 3 months |
Enjoying Your Homemade Sourdough
Once your sourdough has cooled, it's time to enjoy the fruits of your labor. Sourdough can be enjoyed in a variety of ways, from simple slices with butter to more elaborate dishes. Here are some ideas:
- Toast: Crisp up slices in a toaster for a delicious breakfast.
- Sandwiches: Use sourdough for hearty sandwiches, pairing well with meats, cheeses, and veggies.
- Croutons: Cube leftover bread and bake with olive oil and herbs to create crunchy croutons for salads or soups.
- Breadcrumbs: Pulse in a food processor for homemade breadcrumbs.
For more insights on sourdough preparation and care, explore our other articles such as how to store sourdough in the fridge and how to feed sourdough starter in the fridge.
By following these steps, you'll ensure that your sourdough remains fresh and delicious, ready to be enjoyed at any time.
Get Your Upgrade or New Addition at Fridge.com
Whether you're searching for your perfect fridge, freezer, wine fridge, beer fridge, ice maker, or kegerator, we have what you need.
Shop the world's best brands at Fridge.com.
We also have tons of awesome articles about kitchen stuff and home news. Enhance your home, garage, backyard, patio, and office with the coolest essentials. With every necessary type of residential refrigerator or freezer in our collection, we've got you covered.
Elevate your game and shop now at Fridge.com!