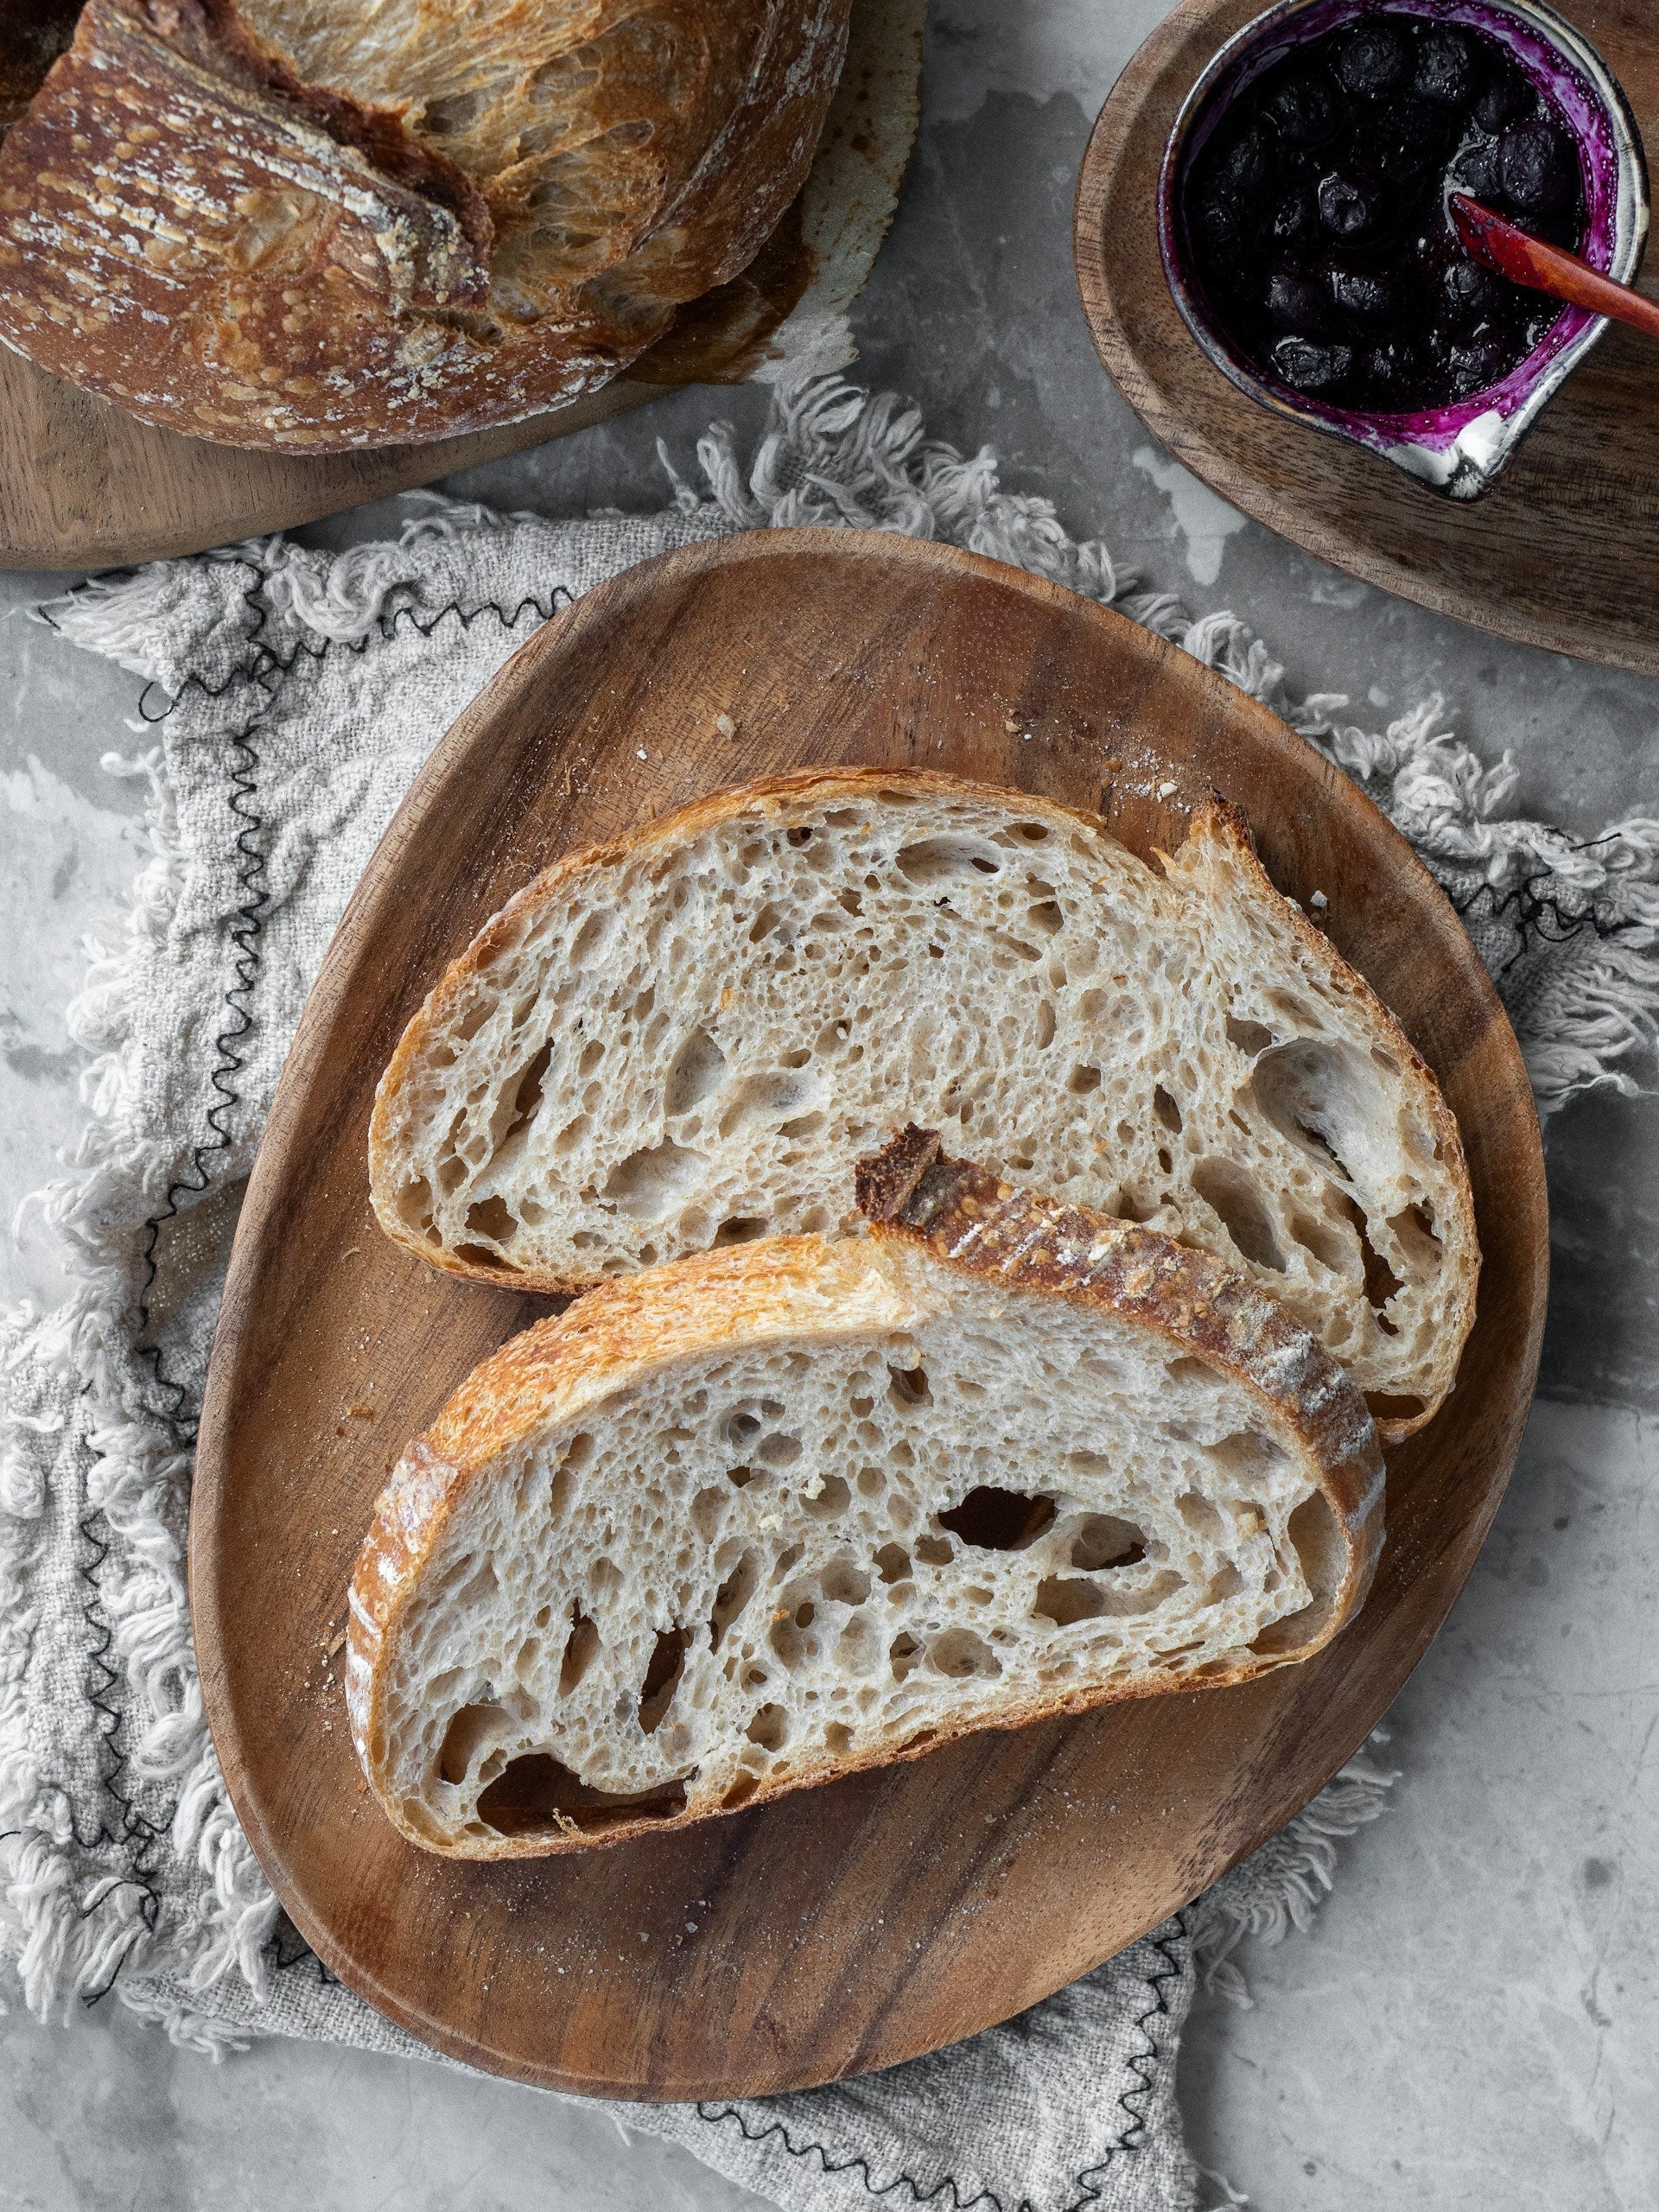
How To Make Sourdough Bread From Starter In The Fridge
Setting Up Your Sourdough Starter
Starting a sourdough starter can be an exciting venture. The process involves creating a living culture that will be the foundation for your homemade sourdough bread. Here's how to set up and maintain your sourdough starter, especially when storing it in the fridge.
Creating Your Sourdough Starter
To create a sourdough starter, you'll need just a few basic ingredients and some patience. The process involves combining flour and water and allowing natural fermentation to occur.
-
Day 1: Mix Flour and Water
- Combine 1 cup of whole wheat flour with 1 cup of water in a glass jar.
- Stir the mixture until it forms a thick batter.
- Cover the jar with a breathable cloth and let it sit at room temperature for 24 hours.
-
Day 2: Feed the Starter
- Discard half of the starter mixture.
- Add 1 cup of all-purpose flour and 1 cup of water to the remaining starter.
- Stir well and cover again, letting it sit at room temperature for another 24 hours.
-
Days 3-7: Continue Feeding
- Repeat the process of discarding half and feeding with fresh flour and water daily.
- By the end of the week, you should notice bubbles and a tangy aroma, indicating a healthy, active starter.
Maintaining Your Sourdough Starter
Once your sourdough starter is active, maintaining it is crucial for ongoing bread making. Regular feeding and proper storage are key.
-
Feeding Schedule
- If you bake frequently, feed your starter every day at room temperature.
- If you bake less often, you can store your starter in the fridge and feed it weekly.
| Storage Method | Feeding Frequency |
|---|---|
| Room Temperature | Daily |
| Fridge | Weekly |
-
Feeding Process
- Remove the starter from the fridge and let it come to room temperature.
- Discard half of the starter.
- Feed with equal parts flour and water (e.g., 1 cup each).
- Stir well and let it sit at room temperature for a few hours before returning it to the fridge.
-
Long-Term Storage
- Starters can be kept in the fridge for extended periods. For tips on how long you can keep your starter without feeding, visit how long can you keep sourdough starter in the fridge without feeding?.
Properly maintaining your sourdough starter ensures a robust culture that can be used whenever you're ready to bake. For more detailed guidance on maintaining your starter in the fridge, check out maintaining sourdough starter in the fridge.
Preparing the Dough
Once you have your active sourdough starter, it's time to prepare the dough. This section will guide you through the ingredients needed and the steps for mixing and kneading the dough.
Ingredients You'll Need
To make sourdough bread from a starter stored in the fridge, you need the following ingredients:
| Ingredient | Quantity |
|---|---|
| Active Sourdough Starter | 1/4 cup (60g) |
| Bread Flour | 4 cups (500g) |
| Water | 1 3/4 cups (400g) |
| Salt | 2 tsp (12g) |
Make sure your sourdough starter is active and bubbly before using it. If needed, refer to our article on activating sourdough starter from the fridge for more details.
Mixing and Kneading the Dough
-
Combine Ingredients: In a large mixing bowl, combine the bread flour, water, and active sourdough starter. Mix until a shaggy dough forms.
-
Autolyse: Let the mixture rest for 30 minutes. This process, known as autolyse, allows the flour to hydrate and makes the dough easier to work with.
-
Add Salt: After the autolyse period, add the salt to the dough. Mix until the salt is fully incorporated.
-
Kneading: Knead the dough to develop the gluten structure. You can use the stretch and fold method, which involves stretching the dough and folding it over itself. Repeat this process every 30 minutes for 2 hours.
-
Bulk Fermentation: Once the kneading process is complete, allow the dough to undergo bulk fermentation. This is where the dough will rise and develop its flavor. For detailed steps on fermenting the dough, check our article on bulk fermentation process.
| Process Step | Time |
|---|---|
| Autolyse | 30 minutes |
| Kneading | 2 hours (stretch and fold every 30 minutes) |
| Bulk Fermentation | Varies (see fermentation section) |
By following these steps, you are on your way to creating a delicious loaf of sourdough bread.
Fermenting the Dough
Fermentation is a crucial step in making sourdough bread. It allows the dough to develop flavor, texture, and structure. There are two main fermentation processes to consider: bulk fermentation and cold fermentation in the fridge.
Bulk Fermentation Process
Bulk fermentation, also known as the first rise, is where the magic begins. During this stage, the dough ferments at room temperature, allowing the natural yeast and bacteria to work on the dough. This process can take several hours, depending on the ambient temperature and the strength of your sourdough starter.
| Temperature (°F) | Bulk Fermentation Time (hours) |
|---|---|
| 65° - 70° | 6 - 8 |
| 70° - 75° | 4 - 6 |
| 75° - 80° | 3 - 4 |
To perform bulk fermentation:
- Place your mixed and kneaded dough into a lightly oiled bowl.
- Cover the bowl with a damp cloth or plastic wrap.
- Let the dough rest at room temperature, allowing it to double in size.
During bulk fermentation, you may need to perform a series of folds to strengthen the dough and improve its structure. This usually involves gently stretching and folding the dough every 30 minutes to an hour.
Cold Fermentation in the Fridge
Cold fermentation, also known as retarding, is the process of slowing down the fermentation by placing the dough in the refrigerator. This step enhances the flavor and texture of the bread, giving it a more complex taste and a chewier crumb.
| Temperature (°F) | Cold Fermentation Time (hours) |
|---|---|
| 35° - 40° | 12 - 24 |
| 40° - 45° | 8 - 12 |
To perform cold fermentation:
- After bulk fermentation, shape your dough into a loaf.
- Place the shaped dough into a proofing basket or a bowl lined with a cloth.
- Cover it with plastic wrap or a damp cloth.
- Refrigerate the dough for 12 to 24 hours.
Cold fermentation helps develop the dough's flavor and makes it easier to handle. When you're ready to bake, remove the dough from the fridge and allow it to come to room temperature before baking. This process can be explored further in our article on baking sourdough after proofing in the fridge.
By understanding and mastering both bulk and cold fermentation processes, you'll be well on your way to making delicious sourdough bread right from your fridge. For more details on related topics, check out our guide on activating sourdough starter from the fridge.
Shaping and Proofing
When making sourdough bread from a starter stored in the fridge, shaping and proofing are crucial steps to ensure your bread turns out perfect. These steps help develop the structure and texture of your loaf.
Shaping Your Sourdough Loaf
After the dough has gone through its bulk fermentation, it's time to shape it into a loaf. Shaping helps create surface tension, which is essential for a good rise and crust.
- Lightly flour your work surface.
- Turn out the dough and gently pat it into a rectangle.
- Fold the dough into thirds, like a letter.
- Turn it 90 degrees and fold into thirds again.
- Shape the dough into a tight ball by pulling the edges toward the center.
- Flip the dough seam-side down and use your hands to shape it into a round loaf.
| Step | Description |
|---|---|
| 1 | Lightly flour the surface |
| 2 | Pat dough into a rectangle |
| 3 | Fold into thirds |
| 4 | Rotate and fold again |
| 5 | Shape into a ball |
| 6 | Final shaping |
For more detailed instructions, visit our guide on shaping your sourdough loaf.
Proofing Your Dough in the Fridge
Proofing, also known as the final rise, allows the dough to develop flavor and texture. Proofing in the fridge, also called cold fermentation, can enhance the sourdough's flavor.
- Place your shaped dough in a proofing basket or bowl lined with a floured cloth.
- Cover the dough with a damp cloth or plastic wrap.
- Place the dough in the fridge for 12 to 24 hours.
Cold proofing slows down the fermentation process, allowing the flavors to develop more fully. This method also makes it easier to handle the dough, as it becomes firmer when chilled.
| Proofing Duration | Temperature |
|---|---|
| 12 - 24 hours | 35-40°F (1.7-4.4°C) |
For more tips on proofing, check out our article on do you have to proof sourdough in the fridge?.
Remember, proper shaping and proofing are key to achieving a beautiful and delicious sourdough loaf. After this step, you're ready to move on to baking. For baking techniques, visit our guide on baking sourdough after proofing in the fridge.
Baking Your Sourdough Bread
Preparing Your Oven
Proper oven preparation is key to successfully baking sourdough bread. Start by preheating your oven to 500°F (260°C). This high initial temperature helps create the steam needed for a good oven spring, which allows your bread to rise properly.
It's recommended to use a baking stone or a Dutch oven. These tools help retain heat and distribute it evenly. Place the baking stone or Dutch oven in the oven while it preheats. If using a Dutch oven, be sure to preheat the lid as well.
To create steam, place a shallow pan of water on the bottom rack of the oven. The steam will keep the crust from setting too quickly, allowing the bread to expand fully.
Baking Techniques and Tips
After your oven is preheated, it's time to bake your sourdough. Carefully transfer your dough into the preheated Dutch oven or onto the baking stone. If using a Dutch oven, place the lid on top to trap steam during the initial baking phase.
Here are some key steps and tips for baking:
- Initial Bake: Bake the bread for 20 minutes with the lid on or with steam in the oven.
- Reduce Temperature: After 20 minutes, reduce the oven temperature to 450°F (232°C). Remove the lid if using a Dutch oven.
- Continue Baking: Bake for another 20-25 minutes, or until the crust is golden brown and the internal temperature of the bread reaches 210°F (99°C).
| Baking Stage | Temperature | Time |
|---|---|---|
| Initial Bake | 500°F (260°C) | 20 minutes |
| Second Bake | 450°F (232°C) | 20-25 minutes |
To ensure even baking, you may rotate the loaf halfway through the second baking stage. This prevents any hot spots in the oven from over-browning one side of the bread.
For a more detailed guide on the baking process, refer to our article on baking sourdough after proofing in the fridge.
Remember to let your bread cool completely on a wire rack before slicing. This allows the crumb to set and makes slicing easier. If you need tips on slicing, check out our section on proper slicing techniques.
By following these steps and tips, you'll be well on your way to baking delicious sourdough bread using a starter from the fridge. For more information on maintaining your starter, visit our guide on maintaining sourdough starter in the fridge.
Achieving the Perfect Crust
Creating the perfect crust on your sourdough bread is an essential part of the baking process. A crispy, golden crust not only enhances the appearance of your loaf but also adds to the overall flavor and texture. Here are some tips to help you achieve the ideal crust and enhance the flavor profiles of your sourdough bread.
Creating a Crispy Crust
To achieve a crispy crust, you need to focus on moisture, temperature, and baking techniques. Here are some key factors to consider:
-
Steam in the Oven: Introducing steam during the initial phase of baking helps to keep the dough surface moist, allowing it to expand fully before the crust sets. You can create steam by placing a pan of water at the bottom of the oven or by spraying water inside the oven before placing the dough.
-
High Baking Temperature: Baking your sourdough at a high temperature (around 450°F or 230°C) helps to develop a nice, crispy crust. It's important to preheat your oven thoroughly before baking.
-
Baking Stone or Dutch Oven: Using a baking stone or a Dutch oven can help to retain heat and create an even baking environment. This results in a more consistent crust.
-
Scoring the Dough: Scoring the dough with a sharp blade allows for controlled expansion and helps to create a beautiful crust pattern.
| Factor | Description |
|---|---|
| Steam in the Oven | Keeps dough surface moist for full expansion |
| High Baking Temperature | Develops a crispy crust |
| Baking Stone/Dutch Oven | Retains heat for even baking |
| Scoring the Dough | Controls expansion and creates patterns |
For more tips on baking techniques, you can refer to our article on baking sourdough after proofing in the fridge.
Enhancing Flavor Profiles
The flavor of your sourdough bread is influenced by several factors, including the fermentation process, ingredients, and baking techniques. Here are some ways to enhance the flavor profiles:
-
Extended Fermentation: Allowing the dough to ferment for a longer period, especially through cold fermentation in the fridge, can develop complex flavors. The slow fermentation process allows for the breakdown of sugars and the development of lactic acid, which contributes to a tangy flavor.
-
Quality Ingredients: Using high-quality flour, water, and salt can significantly impact the flavor of your sourdough. Opt for unbleached flour and filtered water for the best results.
-
Hydration Levels: Adjusting the hydration levels of your dough can affect the texture and flavor. Higher hydration doughs tend to produce a more open crumb and a chewier texture, enhancing the overall eating experience.
-
Adding Seeds and Grains: Incorporating seeds, grains, or other flavor-enhancing ingredients into your dough can add depth and complexity to the flavor. Experiment with different additions to find your favorite combination.
| Method | Description |
|---|---|
| Extended Fermentation | Develops complex and tangy flavors |
| Quality Ingredients | Enhances overall flavor |
| Hydration Levels | Affects texture and flavor |
| Adding Seeds and Grains | Adds depth and complexity |
For more information on cold fermentation, you can read our article on can I put my sourdough in the fridge overnight?.
By focusing on these techniques, you can achieve the perfect crust and enhance the flavor profiles of your sourdough bread. Enjoy the process of experimenting and discovering the unique characteristics of your homemade sourdough.
Slicing and Storing
Once your sourdough bread is perfectly baked, it's essential to slice and store it properly to maintain its freshness and flavor.
Proper Slicing Techniques
Slicing your sourdough bread correctly ensures even slices and helps preserve the loaf's texture. Here are some steps to follow:
- Wait for the Bread to Cool: Allow your sourdough loaf to cool completely before slicing. Cutting into hot bread can result in a gummy texture.
- Use a Serrated Knife: A serrated bread knife works best for slicing sourdough. The saw-like edges help cut through the crust without squishing the soft interior.
- Slice at an Angle: Hold the loaf at a slight angle and slice in a back-and-forth motion. This helps to achieve even slices and prevents tearing.
| Step | Description |
|---|---|
| 1 | Let the bread cool completely. |
| 2 | Use a serrated bread knife. |
| 3 | Slice at a slight angle. |
For more tips on baking and slicing sourdough, check out our article on baking sourdough after proofing in the fridge.
Storing Your Freshly Baked Sourdough
Proper storage is key to keeping your sourdough fresh and delicious for as long as possible. Here are some methods to store your bread:
-
Room Temperature Storage:
- Wrap in a Cloth or Paper Bag: Wrapping your bread in a clean kitchen towel or placing it in a paper bag helps maintain the crust while allowing some air circulation.
- Avoid Plastic Bags: Plastic bags can make the crust soggy due to trapped moisture. If you need to use plastic, ensure the bread is fully cooled and wrap it loosely.
-
Refrigeration:
- Short-Term Storage: Place the bread in a bread box or wrap it in a cloth and store it in the fridge. This method helps extend the freshness but may slightly harden the crust.
- Long-Term Storage: For longer storage, slice the bread and place the slices in a sealed plastic bag or airtight container. This method is ideal if you plan to toast the slices later.
-
Freezing:
- Slice and Freeze: Slice the bread before freezing to make it easier to thaw and use. Place the slices in a single layer on a baking sheet and freeze until solid. Then, transfer the frozen slices to a freezer-safe bag.
- Thawing: To thaw, leave the slices at room temperature for a few minutes or toast them directly from the freezer.
| Storage Method | Duration | Best For |
|---|---|---|
| Room Temperature | 1-2 days | Maintaining crust texture |
| Refrigeration | 1 week | Extending freshness |
| Freezing | 1-3 months | Long-term storage |
For more insights on how to store your sourdough, visit our article on how long does sourdough last in the fridge?.
By using these slicing and storage techniques, you can enjoy your homemade sourdough bread at its best, whether fresh or stored.
Get Your Upgrade or New Addition at Fridge.com
Whether you're searching for your perfect fridge, freezer, wine fridge, beer fridge, ice maker, or kegerator, we have what you need.
Shop the world's best brands at Fridge.com.
We also have tons of awesome articles about kitchen stuff and home news. Enhance your home, garage, backyard, patio, and office with the coolest essentials. With every necessary type of residential refrigerator or freezer in our collection, we've got you covered.
Elevate your game and shop now at Fridge.com!