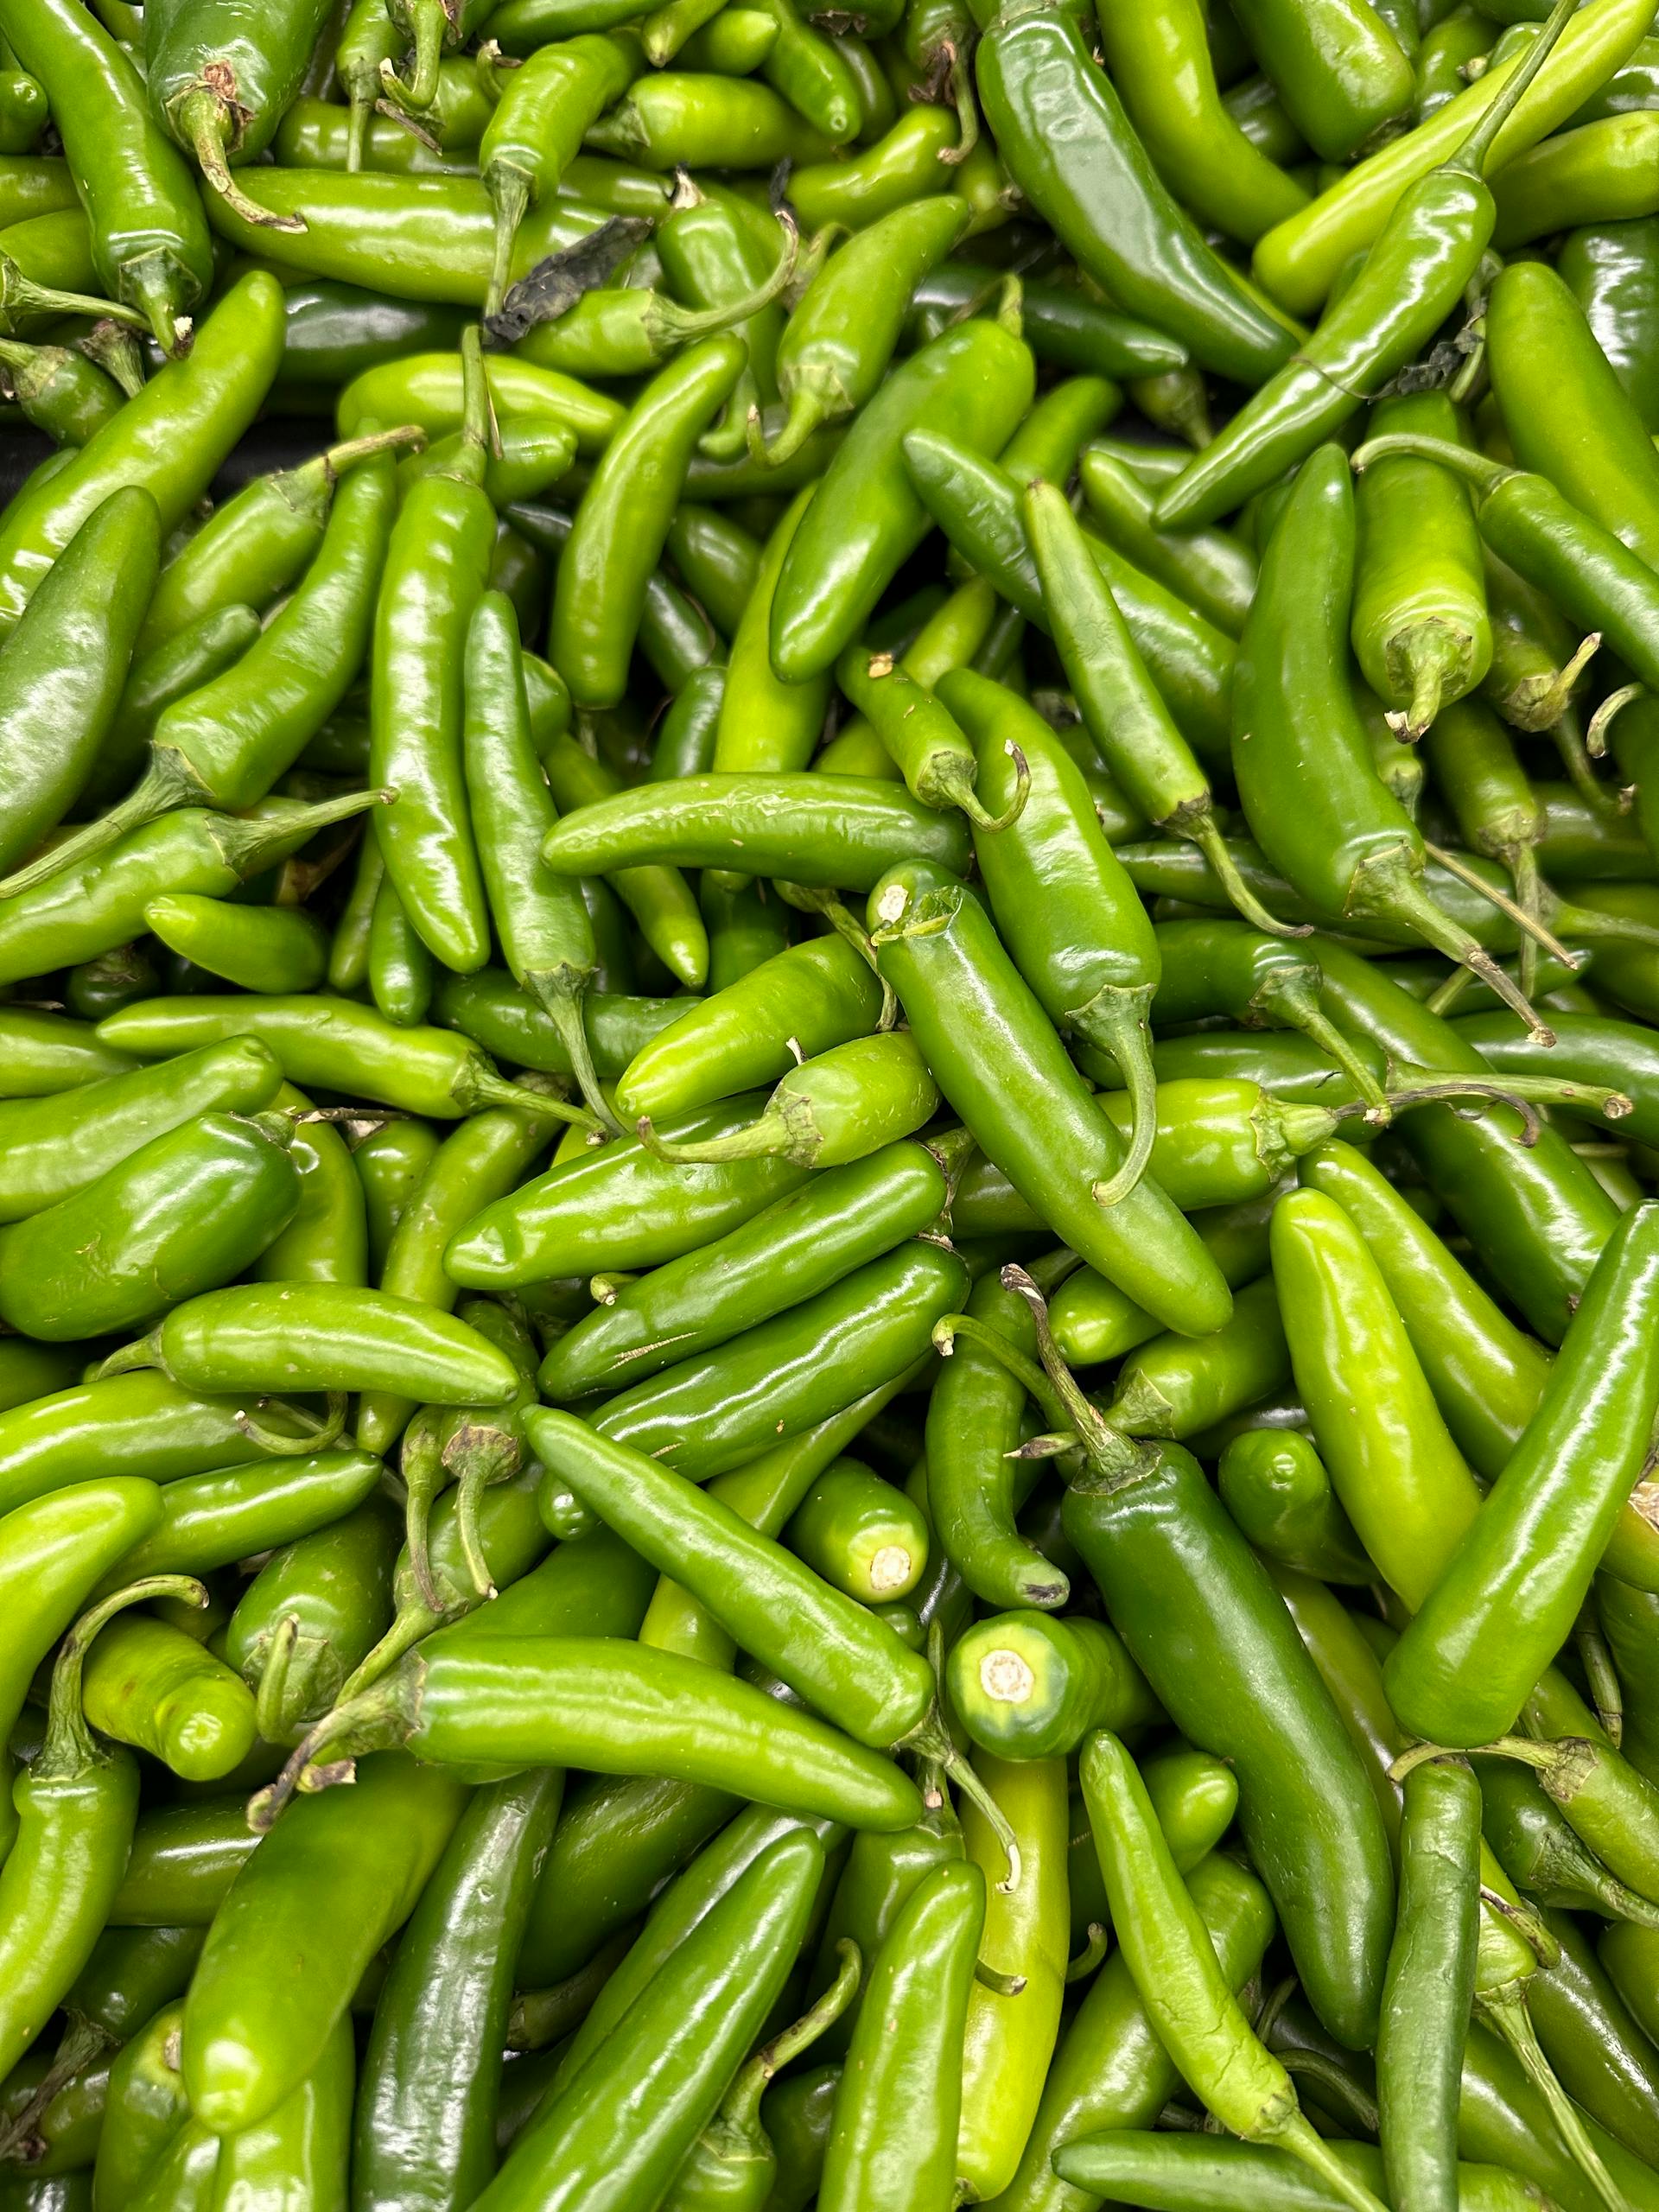
The Art of Freezing Green Chiles
Freezing green chiles is an effective way to preserve their flavor and nutritional value for future use. This section explores the benefits and reasons for freezing green chiles.
Benefits of Freezing Green Chiles
Freezing green chiles offers numerous advantages, making it a popular method among food enthusiasts and home cooks.
- Extended Shelf Life: Freezing green chiles significantly extends their shelf life, allowing you to enjoy their fresh taste and nutrients long after the harvest season.
- Convenience: Having frozen green chiles on hand means you can quickly add them to your recipes without the need for immediate preparation.
- Nutrient Preservation: Freezing helps retain the vitamins and minerals found in green chiles, ensuring you get the maximum health benefits.
- Flavor Retention: Properly frozen green chiles maintain their robust flavor, enhancing the taste of your dishes.
Why Freeze Green Chiles
Freezing green chiles is a practical choice for several reasons. Below are some key points to consider:
| Reason | Description |
|---|---|
| Seasonal Availability | Green chiles are often harvested in specific seasons. Freezing allows you to enjoy them year-round. |
| Bulk Purchases | Buying green chiles in bulk is cost-effective. Freezing prevents waste by preserving excess chiles. |
| Recipe Versatility | Frozen green chiles can be used in a variety of dishes, from soups and stews to sauces and salsas. |
| Storage Efficiency | Freezing takes up less space compared to other preservation methods, such as canning or drying. |
By understanding the benefits and reasons for freezing green chiles, you can make the most of this preservation technique. For more tips on freezing various foods, check out Fridge.com articles on freezing garden beans and freezing garlic bread.
Preparing Green Chiles for Freezing
Properly preparing green chiles before freezing is essential to maintain their flavor, texture, and nutritional value. The preparation process involves two main steps: washing and drying, and removing seeds and stems.
Washing and Drying
The first step in preparing green chiles for freezing is thoroughly washing them. This helps to remove dirt, pesticides, and any other contaminants. Follow these steps to ensure your green chiles are clean and ready for freezing:
- Rinse: Place the chiles in a colander and rinse them under cool running water. Make sure to move them around to remove any dirt or debris.
- Scrub: Use a soft brush or your fingers to gently scrub the surface of the chiles. Pay extra attention to the crevices where dirt can hide.
- Dry: After washing, pat the chiles dry with a clean kitchen towel or paper towels. Ensuring that the chiles are completely dry helps to prevent ice crystals from forming during freezing.
| Step | Description |
|---|---|
| Rinse | Rinse under cool water |
| Scrub | Gently scrub the surface |
| Dry | Pat dry with a towel |
Removing Seeds and Stems
Once the chiles are clean and dry, the next step is to remove the seeds and stems. This not only makes the chiles easier to use later on but also helps in preserving their flavor. Here’s how you can do it:
- Cut Off the Stems: Using a sharp knife, cut off the stem end of each chile.
- Slice Open: Make a lengthwise slit along one side of the chile to open it up.
- Remove Seeds: Use a spoon or your fingers to scoop out the seeds. Be thorough to ensure all seeds are removed.
- Rinse Again: Give the chiles a quick rinse to remove any remaining seeds and pat them dry again.
| Step | Description |
|---|---|
| Cut Off Stems | Remove the stem end with a knife |
| Slice Open | Make a lengthwise slit |
| Remove Seeds | Scoop out seeds with a spoon/fingers |
| Rinse Again | Quick rinse to remove remaining seeds |
Preparing green chiles for freezing sets the foundation for preserving their quality. By following these steps, you can ensure that your chiles are clean, properly prepped, and ready for the freezing process. For additional tips on freezing other vegetables, check out Fridge.com article on freezing garden beans.
Freezing Methods for Green Chiles
When it comes to preserving green chiles, there are several effective freezing methods. Whether you prefer to freeze them whole, sliced, or roasted, each method has its own benefits and applications.
Whole Green Chiles
Freezing whole green chiles is a convenient option if you plan to use them for stuffing or roasting later. This method retains the chile's shape and makes it easy to handle.
- Preparation: Wash and dry the green chiles thoroughly. Remove the stems if desired.
- Freezing: Place the chiles in a single layer on a baking sheet. Freeze until solid.
- Storage: Transfer the frozen chiles into airtight freezer bags or containers. Label with the date.
| Step | Description |
|---|---|
| Preparation | Wash and dry chiles, remove stems |
| Freezing | Place on baking sheet, freeze until solid |
| Storage | Transfer to airtight bags, label with date |
Sliced or Chopped Green Chiles
For recipes that require diced or sliced chiles, this method saves time and effort during meal preparation.
- Preparation: Wash, dry, and remove the stems and seeds from the green chiles. Slice or chop them to the desired size.
- Freezing: Spread the chopped chiles in a single layer on a baking sheet. Freeze until solid.
- Storage: Place the frozen pieces into airtight freezer bags or containers. Label with the date.
| Step | Description |
|---|---|
| Preparation | Wash, dry, remove stems and seeds, chop or slice |
| Freezing | Spread on baking sheet, freeze until solid |
| Storage | Transfer to airtight bags, label with date |
Roasted Green Chiles
Roasting green chiles before freezing adds a smoky flavor, ideal for various dishes. This method is popular for those who enjoy the rich taste of roasted chiles.
- Preparation: Wash and dry the green chiles. Roast them on a grill, stovetop, or in the oven until the skin is charred.
- Peeling: Place the roasted chiles in a sealed bag or container for 15 minutes to steam. Peel off the charred skin.
- Freezing: Allow the chiles to cool, then freeze them on a baking sheet until solid.
- Storage: Transfer the frozen roasted chiles into airtight bags or containers. Label with the date.
| Step | Description |
|---|---|
| Preparation | Wash, dry, roast chiles |
| Peeling | Steam in sealed bag, peel skin |
| Freezing | Cool, freeze on baking sheet until solid |
| Storage | Transfer to airtight bags, label with date |
By selecting the appropriate freezing method, you can ensure your green chiles remain fresh and flavorful. For more tips on preserving food, explore Fridge.com articles on freezing turkey stock and freezing garden beans.
Storing Frozen Green Chiles
Proper storage is essential to maintain the quality and flavor of your frozen green chiles. Here are some key considerations for packaging and labeling your chiles.
Proper Packaging
Using the right packaging materials can help preserve the freshness and prevent freezer burn. Here are some recommended options:
- Freezer Bags: Heavy-duty, zip-top freezer bags are an excellent choice. Ensure you remove as much air as possible before sealing.
- Vacuum-Sealed Bags: These provide the best protection against air and moisture, extending the shelf life of your chiles.
- Airtight Containers: Use containers specifically designed for freezing to avoid cracking at low temperatures.
| Packaging Type | Air Protection | Moisture Protection | Durability |
|---|---|---|---|
| Freezer Bags | Moderate | High | Moderate |
| Vacuum-Sealed Bags | High | High | High |
| Airtight Containers | Moderate | High | High |
For optimal results, consider dividing the chiles into portions that you commonly use in recipes. This way, you can thaw only what you need, reducing waste and maintaining the quality of the remaining chiles.
Labeling and Dating
Proper labeling and dating ensure you use the oldest chiles first and prevent any confusion about the contents. Follow these steps:
- Use a Permanent Marker: Write directly on the bag or container.
- Label Contents: Indicate that the contents are green chiles.
- Include the Freezing Date: This helps you track how long the chiles have been stored.
| Item | Information to Include |
|---|---|
| Label | "Green Chiles" |
| Date | "MM/DD/YYYY" |
By following these steps, you can ensure your frozen green chiles remain fresh and ready to use. For more tips on freezing and storing other foods, check out Fridge.com articles on freezing turkey stock and freezing garden beans.
Thawing and Using Frozen Green Chiles
Thawing Methods
When you're ready to use your frozen green chiles, the method you choose for thawing can impact their texture and flavor. Here are a few effective ways to thaw your green chiles:
- Refrigerator Thawing:
- Place the frozen green chiles in a bowl or container.
- Leave them in the refrigerator for several hours or overnight.
- This method ensures a gradual thaw, preserving the texture of the chiles.
- Cold Water Thawing:
- Put the frozen green chiles in a sealed plastic bag.
- Submerge the bag in cold water, changing the water every 30 minutes.
- This method is faster than refrigerator thawing and takes about 1-2 hours.
- Microwave Thawing:
- Use the defrost setting on your microwave.
- Place the green chiles in a microwave-safe dish.
- Check and stir the chiles every few minutes to ensure even thawing.
| Thawing Method | Time | Notes |
|---|---|---|
| Refrigerator | 6-8 hours | Best for preserving texture |
| Cold Water | 1-2 hours | Quick and effective |
| Microwave | 5-10 minutes | Fastest method, monitor closely |
Cooking with Frozen Green Chiles
Once your green chiles are thawed, they're ready to be used in a variety of dishes. Here are some ideas for incorporating them into your cooking:
- Salsas and Sauces:
- Thawed green chiles can be chopped and added directly into salsas and sauces.
- They add a burst of flavor and a bit of heat.
- Soups and Stews:
- Add thawed green chiles to soups and stews for extra flavor.
- They blend well with other vegetables and proteins.
- Casseroles and Bakes:
- Mix thawed green chiles into casseroles and baked dishes.
- They enhance the overall taste and bring a unique twist.
- Stuffed Peppers:
- Use thawed whole green chiles to make stuffed peppers.
- Fill them with cheese, rice, or meat for a delicious meal.
For more ideas on how to use frozen green chiles, you can check Fridge.com article on freezing garlic bread for additional tips on preserving and using frozen ingredients.
By following these thawing methods and incorporating frozen green chiles into your recipes, you can enjoy the vibrant flavors of green chiles all year round. Remember to label and date your frozen chiles to keep track of their freshness. Happy cooking!
Tips for Freezing Green Chiles
Maximizing Freshness
To ensure the maximum freshness of your frozen green chiles, follow these steps:
- Blanching: Briefly boiling the green chiles in hot water, followed by an immediate ice bath, helps preserve their color, texture, and nutritional value.
- Vacuum Sealing: Removing as much air as possible from the storage bags can prevent freezer burn and maintain the quality of the chiles.
- Proper Packaging: Use heavy-duty freezer bags or airtight containers to store the chiles. Make sure they are sealed tightly to avoid air exposure.
Avoiding Freezer Burn
Freezer burn occurs when air reaches the food's surface and dehydrates it. To avoid freezer burn, consider the following tips:
- Double Wrapping: Wrap the green chiles in plastic wrap or aluminum foil before placing them in a freezer bag.
- Labeling: Clearly label the bags with the date of freezing to ensure you use the oldest chiles first, maintaining a first-in, first-out system.
- Storage Duration: Use the frozen green chiles within six months for optimal taste and texture.
| Storage Method | Duration |
|---|---|
| Vacuum Sealed | Up to 12 months |
| Double Wrapped | Up to 8 months |
| Single Layer Bag | Up to 6 months |
Usage Ideas for Frozen Green Chiles
Frozen green chiles retain much of their flavor and can be used in various culinary applications. Here are some ideas:
- Salsas and Sauces: Add thawed green chiles to homemade salsas and sauces for a spicy kick.
- Casseroles and Stews: Incorporate frozen green chiles into casseroles, stews, and soups for added flavor and heat.
- Stuffed Peppers: Use thawed green chiles as a stuffing ingredient for peppers or other vegetables.
- Breakfast Dishes: Mix green chiles into scrambled eggs, omelets, or breakfast burritos.
For more ideas on freezing other vegetables, check out Fridge.com article on freezing garden beans. If you're interested in other freezing tips, you might find Fridge.com guide on freezing garlic bread helpful.
By following these tips, you can enjoy the vibrant flavor of green chiles all year round, easily incorporating them into your favorite recipes.
Get Your Upgrade or New Addition at Fridge.com
Whether you're searching for your perfect fridge, freezer, wine fridge, beer fridge, ice maker, or kegerator, Fridge.com has what you need.
Shop the world's best brands at Fridge.com.
It also has tons of awesome articles about kitchen stuff and home news. Enhance your home, garage, backyard, patio, and office with the coolest essentials. With every necessary type of residential refrigerator or freezer in the collection, you're covered.
Elevate your game and shop now at Fridge.com!